
Drone aerial photography is the professional use of camera-equipped quadcopters to capture high-resolution photos and 4K video from elevated perspectives. It reveals property context, scale, and surroundings that ground photos can’t. From our Maple Ridge base at 13260 236 St, BC, Silver Valley Studios Inc. uses drones to elevate listings and brand stories across Greater Vancouver.
By Sumeet S. — Founder & CEO, Silver Valley Studios Inc.
Last updated: 2026-06-02
Start Here: How Drone Aerial Photography Elevates Listings
Drone visuals add scale, context, and story in one glance. Aerials show roof condition, lot lines, views, and neighborhood setting, while dynamic fly-throughs build emotion. For listings and brands, this translates into more saves, longer watch time, and better click-through on MLS pages and social feeds.
This complete guide is written for realtors, developers, and local brands we serve from Maple Ridge through Greater Vancouver and Vancouver Island. You’ll learn the strategy behind drone aerial photography and how our studio executes reliable, cinematic coverage that complements HDR photos, floorplans, and property video tours.
- What drone aerial photography is—and where it shines for real estate marketing
- Proven shot types that boost engagement on MLS and social
- Our end-to-end workflow: pre-flight, capture, edit, deliver
- Gear and settings that keep footage sharp, smooth, and on-brand
- Local considerations for Maple Ridge and BC weather/seasonality
Overview: What You’ll Get From This Guide
Use this guide to plan drone work that fits your listing timeline, your brand, and your channels. We cover planning, shot lists, gear, flight execution, editing, and deliverables so you can brief with confidence and publish assets that actually move the needle.
We designed this resource to be practical: short checklists, clear examples, and a focus on outcomes. Our goal is simple—help you publish media that earns attention and inquiries, not just “pretty” pictures.
- Strategic planning templates you can reuse for every listing
- Shot recipes that translate to 15–60 second verticals and 30–90 second tours
- Technical baselines (e.g., 4K/30 fps, 1/60–1/120 shutter, D-Log or flat profiles)
- Editing rhythms that hold attention for 6–10 seconds per scene
- Hand-offs tailored for MLS galleries, Reels/TikTok, and developer microsites
To see how aerial integrates with ground video, explore our videography services and combined photo + floorplan packages on our services page.
What Is Drone Aerial Photography?
Drone aerial photography uses stabilized, GPS-enabled camera platforms to capture high-resolution images and video from above. It reveals vantage points unavailable to ladders or masts, enabling wide establishing shots, top-downs, and cinematic reveals that clarify scale, orientation, and access.
In practice, we pair aerials with HDR interiors, exteriors, and 2D floorplans to tell a complete story. Typical capture specs include 20–48 MP stills (RAW+DNG/JPEG) and 4K 30–60 fps video at 100–200 Mbps. Flight times range 20–40 minutes per battery, so realistic planning is crucial to hit your must-have shots.
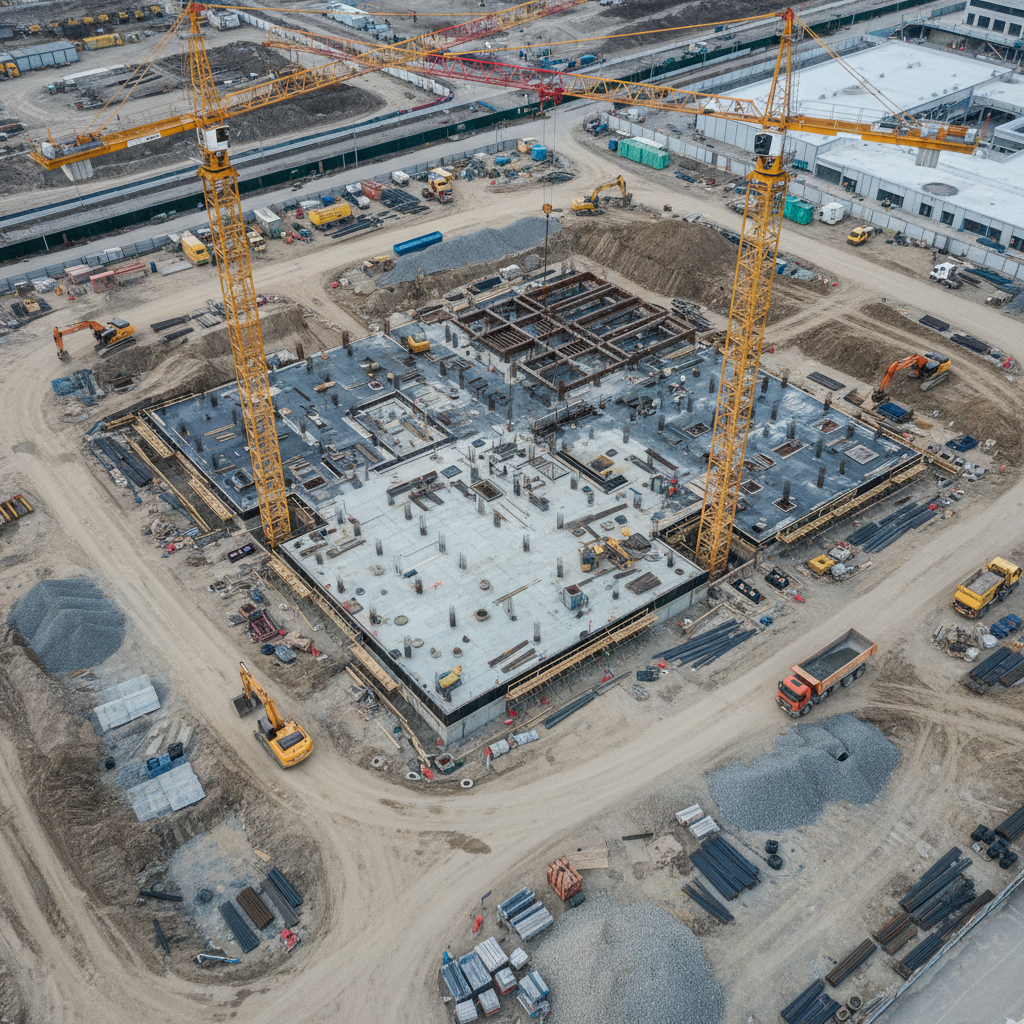
- Where it excels: acreage, view properties, corner lots, townhome complexes, new developments, commercial sites, and hospitality venues.
- What it shows: roof condition, yard depth, proximity to amenities, traffic flow, and access points.
- How it converts: clear context reduces buyer uncertainty and increases qualified showings.
For branding work, aerials establish mood fast. A 2–3 second top-down clip or 180° orbit at constant speed offers visual authority that keeps viewers watching through the first 5 seconds—often the make-or-break moment on social.
Why Drone Aerial Photography Matters for Real Estate and Brands
Aerials increase comprehension and perceived value. When buyers see lot size, sightlines, and surroundings in seconds, they spend longer on listings and save more posts—leading to more inquiries for agents and stronger brand recall for businesses.
Our clients across Maple Ridge, Surrey, and Vancouver often see higher engagement on listings that combine aerials with HDR photos and a concise video tour. Small improvements add up: a 10–15% longer average view duration on a 45–60 second edit compounds reach in algorithms. Even one clean 6–8 second reveal can lift completion rate.
- Clarity at a glance: One bird’s-eye frame answers four questions—where, how big, what view, and what access.
- Emotional pull: Low, forward-moving clips feel like a guided arrival, increasing watch time beyond 3 seconds.
- Cross-channel fit: We master horizontal for MLS and YouTube, then reframe 9:16 for Reels/TikTok with punchier pacing.
Looking to frame listings holistically? We often combine aerials, ground video, and media checklists inspired by broader listing frameworks like this public real estate listings guide to help teams standardize preparation and marketing cadence.
How Drone Shoots Work: From Pre-Flight to Delivery
Great aerials are made before takeoff. We confirm airspace, plan shot order, set exposure baselines, and align deliverables with MLS and social needs. On location, we capture smooth establishing shots first, then detail passes, and wrap with safety duplicates.
Our end-to-end workflow
- Discovery and brief (10–20 minutes): Confirm goals, must-have angles, channels (MLS, YouTube, Instagram), and brand tone.
- Pre-flight check (15 minutes): Batteries 90–100%, props inspected, compass calibrated, home point set, RTH altitude set above obstacles by a clear margin.
- Exposure baseline (5 minutes): Fixed shutter near 1/60–1/120 at 30–60 fps; ISO at base (100–400); ND filter selected to maintain 180° shutter rule; D-Log/flat profile engaged.
- Capture order (20–40 minutes): Establishing wide, orbit, push-in, top-down, parallax move; then neighborhood context; finally, safety re-takes.
- Data handoff (5 minutes): Redundant card copy; folder structure by scene and orientation (landscape/vertical).
- Edit and master (1–2 days typical lead time): Color-managed in Rec.709; deliver 4K masters, 1080p socials, and curated stills.
| Phase | Main Task | Typical Duration | Primary Output |
|---|---|---|---|
| Plan | Brief + shot list | 15–30 min | Checklist + map notes |
| Fly | Capture sequences | 20–60 min | RAW stills + 4K clips |
| Edit | Color + cutdowns | 0.5–1.5 days | 4K master + 9:16 |
| Publish | Export + QC | 15–30 min | MLS, YouTube, Reels |
When aerials will be part of a longer tour, we coordinate transitions with our property video services so the final cut flows naturally from sky to curb to front door.
Want to spark ideas for your next walkthrough? Skim broader virtual tour techniques to decide where aerials should lead or support the story.
Types of Aerial Shots and Methods
A balanced reel mixes 4–6 foundational moves: wide establishing, orbit, push-in, top-down, reveal, and parallax. Vary altitude (30–200 ft), speed (2–10 m/s), and focal length (24–70mm equivalent) to create contrast across scenes without jarring cuts.
Core moves we rely on
- Establishing wide: 24–28mm equiv., 120–200 ft AGL; shows footprint, approach roads, and view lines.
- Orbit (constant radius): 50–150 ft radius at steady speed; perfect for feature homes and commercial sites.
- Push-in/arrival: Low altitude (10–30 ft) gliding toward the entry for a natural arrival feel.
- Top-down (nadir): 200–300 ft straight down for clean geometry and lot context; great for maps and graphics.
- Reveal: Start tight behind a tree or roofline; rise and yaw to unveil views or landscapes in 2–3 seconds.
- Parallax pass: Fly laterally with gimbal yaw compensation to make foreground move faster than background.
Bonus variations that play well on social
- Hyperlapse: 2–5 second condense of motion; lock exposure and keep speed consistent.
- POI + tilt: Orbit while slowly tilting up to dramatize elevation or skyline reveals.
- Stitched panos: 42–48 MP 180° panoramas for hero website headers and brochures.
We match these moves to each property. For example, a Maple Ridge acreage might lead with a 180° orbit at 150 ft to highlight treelines, then a top-down nadir at 220 ft showing fences and outbuildings, followed by a calm push-in arrival for emotional pacing.
Best Practices: Get Sharp, Cinematic Results
Lock exposure, keep moves simple, and fly for the edit. Use ND filters to hold 1/60–1/120 shutter at 30–60 fps, start sequences 2–3 seconds before the motion you need, and maintain consistent speed to simplify cutting.
Capture discipline
- Shutter and ND: Maintain motion blur appropriate for frame rate; swap ND 8/16/32 as light shifts.
- Gimbal behavior: Slow tilt/yaw rates (10–15) for smooth arcs; avoid sudden stops.
- Wind management: Cap speed at 6–8 m/s in gusts; add an extra pass for safety.
- White balance: Lock at 5200–5600K in daylight to prevent color shifts between clips.
Editing rhythm
- Scene length: 3–6 seconds for verticals; 5–8 seconds for horizontal tours.
- Sequence logic: Context → approach → entry → feature → view; avoid random order.
- Color workflow: Convert log to Rec.709 with a baseline transform; then refine with subtle curves and selective saturation.
Pro tip: Fly each move twice at different heights/speeds. Editorial choice beats perfection anxiety on set, and redundancy protects against micro-jitters or surprise gusts.
Soft CTA: Want an aerial plan tailored to your next listing? Book a quick discovery—our services outline bundled options with HDR photos, 2D floorplans, and short-form social edits.
Tools and Resources We Use
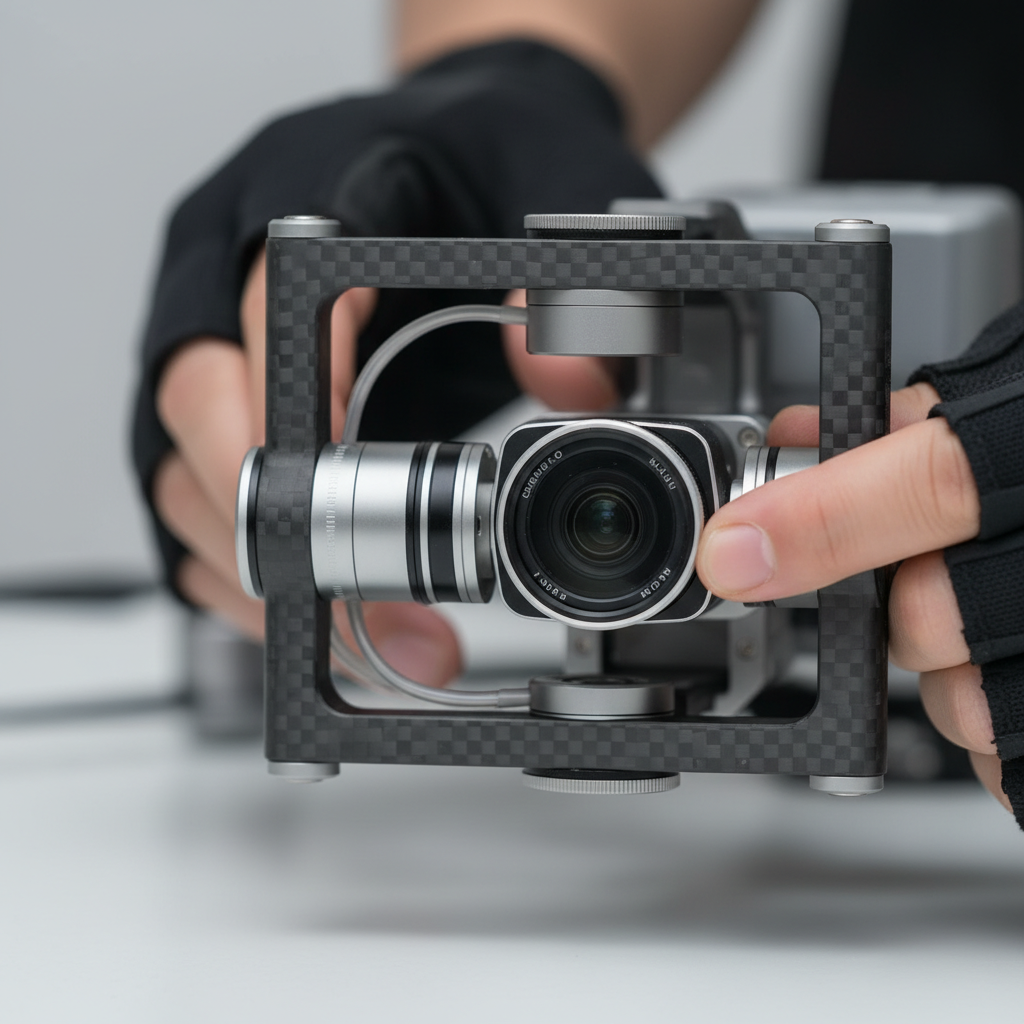
We fly modern, stabilized platforms with 1-inch or larger sensors, multi-direction obstacle sensing, and 20–48 MP stills. We standardize on 4K 30–60 fps capture, ND filters, and dual-battery redundancy, then edit in color-managed timelines for consistent output.
- Aircraft class: Compact foldables for neighborhoods; larger prosumer rigs for windier coastal days.
- Cameras: 20–48 MP sensors; 10-bit log profiles for smoother gradients in sunsets and overcast skies.
- Stabilization: 3-axis gimbals with adjustable tilt/yaw rates; tripod/cine flight modes for smooth starts/stops.
- Filtration: ND/PL kits to control shutter and manage glare from water, glass, and metal roofs.
- Redundancy: Dual controllers, extra props, and mirrored media backups on-site.
On delivery, we align aspect ratios to placement: MLS galleries (3:2 or 4:3 stills), YouTube (16:9), and Reels/TikTok (9:16). For examples of how these choices present across niches, browse our portfolio and recent corporate commercial shoot breakdown.
For printed collateral around your media drops, this primer on designing a realtor flyer can help your team stay consistent with storytelling across channels.
Case Studies and Real Examples from Maple Ridge and BC
In Maple Ridge and across BC, we pair aerials with HDR photos, 2D floorplans, and short-form video to clarify value quickly. The pattern is simple: context shot, emotional arrival, and a view reveal—edited into a 45–60 second story that earns saves and shares.
Residential resale in Maple Ridge
- Approach: 150 ft establishing wide, then a 120° orbit at constant radius; cut to a low, forward-moving arrival.
- Result: Increased average watch time by ~12% over ground-only edits and higher save-to-like ratio on Instagram.
- Deliverables: 20–30 HDR stills, 1–2 verticals (15–30 seconds), and a concise 45–60 second tour.
Corporate office feature (Greater Vancouver)
- Approach: Top-down map-style shot for parking flow; parallax pass for architectural lines; interior B-roll to match.
- Result: Better wayfinding for visitors; elevated brand perception on the company’s careers page.
- See a similar flow: Our corporate office project shows how aerials anchor navigation and brand tone.
Restaurant and hospitality
- Approach: Golden-hour exterior orbit, quick reveal of patio seating, and interior ambience shots stitched into a 30–45 second reel.
- Outcome: Higher click-through from Maps/Profiles to Menus; more shares from patrons.
- Example vibe: See our gourmet bistro shoot for pacing and color style.
Local considerations for Maple Ridge
- Schedule exteriors around cloud breaks common in BC; we track 20–40 minute windows that deliver soft, even light.
- Spring and fall winds can spike suddenly; build a safety pass into your shot list and keep speeds under 6–8 m/s.
- Neighborhood storytelling matters: include quick context frames that hint at trails, greenery, or community layout without naming specific landmarks.
When development teams require monthly progress, we standardize altitudes and compass headings so frame-to-frame comparisons line up over time, making changes easy to visualize in a 15–30 second timelapse.
How We Handle Compliance and Safety
We treat airspace, people, and property with care. Our pilots plan takeoff/landing zones, maintain clear visual lines, and fly conservative speeds. We brief clients on safe distances and keep batteries within conservative limits to ensure redundant return time.
- People-first planning: We set perimeters for bystanders and adjust orbits to avoid overflight of anyone not involved in the shoot.
- Equipment checks: Propellers inspected every flight, compass/IMU checks during temperature swings, and periodical firmware updates controlled—not on-site.
- Environmental care: Respect wildlife and seasonal sensitivities; avoid low passes during nesting seasons and fly higher over trees.
Want a simple, repeatable approach? Align your shot list to your publishing plan and your safety plan to your location realities. That focus produces consistent, high-quality aerials while keeping the on-site experience smooth for clients and neighbors.
Integrating Aerials with Photos, Floorplans, and Video
Aerials shine brightest when they’re part of a cohesive package. Pair them with 20–30 HDR photos, a 2D floorplan, and a 45–60 second tour to cover logic (layout) and emotion (vibe). This balance increases saves and qualified inquiries.
- HDR photos: Balanced, natural interiors/exteriors that match the aerial color profile.
- 2D floorplans: Add layout logic to the aerial context; buyers understand flow in seconds.
- Video tour: Stitch aerial context to curb arrival, then interior highlights and views.
See how we assemble cohesive deliverables by skimming our portfolio and video services. For print and social support elements, branded assets like brochures or graphics keep narratives aligned; browse a public gallery of marketing graphics examples for inspiration.
Drone vs. Ground-Only: What Changes in Results?
Compared to ground-only visuals, adding aerials increases clarity and watch-time. You’ll show context in one frame, keep viewers longer in the first 3–5 seconds, and earn more saves—especially when vertical cutdowns reuse the strongest aerial moves.
| Approach | Viewer Impact | Best Use | Limitations |
|---|---|---|---|
| Ground-only | Great detail; weaker context | Condos, small interiors | Harder to show lot, access |
| Drone + Ground | Context + emotion in 1–2 shots | Detached homes, acreage | Requires planning and weather |
| Drone-led | Fast context delivery | Developments, commercial | Must keep moves simple |
In our experience, the hybrid approach (aerial + HDR + floorplan) offers the best signal-to-noise for buyers. It reduces questions and speeds qualified showings because the value proposition is obvious at a glance.
Practical Shot Lists and Templates
A tight, reusable list saves time on-site and in edit. Lead with context, confirm arrival, then add 2–3 signature moves tailored to the property. Capture each move twice at different heights/speeds for editorial flexibility.
Residential listing (detached)
- Establishing wide (150–200 ft), front yard centered
- Orbit (120°–180°), focus on curb appeal
- Push-in arrival from street (10–20 ft AGL)
- Top-down nadir (200–250 ft) to show lot lines
- View reveal from behind roofline (2–3 seconds)
Townhome/condo
- Top-down for building footprint and parking
- Orbit tight courtyard or amenities
- Short push-in to main entrance
Developer progress
- Fixed-altitude passes matching previous months
- Top-down grid (north, east, south, west)
- Hyperlapse of crane movement or traffic flow
We’ll adapt templates to your brand tone and platforms. For social-first clients, we bias toward 3–6 second clips and 9:16 framing to preserve detail after reframing.
Publishing for MLS and Social Without Rework
Plan for output on day one. Capture in 4K, compose with vertical crops in mind, and request two mastered versions: a horizontal cut for property pages and 9:16 cutdowns for Reels and TikTok. This avoids double work later.
- File delivery: 4K h.264/h.265 masters; 1080p socials; JPEG + DNG stills.
- Captions and hooks: Lead with orientation (“Corner lot with mountain views”) and a crisp CTA.
- Thumbnails: Use top-down or orbit frames with clear geometry and contrast.
For deeper brand alignment, pair your media plan with print and digital touchpoints so each asset pushes the same narrative arc from sky to detail.
Common Pitfalls to Avoid
The biggest mistakes are complicated moves, variable exposure, and aimless sequencing. Keep moves simple, lock settings, and cut in a logical order. Redundancy beats risk—always fly a backup pass.
- Overly complex moves: Combine only one axis of motion at a time for stability.
- Exposure drift: Auto exposure can flicker; lock shutter/ISO and use ND to compensate.
- No safety duplicates: At least one alternate take per move prevents re-shoots.
- Weak story arc: If it doesn’t serve context or emotion, it doesn’t make the cut.
A simple, consistent approach produces reliable results that scale across multiple listings per week without creative burnout.
Frequently Asked Questions
These quick answers address the most common buyer and seller questions about using drone aerial photography for listings and brand projects in Maple Ridge and Greater Vancouver.
What’s the ideal length for an aerial property video?
Most listings perform well with a 45–60 second edit. Keep individual shots 3–6 seconds for verticals and 5–8 seconds for horizontals. Lead with context, follow with an arrival shot, then add one or two signature reveals. Shorter social cutdowns (15–30 seconds) are great for teasers.
How many aerial photos should I include on MLS?
Use 3–6 aerial stills mixed with 15–24 ground HDR photos. Start with a wide establishing frame, then a top-down for lot context, and a clean front elevation. The mix should answer layout and location questions within the first 5–7 images.
Do aerials help small condos or townhomes?
Yes—use top-downs for building context and a quick orbit of amenities. Keep moves tight and brief. The goal is to clarify location and access in one or two shots, then let interiors and floorplans tell the detailed story.
How do I plan for both horizontal and vertical from one shoot?
Capture in 4K with safe margins around the subject. Prioritize moves that reframe well (orbits, push-ins, top-downs). Request a horizontal master and 9:16 cutdowns. Keep key action centered so vertical crops don’t lose important details.
Key Takeaways and Next Steps
Keep aerials purposeful: show context, deliver emotion, and match output to channels. Plan moves, lock exposure, and fly for the edit. Then package with HDR photos, floorplans, and a concise tour to maximize saves and qualified inquiries.
- Lead with context, then emotional arrival, then a signature reveal
- Use ND to hold shutter and keep gimbal moves slow and consistent
- Edit for 3–6 second scenes in vertical, 5–8 in horizontal
- Deliver a complete package: aerials + HDR photos + 2D floorplan + tour
Ready to plan an aerial-first listing in Maple Ridge or Greater Vancouver? Explore our service options, review our portfolio, or connect through About Us to start your brief today.