


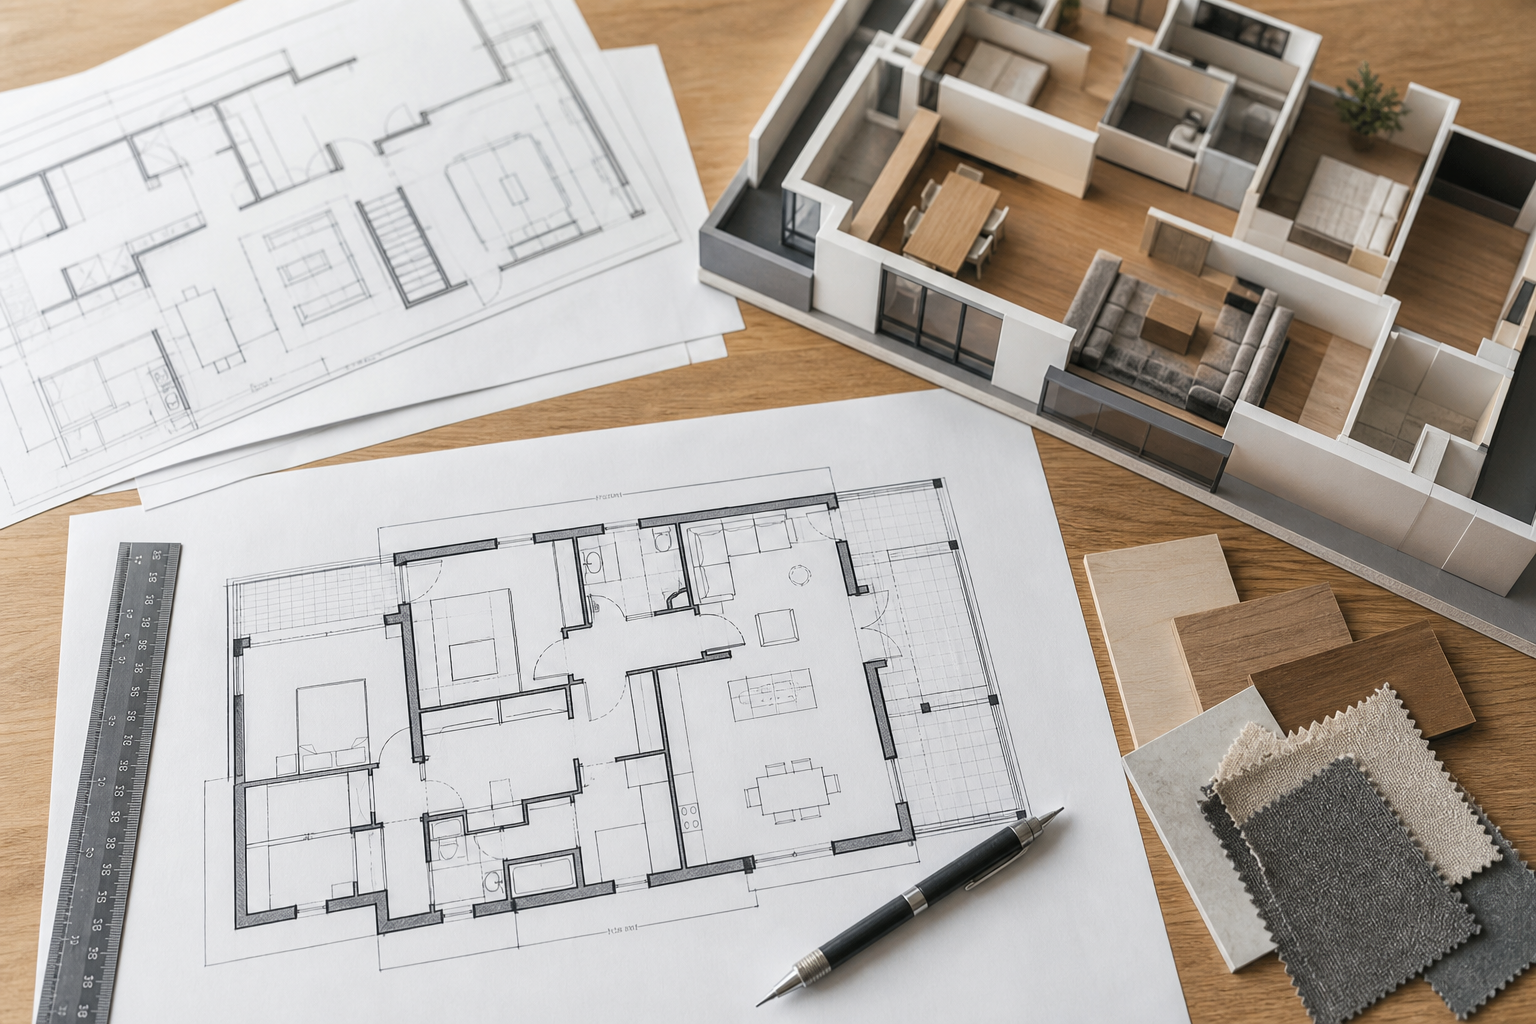
If a property photo shows what a room looks like, a 2D floorplan shows how the entire space works. Mastering how to read a 2D floorplan lets you measure accurately, visualize furniture placement, and understand movement from room to room—all before stepping inside. Use this practical breakdown to move from “What am I looking at?” to “I know exactly how this space fits my life.”
Start with orientation and scale
Your quickest wins come from two details most people skip: orientation and scale.
- Orientation (the “north” arrow): This tells you which way the home faces and how light may enter during the day. It also helps you align the plan with a map or site drawing if you have one.
- Scale: Look for a scale bar (for example, a line marked 1 m or 5 ft) or a ratio such as 1:100. A ratio means 1 unit on the drawing equals 100 of the same units in real life. With the scale, you can turn paper measurements into real dimensions.
How to use scale in practice:
- Measure a room line on the plan with a ruler (for printed plans) or use the provided measurement tool (for digital plans).
- Multiply by the scale factor. For a 1:100 plan, 3 cm on paper equals 300 cm (3 m) in reality. For a 1/4" = 1'–0" plan, each quarter inch on paper equals one foot in reality.
- Prefer the scale bar when available. Laptops, printers, and phone screens can change drawing size; a scale bar remains reliable.
Decode lines, doors, windows, and other symbols
Floorplans compress complex spaces into a visual language. Once you recognize the symbols, the drawing becomes intuitive.
- Walls: Typically bold or double lines. Thicker lines often indicate exterior or structural walls. Thin or dashed lines can indicate items above/below the cut line, or proposed changes; check the legend if provided.
- Doors: A straight line (the door) with a curved arc (its swing). The hinge is on the arc’s centre; the arc points toward the room the door swings into. Pocket doors are shown as a line sliding into a wall cavity; sliding doors show overlapping leaf lines without a swing arc; double doors show two leaves.
- Windows: Breaks in the wall line with thin parallel lines. Long stretches indicate picture windows; shorter symbols indicate standard window units.
- Stairs: A run of parallel rectangles or a single shape with treads indicated. An arrow usually points up to the higher level. Sometimes the top or bottom few treads are dashed to show the portion above/below the cut plane.
- Fixtures: Icons for sinks, toilets, tubs, showers, ranges, fridges, washers/dryers, and fireplaces. These confirm utility and vent locations and help you estimate clearances.
- Ceiling notes: Look for symbols or text like “CLG 9'” (ceiling height) or bulkhead/soffit outlines, often dashed.
- Levels and sections: Floor level notations (e.g., “Main,” “Upper,” “Lower”) and arrows referencing separate section drawings or details, when included.
Many plans include a legend or key. If it’s present, use it—it defines exactly how that plan denotes walls, swings, heights, and materials.
Make sense of dimensions and area
The numbers on a plan unlock sizing, fit, and comparisons. Here’s how to read them with confidence.
- Room dimensions: Notated as length × width (for example, 3.6 × 3.0 m or 12' × 10'). Dimensions may be inside or outside of the room outline—follow the arrows or extension lines to see what they reference.
- Wall-to-wall vs. clear space: Some dimensions include wall thickness; others reference clear usable space between finished surfaces. If the plan uses multiple dimension strings (outer building line, inner room, fixture clearances), confirm which is which.
- Total area: Plans may label a total floor area and sometimes breakouts by level. Read footnotes: a plan might differentiate interior space from balconies, garages, or storage rooms. If different area categories are listed, note exactly what’s included in each.
- Ceiling heights: These often vary by room. Where noted, use them to judge volume, bulkheads, and potential for tall furniture or lighting.
DIY area check: For rectangular rooms, multiply length by width. For L-shaped spaces, split into rectangles, compute each, and add them. If your numbers don’t match the plan’s notes, re-check scale, whether you measured to the centreline or inside face of walls, and whether niches or built-ins are included.
Understand room labels and flow
Labels tell you the intended use; doors and hallways reveal how the home lives. Use this sequence to see how the plan supports daily activities:
- Public vs. private zones: Identify the entry, living/dining/kitchen (public), and bedrooms/baths (private). The relationship between these zones drives noise, privacy, and sightlines.
- Circulation: Trace the main path from the entry to the living area and to bedrooms. Efficient plans reduce long, narrow hallways without sacrificing privacy.
- Kitchen triangle and work lines: Spots for the sink, range, and refrigerator typically form a loop. Confirm that door swings and islands don’t interrupt that movement.
- Bedrooms and bathrooms: Check how doors open, whether beds can fit with side tables, and if bathroom doors conflict with vanities or showers.
- Storage: Mark closets, pantry, linen, mechanical, and utility spaces. Adequate storage near the rooms it serves is a sign of functional planning.
- Natural light paths: Note windows in living spaces and bedrooms, then connect this with orientation so you can anticipate times of day each room feels brightest.
Spot what is—and isn’t—included
Clarity about inclusions prevents surprises later.
- Outdoor areas: Are balconies, patios, terraces, or yards shown? Are their sizes noted separately from interior area?
- Parking and storage: If present, look for stall or locker labels and dimensions. Confirm whether they’re on a separate sheet.
- Built-ins and appliances: Fixed items are often shown; movable furniture may be illustrative only. Use fixtures as anchors for measuring clearances.
- Notes and disclaimers: Many plans include footnotes about measurement methodology, rounding, and potential variance. Read them so you know the basis for every number.
Measure confidently for furniture
To check whether key pieces will fit without crowding:
- List critical dimensions of your largest items (sofa length and depth, bed size plus side tables, dining table diameter or length/width, dresser depth, desk size).
- Mark minimum clearances you want to keep around them (e.g., comfortable walkway around a bed or table).
- Use the plan’s scale bar to sketch your furniture footprints on tracing paper, or create scale rectangles in a digital tool, and place them over the plan.
- Account for swings and slides: Keep clear of door arcs, fridge doors, oven doors, and shower doors. For sliders and pocket doors, ensure wall space remains usable for furniture.
Compare multiple floorplans objectively
When deciding between two or more layouts, standardize your review:
- Normalize the scale: Reprint or resize so each plan’s scale bar matches. Comparing like-for-like reveals real differences in room sizes and hall lengths.
- Score key factors: Entry storage, kitchen workflow, dining table fit, living-room seating capacity, bedroom wall lengths, bathroom privacy, laundry placement, and circulation efficiency.
- Check stacking: For multi-level homes, align stairs and plumbing stacks between floors; misalignment can affect future changes.
- Light and outlook: Combine orientation with window locations to predict which layout feels brighter where you spend the most time.
Common pitfalls to avoid
- Ignoring the scale: Eyeballing sizes often misleads. Always verify with the scale bar or ratio.
- Overlooking door swings: A single door arc can block a closet or collide with a vanity. Check every swing.
- Confusing drawing conventions: Dashed lines might indicate overhead elements or proposed changes—read the legend.
- Assuming furniture drawings are exact: Staged symbols may be smaller than real pieces. Measure your actual items.
- Mixing measurement bases: Don’t combine centreline, stud-to-stud, and finished dimensions in one comparison. Pick one basis and stick to it.
- Forgetting vertical space: Ceiling heights, bulkheads, and sloped ceilings affect cabinets, lighting, and tall storage.
Quick reading checklist
- Find the north arrow and note orientation.
- Confirm the scale; test it against the scale bar.
- Identify exterior vs. interior walls; note any dashed overhead items.
- Trace circulation from entry to living areas and bedrooms.
- Mark door swings and window placements.
- Record room dimensions and ceiling heights where shown.
- Verify what’s included in total area vs. separate spaces.
- Map key furniture against the plan using the scale.
- List open questions from footnotes or missing labels.
FAQ
What does a scale like 1:100 or 1/4" = 1'–0" mean on a floorplan?
A scale expresses the relationship between the drawing and the real world. At 1:100, 1 unit on the plan equals 100 of the same units in reality (for example, 2 cm on paper equals 200 cm in real space). At 1/4" = 1'–0", every quarter inch on paper equals one foot in real space. Use the printed scale bar whenever possible to counteract printer or screen zoom differences.
How can I tell which way a door swings and whether it will block something?
Look for the curved arc attached to the door line—the arc shows the path of the door leaf. The hinge is at the arc’s centre; the arc points into the room the door opens into. If that arc crosses a vanity, closet, or cabinet footprint, you’ll have a conflict. Sliding doors have no arc; pocket doors disappear into the adjacent wall.
Are the room dimensions the usable space or do they include walls?
It depends on the plan’s conventions. Some dimensions are taken between finished wall faces (usable clear space), while others measure to wall centrelines or outside faces. Follow the extension lines and arrows to see exactly what’s being measured, and check any footnotes or legend for the method used.
How do I check if my furniture fits without visiting the property?
Gather your furniture’s real measurements, use the plan’s scale bar to create to-scale rectangles (on tracing paper or digitally), and place them over the room outline. Confirm that door swings, appliance doors, and walkways remain clear.
What do dashed lines usually represent on a floorplan?
They often indicate elements above or below the typical “cut plane” (like overhead cabinets, beams, or soffits), or sometimes proposed or optional features. Refer to the legend on the specific plan to confirm the meaning.
A practical next step
To discuss the options that apply to your situation, contact Silver Valley Studios Inc. and request the relevant details before moving forward.