
Professional real estate photography is the expert planning, lighting, and composition of property images that help listings convert. At 13260 236 St in Maple Ridge, our team at Silver Valley Studios Inc. produces HDR photos, cinematic tours, floorplans, and drone media for Metro Vancouver listings that need to stand out fast.
By Sumeet S. — Founder & CEO
Last updated: 2026-05-07
Overview
This complete guide explains what professional real estate photography is, why it matters for online listings, and how the full media workflow runs—from prep and staging to HDR capture, video tours, floorplans, and drone imagery—using real examples from Silver Valley Studios Inc. serving Maple Ridge and Metro Vancouver.
Here’s what you’ll learn and be able to use today:
- Clear definition of professional real estate photography and when to use it
- Buyer psychology and why visuals drive more showings and offers
- A step-by-step media process you can follow for any listing
- Approaches: HDR, flambient, twilight, drone, video tours, and 2D floorplans
- Best practices checklists for staging, timing, and post-production
- Local tips for Maple Ridge and the Metro Vancouver market
- Tools and templates to speed up your next launch
Quick navigation:
- What it is
- Why it matters
- How it works
- Methods and approaches
- Best practices
- Tools and resources
- Case studies and examples
- FAQ
What is professional real estate photography?
Professional real estate photography is the deliberate planning, lighting, and composition of property images that sell the experience of a space, not just the square footage. It uses HDR blending, color accuracy, and wide-angle framing to create consistent, welcoming visuals across MLS, social, and print.
In our work across Greater Vancouver, this means:
- HDR photos that balance bright windows and interior shadows for a natural look
- True-to-life color so walls, wood tones, and finishes look accurate and inviting
- Purposeful composition that leads the eye and showcases flow between rooms
- Media consistency across photos, 4K video, vertical clips, and 2D floorplans
When we say professional real estate photography, we’re also talking about a repeatable system. From Maple Ridge townhomes to downtown Vancouver condos, we use a defined checklist that covers prep, capture, and delivery—so your listing launches cleanly and on schedule.
Why professional real estate photography matters
Great visuals make buyers stop scrolling, save the listing, and book a showing. In competitive Metro Vancouver markets, professional real estate photography shortens time on market by telling a clear story in the first five images buyers see on MLS and social feeds.
Why this is crucial for your next launch:
- Attention wins first: Most buyers skim thumbnails before they read—images do the heavy lifting.
- Story > specs: Photos show layout, light, and lifestyle faster than text can explain.
- Confidence signal: Polished media implies a well-cared-for property and attentive agent.
- Cross-channel leverage: One shoot fuels MLS, Instagram Reels, TikTok, email, and print.
In our experience with Maple Ridge and broader Metro Vancouver listings, the first five frames act like an elevator pitch. Lead with curb appeal, a sunlit living space, the kitchen hero shot, primary suite, and an outdoor moment—then deepen the narrative with details and floorplans.
Local considerations for Maple Ridge
- Schedule shoots when mountain light favors interiors; overcast mornings can yield clean, shadow-free rooms near Maple Ridge Park.
- Plan exteriors around seasonal greenery and golden hour; summer evenings near WildPlay Maple Ridge create warm, inviting curb appeal.
- Expect fast weather shifts. Keep a rain-ready plan for exteriors and optional interior reshoots to maintain consistency.
How professional real estate photography works (step-by-step)
The best media workflows follow six steps: discovery, prep checklist, on-site staging, HDR capture, post-production, and delivery. Each step compounds quality and consistency, reducing revisions and speeding up your listing launch.
1) Discovery and goals
- Define buyer persona (first-time, upsizers, luxury, relocation) and channels (MLS, social, print).
- Confirm deliverables: photos, 4K video tour, vertical clips, 2D floorplans, aerials.
- Align on the narrative: light, flow, standout finishes, and lifestyle moments to prioritize.
2) Prep checklist (agent + seller)
- Declutter countertops, nightstands, and entryways; hide trash cans and pet bowls.
- Stage towels, pillows, and throws; add one fresh plant per key room.
- Replace burned-out bulbs; standardize color temperature for lighting consistency.
3) On-site staging and test frames
- Walkthrough to lock the shot order and identify hero angles.
- Open blinds evenly; balance practical lights to avoid harsh color casts.
- Capture test exposures to confirm window detail and interior shadow balance.
4) HDR capture and angles
- Bracket exposures to preserve window views and interior contrast.
- Use 2–3 anchor angles per room with consistent eye height (approx. 4.5–5 ft).
- Mix wide establishing frames with detail vignettes for texture and warmth.
5) Post-production
- Blend brackets for natural HDR; correct white balance and lens distortion.
- Retouch distractions (wires, minor scuffs) while maintaining realism.
- Export platform-specific sets: MLS aspect ratios, social-first crops, and print.
6) Delivery and launch
- Provide download sets labeled by room and channel.
- Hand off 2D floorplans and video links; prep captions for Instagram/TikTok.
- Review first-week performance and adjust thumbnails or captions as needed.
See how video integrates with this flow in our real estate videography services overview. If you need a hand coordinating media across channels, our services page maps deliverables to goals by listing type.
Types, methods, and approaches that work
Use a mix of HDR interiors, flambient techniques, twilight exteriors, aerials, cinematic video tours, vertical clips, and 2D floorplans. Together, these methods tell a complete story and give you assets that fit MLS, social, and print without extra shoots.
HDR and flambient interiors
- HDR blending: Multiple exposures combined to capture bright windows and true interior tones.
- Flambient: Blended flash and ambient frames for crisp color without harsh hotspots.
- Use case: Mixed lighting spaces, wood tones, and large window walls common across Greater Vancouver.
Twilight and blue-hour exteriors
- Golden hour warms wood and stone; great for listings with outdoor living spaces.
- Blue hour balances exterior accent lighting with rich sky tones for curb appeal.
- Use case: West Coast homes with tree cover benefit from controlled, moody light.
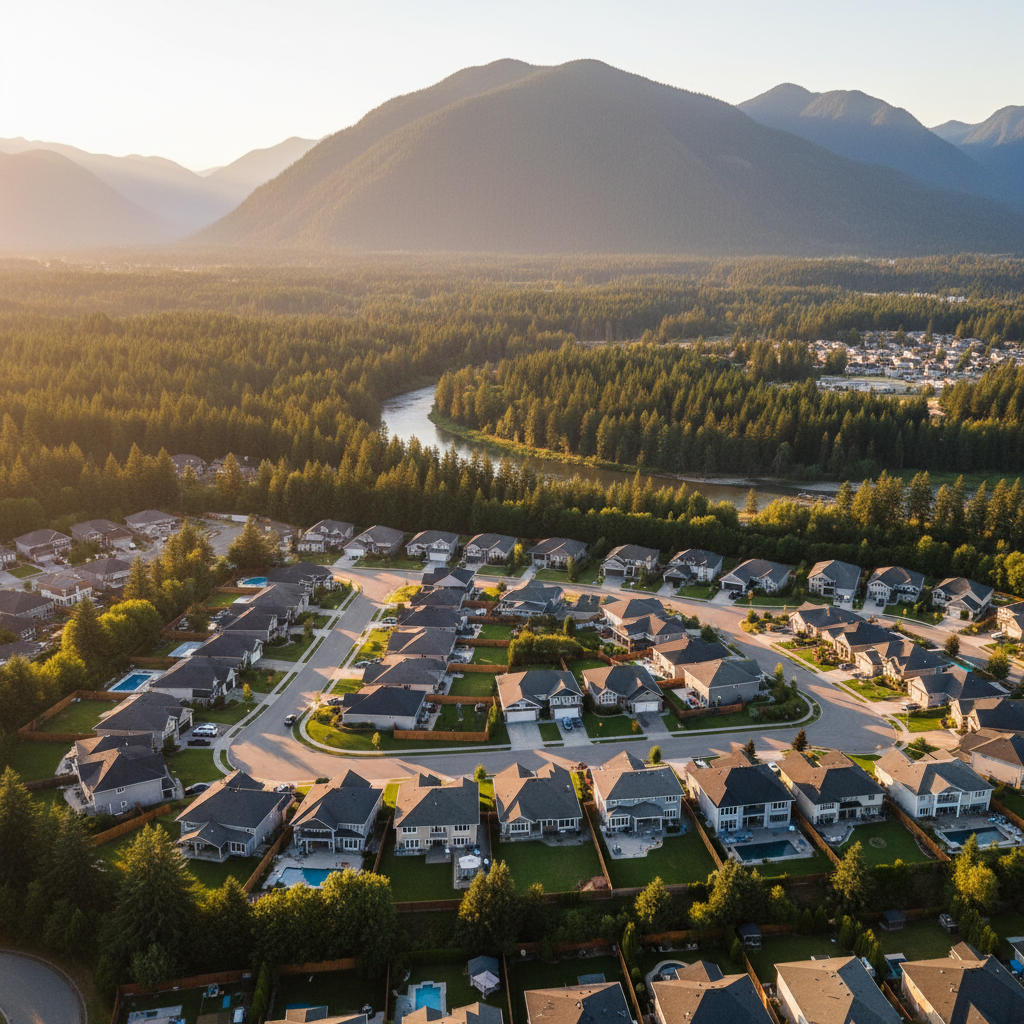
Drone photography and aerial video
- Context matters: Show proximity to parks, schools, and trails with elevated perspectives.
- Framing: Use 3–5 anchor heights to reveal lot lines, yard depth, and neighborhood setting.
- Compliance: Always fly legally and safely; confirm airspace and local rules before takeoff.
2D floorplans
- Context for flow: Buyers understand scale, circulation, and bedroom separation faster.
- Accuracy: Clear dimensions reduce surprises and improve showing quality.
- Pairing: Use floorplans with a short video tour to cement mental maps.
Cinematic video tours and vertical clips
- 4K walk-throughs connect dots between photos, highlighting transitions and lifestyle.
- Vertical video fuels Instagram Reels and TikTok; add captions and location tags for reach.
- Distribution: Recut a 60–90 second master into 15–30 second social cuts.
To see how these assets look together, browse our project portfolio or jump straight to this downtown Vancouver condo feature for a high-rise example.
Best practices for consistent, conversion-ready listings
Standardize your prep, shot order, and delivery. Stage simply, prioritize symmetry, and keep eye height consistent. Lead with five hero frames, follow with detail vignettes, and always pair photos with floorplans or short video to improve saves and showing quality.
Staging that sells without clutter
- One hero plant or floral per key room; avoid over-accessorizing shelves.
- Neutral throws and pillows add warmth without dating the space.
- Clear counters; keep one tasteful vignette in kitchens and baths.
Angles and sequencing
- 2–3 angles per room: wide, alternate, and detail.
- Keep verticals straight; level horizons to avoid distortion.
- Order images to mirror an in-person tour from entry to backyard.
Lighting and timing
- Use balanced window light; avoid mid-day hotspots when possible.
- Twilight exteriors on clear evenings can become your thumbnail hero.
- Standardize interior color temperature for clean, cohesive galleries.
We’ve baked these habits into our shoots across Abbotsford, Coquitlam, and Surrey. If you want a jumping-off point, our services overview outlines a practical shot list that keeps turnarounds smooth and media consistent.
Tools and resources you can use today
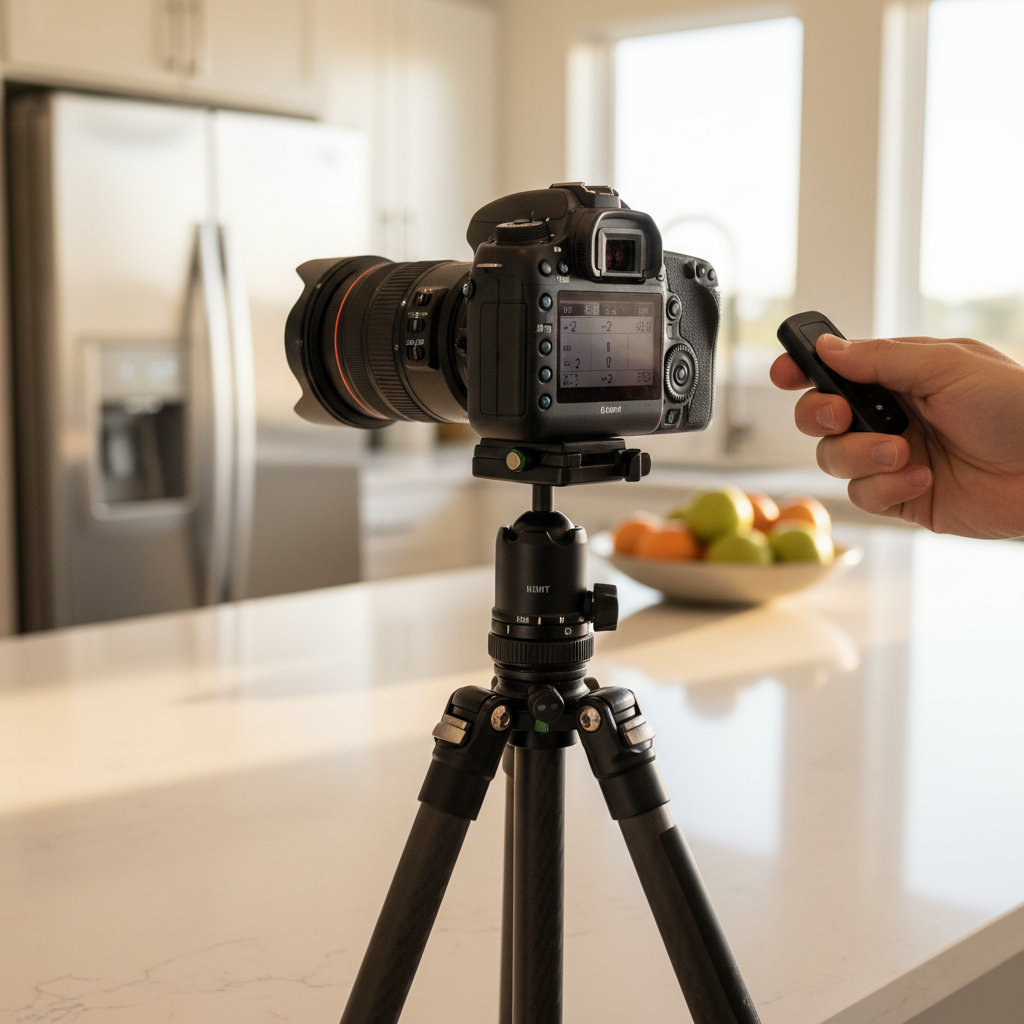
You don’t need every gadget to win. Use a wide-angle lens, a sturdy tripod, bracketed exposures, and a repeatable room order. Off-load to cloud, tag by room, and export platform-specific sets. These basics level up your listing media immediately.
Gear and workflow basics
- Wide-angle lens for establishing frames; avoid extreme distortion.
- Tripod + remote for tack-sharp brackets and consistency.
- Room order: entry, living, kitchen, dining, primary, secondaries, baths, laundry, garage, exterior.
- File strategy: folder per room, consistent naming, cloud backup.
Editing and delivery
- HDR blending for natural interiors; correct color and lens geometry.
- Export profiles tailored to MLS, social crops, and print layouts.
- Captions with neighborhood cues and feature highlights.
For deeper reading on fundamentals, see this practical property listing photography guide and browse ideas for distributing media like virtual tours via this virtual tour resource hub. When you’re ready to add motion, review our videography services for video-first strategies.
- Confirm buyer persona and distribution channels
- Finalize deliverables: photos, video, floorplans, drone
- Book ideal shoot window and weather backups
- Send prep checklist to seller one week ahead
- Draft captions and thumbnail plan before delivery
Need help orchestrating everything? Contact us via our contact page to align media with your launch timeline.
DIY vs. professional: what changes
DIY can document a space; professional real estate photography sells the experience. The difference shows up in window detail, color accuracy, composition, and consistency across photo, video, and floorplans.
| Aspect | DIY Images | Professional Media |
|---|---|---|
| Window detail | Blown highlights or dark interiors | Balanced HDR with natural tones |
| Color accuracy | Mixed casts; inconsistent warmth | Neutral whites; true wood/paint tones |
| Composition | Random heights; tilted lines | Consistent eye height; straight verticals |
| Storytelling | Room-by-room snapshots | Cohesive narrative + floorplans/video |
| Distribution | One-size-fits-all exports | Sets for MLS, social, and print |
If you want proof at a glance, scroll our portfolio alongside your last DIY set and note the differences in window detail, color, and flow.
Case studies and examples from our work
Across Maple Ridge, Vancouver, and the Fraser Valley, we apply one system to many property types: townhomes, detached homes, new developments, and condos. Here are concise examples that show how the right mix of media drives engagement.
Downtown condo launch (high-rise)
- Goal: Attract relocate buyers and downtown professionals.
- Assets: HDR photos, 4K tour, vertical clip set, and 2D floorplan.
- Result: Strong social saves and faster-quality showings due to clear layout + lifestyle frames. See the luxury condo feature.
Suburban family home (Maple Ridge)
- Goal: Showcase yard, play spaces, and kitchen updates.
- Assets: Twilight exterior hero, HDR interior set, drone yard overview, and floorplan.
- Result: Strong first-five gallery impact; buyers quickly understood flow and outdoor value.
New build (Fraser Valley)
- Goal: Communicate craftsmanship and premium finishes.
- Assets: Flambient interiors, fixture detail vignettes, 4K walk-through, and site aerials.
- Result: Clear materials story and builder brand lift across social channels.
Commercial space refresh
- Goal: Update leasing gallery and attract foot traffic.
- Assets: HDR interiors, signage and amenity details, and a short vertical teaser.
- Result: Cleaner presentation across listing platforms and smoother inquiries. View a related commercial shoot.
Publishing and distribution playbook
Pair your gallery with a strong thumbnail, a floorplan preview, and a tight caption. Recut video for social, schedule posts for the first week, and update your MLS hero if engagement stalls. One great shoot can fuel every channel.
- MLS: Lead with the most emotionally resonant frame; avoid exteriors with harsh midday light.
- Instagram/TikTok: Post a vertical teaser; pin to profile during the first week.
- Email: Use a 3-image strip (exterior, kitchen, suite) with a short property story.
- Print: Keep copy tight; use clean grids for feature sheets and postcards. See print options like this real estate printing overview.
When to hire a professional
Hire a professional when time is tight, the home has complex lighting, you need floorplans or drone context, or you want media tailored for MLS and social. A unified shoot protects brand consistency and reduces relisting work.
- Luxury listings, unique architecture, or heavy window walls
- Homes with great yards or proximity to parks (ideal for aerial context)
- New builds and renovations where finish accuracy matters
- Busy schedules where coordination and consistency save hours
Ready to streamline your next launch? Explore our service options or get in touch on the contact page.
Frequently Asked Questions
These quick answers cover booking, weather, HDR, floorplans, and video tours. They’re designed for voice search and fast scanning so you can keep your listing on schedule.
What is HDR in real estate photography?
HDR blends multiple exposures to reveal window views and interior detail at the same time. The result is natural-looking rooms with accurate colors and balanced light, which helps buyers understand the space.
Do you include 2D floorplans with photo shoots?
Yes—floorplans are part of our real estate media offering. They clarify scale and flow so buyers can picture furniture and circulation before a showing, improving inquiry quality.
Can you shoot in rainy Maple Ridge weather?
Absolutely. We often schedule interiors for overcast windows and plan weather backups for exteriors. Overcast conditions are great for even interior light; we’ll time exteriors for the next clear window.
How do video tours help a listing?
Video tours connect photos into a clear sequence, highlight transitions, and add lifestyle cues. They also produce vertical clips for Instagram and TikTok, extending reach beyond the MLS listing.
When should I book media for a new build?
Book once final cleaning is complete and all lights are operational. We’ll coordinate HDR photos, drone context, floorplans, and video in a single visit to keep momentum for your launch.
Key takeaways and next steps
Professional real estate photography turns browsing into booking by delivering a clear, consistent story across photos, video, floorplans, and aerials. Standardize your process, lead with five hero frames, and align assets to MLS and social.
- Use HDR or flambient for natural interiors and accurate color.
- Pair galleries with 2D floorplans and a short video tour.
- Plan exteriors for golden or blue hour; add a drone context pass.
- Export media sets for MLS, social, and print separately.
- Need support? Review our services and contact us to align your next listing.