
Property photos are professionally produced images that showcase a home’s best features to attract qualified buyers and speed up sales. At Silver Valley Studios Inc. in Maple Ridge, BC (13260 236 St), we create clean, naturally balanced listing photography that pairs with video tours, 2D floorplans, and drone to help your property stand out.
By Sumeet S., Founder & CEO — Silver Valley Studios Inc.
Last updated: 2026-05-13
Summary
Great property photos highlight space, light, and flow so buyers can picture themselves living there. In this guide, you’ll learn what listing photography is, why it matters, how a pro shoot runs, essential styles and tools, local Maple Ridge/BC tips, and real examples you can model today.
- What property photos include and how they work with video tours, drone, and 2D floorplans
- Why strong visuals increase showings and shorten days on market
- Step-by-step shoot workflow, prep checklists, and delivery expectations
- Styles: HDR, flambient, twilight, aerial, lifestyle, and detail shots
- Tools and resources we use for consistent, on-brand results
What Are Property Photos?
Property photos are professionally planned and edited images that convey a listing’s layout, light, and lifestyle. They’re designed to perform on MLS, portals, and social feeds. The best sets balance wide room coverage with detail shots, and pair seamlessly with video tours, 2D floorplans, and aerials for a complete story.
In practice, “property photos” means more than room snapshots. It’s an editorial approach that covers hero exteriors, wide interiors, vertical social crops, and detail vignettes that sell the feeling of the space.
- Coverage goals: 24–36 final images for detached homes; 12–24 for condos/townhomes.
- Angles per space: Typically 3–5 for living areas and kitchens; 2–3 for bedrooms and bathrooms.
- Lens range: Wide-angle 16–24mm (full-frame) for rooms; 35–85mm for details and lifestyle.
- Output-ready: MLS-safe crops, web-optimized files, and social-first variants when requested.
At Silver Valley Studios Inc., property photos often anchor larger deliverables like cinematic video tours, 2D floorplans, and cohesive real estate media packages so you launch listings with everything on day one.
Why Property Photos Matter
Strong property photos drive clicks, showings, and offers by making spaces feel bright, welcoming, and true-to-life. They reduce buyer uncertainty, highlight unique features, and help listings rank higher in feeds—ultimately shortening days on market when combined with video, floorplans, and smart copy.
Buyers decide in seconds. Scroll-stopping cover images earn the click; consistent interior sets earn the showing. Clean, naturally balanced photography prevents disappointment at showings because the space looks as expected—bright yet honest, with verticals straight and colors accurate.
- First image impact: A compelling exterior or hero interior frames the story for the rest of the gallery.
- Flow clarity: Sequencing photos to match how you would walk the home helps viewers understand layout instantly.
- Complementary assets: Add 2D floorplans for exact dimensions and video tours for pacing, movement, and neighborhood context.
In our experience with Greater Vancouver listings, galleries that combine balanced exposures with lifestyle details (think: a close-up of a waterfall island edge or warm deck lighting at dusk) keep buyers browsing longer—which nudges more showing requests.
How a Professional Shoot Works
A professional property photo shoot follows a proven workflow: discovery and prep, on-site staging and capture, curation and editing, then delivery optimized for MLS and social. Expect 45–90 minutes on-site for average homes and a next-business-day turnaround for web-ready files.
1) Discovery and preparation
- Goals and deliverables: Photos only, or pair with video tour, drone, and 2D floorplans?
- Shot list: Exteriors, every major interior, storage/utility if relevant, amenities, and lifestyle details.
- Scheduling: We aim for bright daylight; golden hour or blue hour for exteriors when needed.
2) On-site staging and capture
- Declutter pass: Counters clear, cords tucked, bins moved, toilet lids down, window coverings consistent.
- Lighting plan: We combine natural window light with controlled interior lighting for a cohesive look.
- Technique: Tripod-based bracketing (5–7 frames, ~1 EV apart) or flambient for color-accurate results.
3) Curation and editing
- Selection: We curate the tightest story—often 24–36 finals—then balance tones, correct geometry, and remove minor distractions.
- Consistency: White balance and contrast aligned across the whole set; verticals straight.
- Output: MLS-resized JPEGs plus high-res versions for print and social.
4) Delivery and launch
- Turnaround: Typically next business day for photos; add time for video, aerial, or floorplans.
- Launch readiness: We coordinate with your copy and portfolio-grade assets so your listing goes live cleanly on day one.
- Social set: Optional 9:16 crops and short vertical clips to power Reels and Stories.
For larger builds or amenities-driven properties, we add location context through aerials and tight detail sequences so buyers grasp both the macro (neighborhood, access) and micro (finishes, storage) quickly.
Types and Methods: HDR, Flambient, Twilight, Aerial
Great property photos blend techniques: HDR for dynamic range, flambient for color fidelity, twilight for curb appeal, and aerials for context. We choose the method room-by-room so the set feels natural, consistent, and true to how the space actually looks in person.
Core capture methods
- HDR (exposure bracketing): 5–7 frames merged to retain window views and shadow detail without halos.
- Flambient (flash + ambient): Mixes bounced flash with natural light for accurate colors and crisp edges.
- Single exposure on tripod: Works in evenly lit rooms; keeps editing minimal and textures honest.
Stylized and contextual looks
- Twilight exteriors: Shot ~20–30 minutes after sunset to glow windows and landscape lighting.
- Lifestyle/details: 35–85mm close-ups of fixtures, texture, and design moments that buyers remember.
- Aerial/drone: Rooflines, lot lines (visual only), proximity to parks or trails, and neighborhood scale.
When we choose what
- HDR vs flambient: HDR for speed and window retention; flambient when color accuracy is paramount.
- Twilight: Use for homes with strong exterior lighting or dramatic facades.
- Aerials: Ideal for unique lots, views, and community amenities.
| Approach | Best for | Strength | Consideration |
|---|---|---|---|
| HDR | Rooms with bright windows | Balanced dynamic range | Watch for natural color retention |
| Flambient | Color-critical interiors | Accurate tones/edges | Longer on-site and edit time |
| Single exposure | Evenly lit rooms | Natural textures | May lose window detail |
| Twilight | Exteriors with lighting | High curb appeal | Narrow timing window |
| Drone | Context and scale | Shows rooflines/views | Weather and airspace dependent |
Best Practices for Realtors and Developers
To maximize results, sequence your gallery like a walkthrough, declutter rooms, align window treatments, and emphasize strengths first. Pair photos with a 2D floorplan and a short video teaser. This combo increases engagement across MLS and social, and reduces buyer friction at showings.
Prep checklist (seller-friendly)
- Clear surfaces; hide trash bins, pet items, and personal photos.
- Match bulb color temps where possible; replace burnt-outs.
- Open blinds evenly; straighten chairs, pillows, and bed linens.
- Stage a simple vignette: a plant, book, or mug—keep it minimal.
- For exteriors: mow lawn, sweep walks, remove cars from driveway.
Gallery structure that sells
- Lead with the best 5: hero exterior and strongest interiors (kitchen, living, primary suite).
- Move room-to-room as a buyer would tour; keep bathrooms tight and bright.
- Close with lifestyle moments, exterior amenities, and an evening shot if available.
We map media to your strategy—photos plus vertical video teasers for social, and real estate media packages when you need drone and floorplans in one booking.
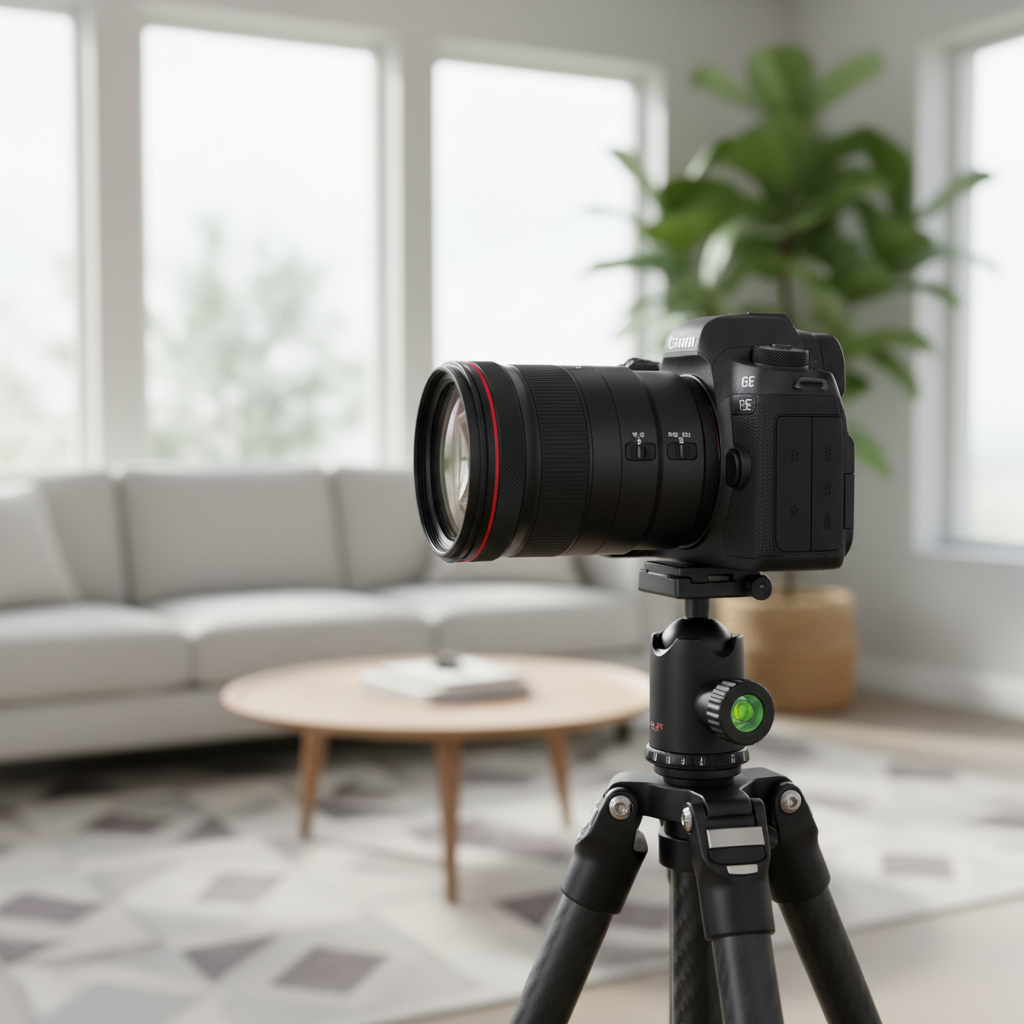
Tools and Resources We Trust
Consistent property photos come from the right tools: full-frame bodies, 16–35mm lenses, sturdy tripods, calibrated flashes, and color-managed editing. We pair this kit with a dependable delivery pipeline so you receive MLS and social-ready files without extra steps.
- Cameras and glass: Full-frame sensors for cleaner files; rectilinear wide lenses (16–24mm) to control distortion.
- Support: Solid tripod, 3-axis head, bubble level; remote trigger to avoid shake.
- Lighting: Bounced flash for flambient; constant lights when video and photo run back-to-back.
- Editing: Color-managed workflow, lens corrections, geometry fixes, dust/cord cleanup.
- Delivery: Web-optimized, MLS-safe sizes; optional high-res for print and brochures.
If you want a deeper marketing perspective, these guides offer additional context on listing readiness and marketing collateral: see this concise real estate listings guide, a Canadian-focused home marketing overview, and a FSBO preparation guide. Use them to align photography with your broader launch plan.
Case Studies and Examples
Real-world results come from disciplined storytelling. In these examples, a tight photo set, a simple floorplan, and a 30–45 second video teaser increased online engagement and drove more showings within the first week—especially when the gallery order matched the home’s flow.
Maple Ridge family home launch
- Assets: 30 photos, twilight exterior, 2D floorplan, 40-second vertical video.
- Approach: Room sequence matched the walkthrough; detail shots highlighted built-ins and updated fixtures.
- Outcome: Higher saves and shares on social; busy first weekend of showings.
Surrey new-build showcase
- Assets: Full gallery with flambient interiors, drone context, and cinematic video tour.
- Approach: Emphasized natural light and color correctness; included amenity shots and nearby green space context.
- Outcome: Strong website time-on-page and quick appointment requests.
Commercial office example
- Assets: Clean architectural angles and lifestyle details to attract tenants.
- See the style: Explore our commercial office shoot for composition and color cues you can apply to listings.
For more breadth across interiors, exteriors, and events, check our evolving portfolio.
Local Tips for Maple Ridge and BC Listings
In Maple Ridge and across BC, daylight shifts quickly and weather can change in minutes. Book morning slots for softer light, keep backup dates ready, and plan twilight exteriors around blue hour. This local timing makes property photos feel crisp and natural—rain or shine.
Local considerations for Maple Ridge
- Morning light is often cleaner after overnight cloud breaks—great for east-facing exteriors and bright kitchens.
- Fall and winter days are short; schedule earlier to secure blue hour and keep a rain-friendly plan in place.
- Many buyers in the region value outdoor living; add a simple deck vignette and an evening exterior when possible.
We’re based in Maple Ridge and serve nearby cities from Abbotsford to Richmond. If you need multi-stop coverage for a tight launch week, our services and team can coordinate assets so everything lands together—photos, video, floorplans, and drone.
How Photos, Video Tours, Floorplans, and Drone Work Together
Photos earn the click, floorplans explain the layout, video sells the feel, and drone provides context. Launching all four together creates a complete narrative—minimizing buyer questions and maximizing confidence before they ever book a showing.
- Photos: Bright, balanced coverage that shows space and finish quality.
- 2D floorplans: Exact square footage and room relationships—ideal for sight-unseen decisions.
- Video tours: Movement and mood; great for social and websites.
- Drone: Neighborhood scale, rooflines, views, and proximity visuals.
Our one-team approach means you can book everything in one place—see our service overview and contact us to coordinate media that lands the same day.
Shoot-Day Checklists (Room-by-Room)
A ready-to-shoot home photographs faster and better. Use these room-by-room checklists to reduce visual noise, standardize lighting, and spotlight selling features. Homes that follow a simple prep plan typically need fewer retakes and produce more consistent galleries.
Kitchen and living areas
- Clear counters; hide dish racks, soaps, magnets, and small appliances.
- Arrange stools evenly; center decor; open window coverings consistently.
- Wipe stainless surfaces and glass; turn on all decorative lighting.
Bedrooms and bathrooms
- Smooth duvet; align pillows; remove visible laundry and hampers.
- Close toilet lids; clear counters; hang fresh towels; hide bins.
- Open a window or run a fan briefly for air freshness before the shoot.
Exteriors and outdoor spaces
- Move cars from driveway; coil hoses; hide tools and garbage bins.
- Stage a small vignette on the deck or patio; add cushions if weather allows.
- If twilight is planned, test exterior lights and replace bulbs ahead of time.
Drone and Aerial Angles That Convert
Use three essential aerials: a front 3/4 hero at 20–30 meters, a top-down for lot context, and a neighborhood sweep that shows amenities and access. These angles help buyers visualize commute, lifestyle, and scale in seconds.
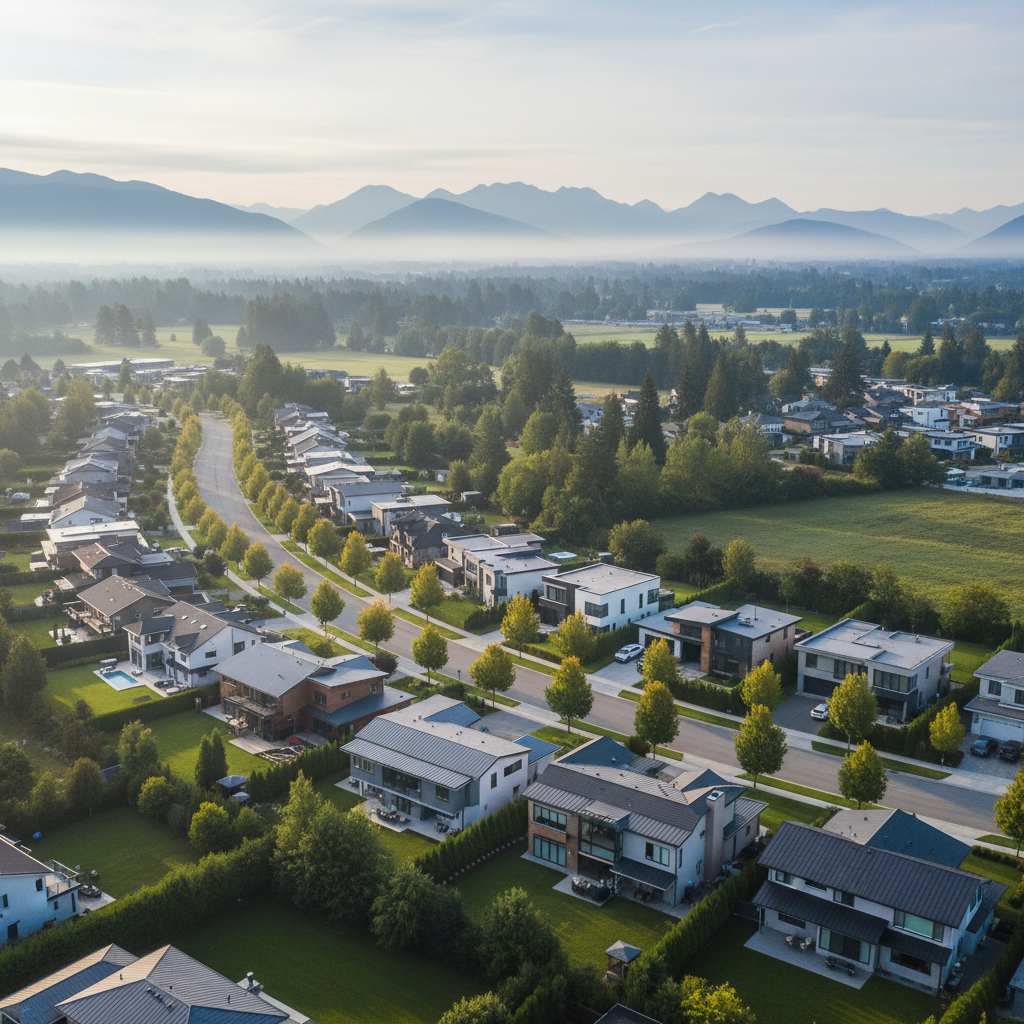
- Front three-quarter: Establishes curb appeal and roofline; ideal cover if landscaping is strong.
- Top-down: Useful for corner lots, pools, and outbuilding relationships.
- Neighborhood context: A sweeping side-angle that shows trails, streets, and nearby amenities.
We pair aerials with ground-level photos and, when appropriate, a short vertical video to give buyers quick, scannable context on feeds and listing portals.
Common Mistakes to Avoid
Avoid over-wide lenses, mixed color temperatures, leaning verticals, and clutter in frame. Skip heavy sky replacements or unrealistic window views. The goal is trustworthy images that look like the home—only tidier, brighter, and better composed.
- Too wide: Stretches rooms unnaturally; prefer 16–20mm for most interiors.
- Mixed bulbs: Orange and blue casts fight each other; standardize color where possible.
- Leaning lines: Keep the camera level and fix geometry in post.
- Distracting items: Phone chargers, fridge magnets, pet bowls—clear them before we start.
- Over-editing: Avoid surreal skies and neon lawns; buyers read them as red flags.
FAQ: Property Photos
These quick answers cover scope, timeline, and how to prepare your listing for photography. If you need a custom media plan that includes video, drone, and floorplans, our team in Maple Ridge can coordinate everything in one booking.
How many property photos do I need?
Most detached homes perform well with 24–36 images; condos and townhomes often land between 12–24. The right count depends on size, features, and how many detail or amenity shots you want to include.
What should sellers do before the photographer arrives?
Declutter surfaces, align window coverings, standardize bulb color, and stage small vignettes (plant, book, mug). Move cars from the driveway and ensure all interior and exterior lights function—this saves time and improves results.
How long does a professional shoot take?
Plan for 45–90 minutes for photos on a typical single-family home. Add time if you’re also booking a video tour, drone coverage, or 2D floorplans. Larger properties or complex lighting can extend the window.
Do I need both photos and a floorplan?
Photos create desire; floorplans explain the layout. For sight-unseen or relocation buyers, combining photos with a simple 2D floorplan reduces questions and helps serious prospects qualify themselves faster.
Next Steps and How We Can Help
Ready to launch? We’ll capture bright, trustworthy property photos and pair them with video, drone, and floorplans as needed. Based in Maple Ridge, we coordinate fast turnarounds across Greater Vancouver so your listing looks its best—on every platform.
Book a shoot or ask for a media plan: Visit our contact page or explore the full services we offer across real estate and commercial projects.
Key Takeaways
Strong property photos are bright, accurate, and sequenced like a walkthrough. Pair them with floorplans, short video, and drone for a complete story. Prep matters, timing matters, and consistent editing matters—those three choices drive more clicks and better showings.
- Lead with your best five images; sequence the rest like a tour.
- Choose HDR or flambient room-by-room for natural results.
- Use floorplans for clarity and short video for emotion.
- Schedule with local light and weather in mind; keep a backup date.
- Keep edits honest—buyers reward trust with showings.