
Real estate photography is the craft of producing clear, well-composed images that sell the story of a property. From our Maple Ridge studio at 13260 236 St, we create listing visuals that highlight light, space, and flow—so buyers stop scrolling and book a showing. For Greater Vancouver, it’s a must-have.
By Sumeet S., Founder & CEO — Last updated: 2026-06-02
At a Glance: The 2026 Real Estate Photography Playbook
This guide shows how to plan, shoot, and publish listing visuals that convert. You’ll learn pro image standards, video and drone add‑ons, 2D floorplans, social-first cuts, and a Maple Ridge–specific checklist. Use it to align your team, brief your photographer, and win more offers.
Use this quick overview to jump to the part you need right now.
- What real estate photography includes
- Why it matters for buyer conversion
- How the end-to-end process works
- Types, methods, and approaches
- Best practices that boost results
- Tools and resources we rely on
- Mini case studies and examples
- FAQ
- Key takeaways and next steps
What Is Real Estate Photography?
Real estate photography is a specialized blend of composition, lighting, and post-production that reveals a property’s true scale and flow. It often includes HDR image blending, styling guidance, and delivery sets sized for MLS, social media, and print—plus optional video, drone, and 2D floorplans.
Here’s how we define the scope at Silver Valley Studios Inc., based in Maple Ridge and serving Greater Vancouver and Vancouver Island.
- Core images for listings: Exterior front/back, entry, living, kitchen, dining, primary bed/bath, secondary rooms, and key amenities.
- HDR photos: 5–7 bracketed exposures blended for balanced highlights and shadows (clean whites, true window detail).
- Styling guidance: Decluttering, light temperature matching (2700–4000K indoors), blinds/curtains set for consistent lines.
- Delivery sets: MLS-optimized JPGs, high-res masters, and square/vertical crops tailored to Instagram and TikTok.
- Enhancements: Blue-sky replacement for gray days, screen replacements for fireplaces/TVs, and color correction for mixed lighting.
- Add-ons: Property video tours, drone photography, and 2D floorplans that pair visuals with measurable layout context.
In our experience, teams that standardize the above see smoother launch timelines and fewer revision cycles. The reason is simple: consistent visual systems make it easier for buyers to perceive space, light, and flow.
Why Real Estate Photography Matters in 2026
High-quality listing visuals drive more views, showings, and stronger offers. Photos set first impressions in under three seconds, while video, drone angles, and floorplans deepen engagement. In competitive BC markets, cohesive media is the difference between another click and a booked tour.
Buyer attention is scarce and mobile-first. Strong visuals are your silent sales pitch.
- Attention window: Buyers form a first impression in ~3–5 seconds. Lead with a hero image that shows depth, light, and natural lines.
- Mobile behavior: Vertical videos and square crops earn more watch time on social feeds. We recommend 9:16 cuts for reels and stories.
- Depth cues: Photos show finish quality; floorplans show proportion; video shows circulation; drone shows context. Use all four intentionally.
- Trust signals: Clean, consistent lighting and true-to-life color reduce buyer uncertainty—especially on renovated spaces and luxury builds.
- Search visibility: File naming, alt text, and structured captions increase discoverability and on-page dwell time.
Industry roundups like this 2026 listings guide emphasize visual hierarchy: lead image, supporting gallery, then video. We see the same pattern across Vancouver and Vancouver Island launches.
How the Process Works (From Booking to Publish)
A winning listing media workflow moves from pre-production (prep checklist, shot list) to capture (photos, video, drone) to post (color, HDR blend, delivery) to distribution (MLS and social). Documenting each step reduces revision loops and accelerates your go-live date.
Here’s our end-to-end framework you can adapt for any listing.
1) Pre-production and prep
- Brief and priorities: Identify the three moments every buyer must see (e.g., vaulted living, chef’s kitchen, backyard).
- Staging checklist: Declutter surfaces, align chairs, hide cords, match bulb temperatures (aim 3000–3500K throughout).
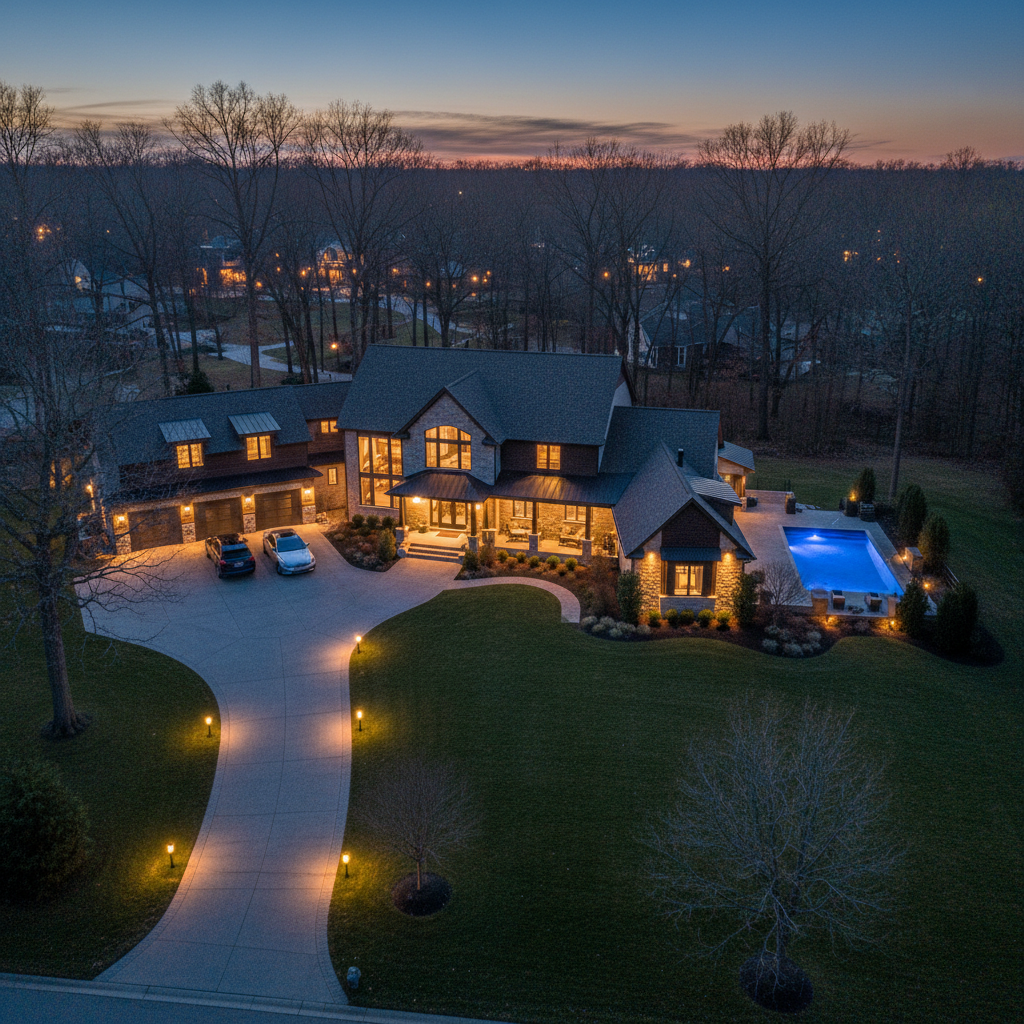
- Timing: Daylight for interiors (soft, even light), blue hour for exteriors (ambient glow), calm wind window for drone.
- Access plan: Garage codes, pet plan, parking, and any HOA timing rules to avoid reshoots.
2) On-site capture
- Lenses and angles: 16–24mm for interiors; 24–70mm for details. Keep verticals straight; avoid extreme distortion.
- HDR brackets: 5–7 exposures at 1–2 EV steps; tripod-mounted for tack-sharp frames.
- Detail coverage: Fixtures, textures, and finishes at 50–70mm; macro accents for lifestyle vignettes.
- Video block: 4K gimbal passes through living/kitchen/primary; 9:16 vertical takes for social previews.
- Drone run: Establishing shots, roof condition, yard lines, and neighborhood context when permissible.
3) Post-production
- HDR blend and color: Natural whites, neutral grays, clean window pulls, corrected white balance.
- Geometry: Lens correction, vertical/horizontal alignment, and light fixture stabilization.
- Export sets: MLS-optimized JPGs (long edge sized per board spec), high-res masters, reels/shorts crops.
- Metadata: Descriptive filenames and alt text (room name + feature), lightweight captions for on-site SEO.
4) Distribution and launch
- MLS + portal: Order images intentionally: hero exterior/interior, then supporting rooms grouped by flow.
- Social-first: 3–5 slide carousels, 12–18 second vertical video teasers, pinned reels for launch week.
- Collateral: Pair with print that reflects the brand; see printing guidance for real estate to align specs.
For integrated video planning, review our videography services overview to align lengths, aspect ratios, and storyboards before shoot day.
Types, Methods, and Approaches
Great listing media combines multiple modalities: HDR stills for clarity, flambient or window pulls for natural light, cinematic 4K video for movement, drone for context, and 2D floorplans for scale. Use each method on purpose, not by habit.
HDR and flambient stills
- HDR core: 5–7 bracketed frames blend highlight/shadow range without crushing blacks or blowing skies.
- Flambient option: One flash frame plus ambient frame merged for natural color and crisp edges.
- When to choose: HDR for speed and consistency; flambient for color-critical spaces (marble, wood grain, deep tones).
Cinematic 4K property video tours
- Purpose: Show circulation and scale; build emotional connection in 30–90 seconds.
- Core shots: 3–5 gimbal moves per hero space, tripod lock-offs for exteriors, gentle speed ramps.
- Outputs: 16:9 master for web + 9:16 vertical cut for reels/stories to extend reach.
See how we structure movement and pacing in our project portfolio.
Drone photography and videography
- Establishing context: Roof integrity, lot lines, proximity to amenities, and sunset orientation.
- Angles: 60–120 feet AGL for overview; low, lateral passes for cinematic motion.
- Blue hour: Warm practicals + cool sky increase contrast, producing scroll-stopping thumbnails.
2D floorplans
- Why buyers love them: Room sizes, door swings, and adjacency—no guessing.
- Accuracy: Laser-measured capture with tolerances typically within small single-digit centimeters.
- Pairing: Link images to plan callouts in captions to help viewers visualize circulation.
For a single vendor across stills, video, drone, and plans, our services page outlines cohesive packages designed for Greater Vancouver listings.
| Approach | Best For | Strengths | Watch Outs |
|---|---|---|---|
| HDR (5–7 brackets) | Most interiors | Speed, consistency, clean window detail | Color can drift if mixed lighting isn’t balanced |
| Flambient | Color-critical finishes | Natural color, crisp edges, low noise | More time per room; needs disciplined flash control |
| Cinematic 4K video | Emotional storytelling | Shows flow and scale; boosts watch time | Requires tidy, staged rooms and quiet set |
| Drone (photo/video) | Context and lot lines | Compelling thumbnails; roof and yard clarity | Weather/wind windows; compliance requirements |
| 2D floorplans | Layout comprehension | Removes uncertainty; aids remote buyers | Complement, not replace, photo narrative |
Real Estate Photography Best Practices (That Move the Needle)
Prioritize natural light, straight verticals, and balanced color. Use 16–24mm for interiors, bracket 5–7 exposures on a tripod, and compose for leading lines. Finish with clean HDR blending, lens corrections, and MLS/social export sets so your visuals work everywhere.
Composition and lensing
- Keep verticals vertical: Correct tilt in-camera and in post; converging lines signal amateur work.
- Work the corners: Shoot from 45° angles to show depth; avoid extreme wide shots that stretch proportions.
- Lens choice: 16–24mm for rooms, 24–70mm for vignettes and details that sell lifestyle.
Lighting and windows
- Window pulls: Blend a darker exposure to retain outdoor detail; avoid white windows that flatten the scene.
- Color harmony: Match lamp and overhead bulbs (3000–3500K) to prevent orange/blue casting.
- Blue hour exteriors: Use ambient house lights for warmth against a cool sky—high-impact hero shots.
Staging and prep
- Declutter: Clear counters, nightstands, and fridge fronts; hide trash bins and cords.
- Symmetry: Align stools, chairs, and pillows; square rugs to walls for calm compositions.
- Surfaces: Wipe stainless, glass, and mirrors to minimize retouching time.
Export and delivery
- MLS set: Optimized JPGs sized per board; descriptive file names (e.g., “kitchen-island-quartz.jpg”).
- Social set: 1080×1350 portrait stills and 9:16 video reels at 1080×1920 for platform compatibility.
- Accessibility: Add alt text describing room and feature; improves on-site SEO and usability.
For integrated campaigns, align your stills, video, and plan deliverables on the services page so each asset supports the listing narrative.
Tools and Resources We Rely On
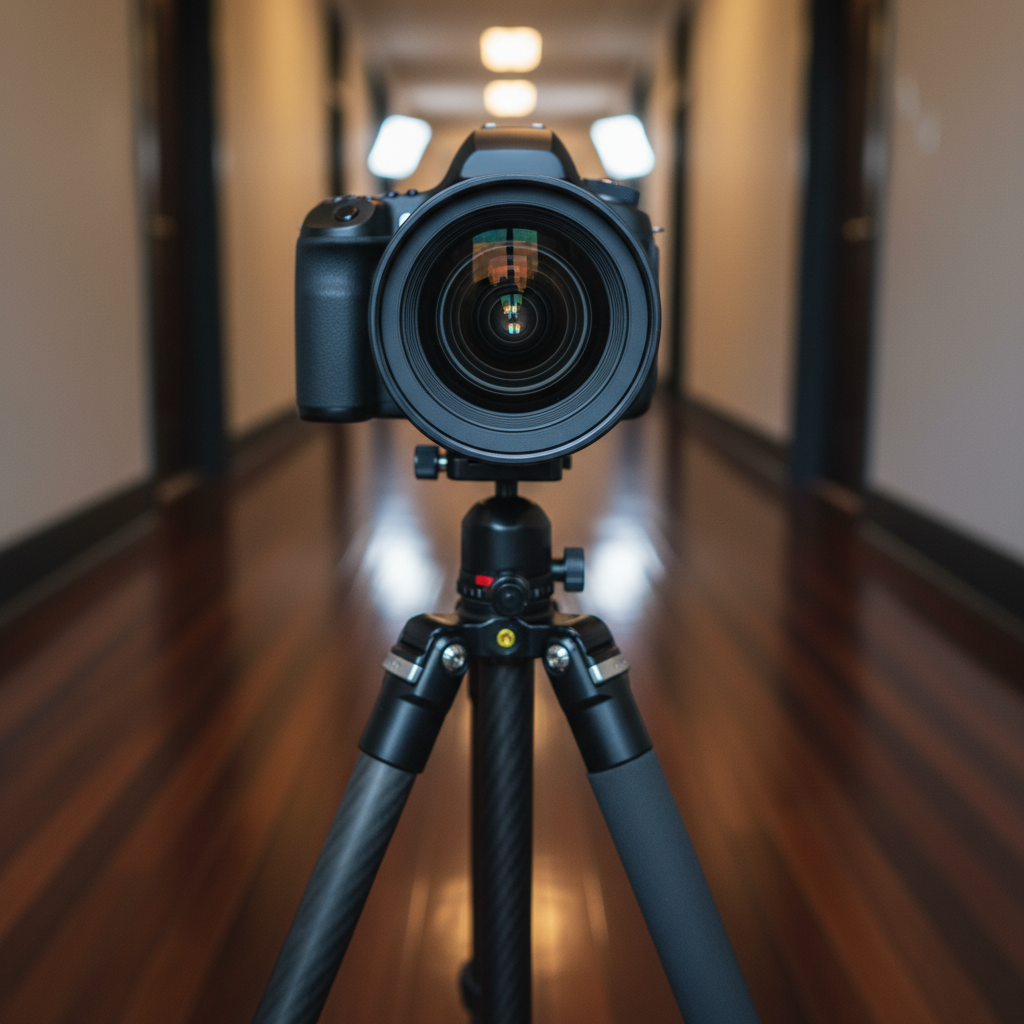
We use fast wide-angle lenses (16–24mm), sturdy tripods, gimbals for 4K video, and drones for aerial context. HDR and flambient techniques handle dynamic range, while calibrated monitors ensure accurate color. Delivery sets are pre-sized for MLS and social.
- Cameras and glass: Full-frame bodies with 16–24mm and 24–70mm lenses cover rooms and details.
- Support: Levelled tripod, gimbal for smooth video, ND filters for consistent shutter speed.
- Lighting: On/off-camera flash for flambient, continuous practicals for ambiance.
- Color control: Gray card and calibrated monitor to keep whites clean and brand colors honest.
- Delivery: Organized folders—MLS JPGs, hi-res masters, and social crops ready to post.
For inspiration on how tools turn into results, browse our commercial office case study and a restaurant visual story. Different industries, same principles: light, lines, and clarity.
Case Studies and Real-World Examples
The most effective listings balance clean stills, concise video, and a clear floorplan. Here are condensed examples from projects across Greater Vancouver, illustrating decisions that led to more showings and faster momentum.
Maple Ridge family home: clarity and comfort
- Challenge: Mixed bulbs and busy counters made rooms feel small.
- Approach: Bulb harmonization at ~3200K, 6-image HDR brackets, corner compositions, and a blue-hour exterior.
- Result: Gallery led with kitchen/living depth; social teaser (15 seconds, 9:16) increased inquiries in launch week.
Surrey new build: video-first narrative
- Challenge: Large square footage but hard-to-visualize flow.
- Approach: 60-second 4K tour with gimbal paths through living–kitchen–patio; drone altitude at ~90 feet for lot context.
- Result: Higher watch time on vertical cut; showings referenced the video and plan to navigate open house.
Vancouver luxury listing: finish fidelity
- Challenge: Deep wood tones and marble required accurate color.
- Approach: Flambient merges; 24–70mm detail work; window pulls to retain cityscape.
- Result: True-to-life finishes reduced buyer objections about color cast online.
To see how we translate shot lists into narratives, visit the portfolio hub and filter by project type.
Local considerations for Maple Ridge
- Schedule interiors mid-morning to early afternoon for softer light typical of Maple Ridge; reserve twilight for exteriors to capture a warm, inviting glow.
- Factor in seasonal rain by planning a blue-sky replacement or a fast exterior pickup when weather clears.
- Highlight outdoor living: decks, yards, and nearby trails resonate with buyers in Maple Ridge and across BC.
Aligning Visuals to the Buyer Journey
Map your visuals to discovery, consideration, and decision stages. Lead with a hero image, deepen with a 30–60 second tour and drone context, and remove uncertainty with a clear 2D floorplan. Each asset has a job; avoid duplication and keep momentum.
- Discovery: Scroll-stopping hero image (kitchen/living depth or blue-hour exterior) + caption that names the feature.
- Consideration: 30–60s video showing circulation; 3–5 slide carousel with bed/bath highlights.
- Decision: 2D floorplan with room sizes; captions that connect photos to plan zones.
- Follow-through: Pin the reel; post a before/after angle; update the listing with a twilight thumbnail.
Content collections for agents work better when pre-planned. See social-friendly deliverables in our video services overview.
Checklists and Workflows You Can Steal
Use these ready-to-run checklists to speed up go-live. They align agents, homeowners, and your photographer, cutting reshoots and keeping momentum high—even during packed launch weeks.
Agent prep checklist (10 items)
- Confirm priorities: top 3 spaces to spotlight
- Stage surfaces: clear counters, hide toiletries
- Match bulb temps across rooms (3000–3500K)
- Open blinds evenly; align curtains
- Replace dead bulbs; check exterior fixtures
- Roll towels; square rugs; fluff pillows
- Crack windows briefly to reduce humidity
- Turn off ceiling fans and TVs
- Park vehicles away from front elevation
- Secure pets; plan access and alarms
On-site capture workflow (7 steps)
- Scout and set exposure baseline per room
- Compose from 45° angles; correct verticals
- Capture 5–7 HDR brackets per angle
- Detail passes at 50–70mm for finishes
- Video gimbal routes through hero spaces
- Drone passes for context (weather-permitting)
- Blue-hour exterior for the hero thumbnail
Post-production QC (8 checks)
- White balance consistency room to room
- Lens correction and geometry alignment
- Window detail retained where it matters
- Skin tones and wood grain look natural
- No sensor dust or cloning artifacts
- File names descriptive and organized
- Alt text and captions in place
- Social cuts exported and labeled
Want a done-for-you launch? Our team handles photos, video tours, drone, and floorplans under one roof. Start a brief on the contact page and we’ll map assets to your listing goals.
SEO, Captions, and Distribution
Treat images and video like content, not files. Write descriptive filenames and captions, add alt text, and post social-first cuts during launch week. Order gallery images to tell a story, not simply room-by-room.
- File names: “1234-oak-street-blue-hour-front.jpg” communicates context and helps indexing.
- Alt text: Describe room and feature: “Primary bedroom with vaulted ceiling and south-facing windows.”
- Captions: Name materials and upgrades—buyers search for “quartz island” and “wide-plank floors.”
- Posting cadence: Pin the vertical tour, then roll room spotlights over 3–5 days.
Roundups like this professional guide echo a simple point: each asset should have a job in your launch sequence.
Frequently Asked Questions
These concise answers cover how to prepare, what deliverables include, and how photos, video, drone, and floorplans work together to market a listing—especially across Maple Ridge and the Greater Vancouver area.
What does real estate photography typically include?
Expect a core gallery of exteriors and interiors captured with HDR blending for balanced light, plus export sets for MLS and social. Many teams add a 30–60 second property video tour, a few drone angles for context, and a 2D floorplan to clarify layout.
How should I prepare a home before the shoot?
Declutter counters and nightstands, match bulbs to the same color temperature, open blinds evenly, and hide cords and trash bins. Square rugs and align chairs for symmetry. If weather is unstable, plan a quick exterior pickup when the sky clears.
Do videos and drone photos actually help the listing?
Yes. Video shows flow and scale, while drone angles provide neighborhood and lot context. Together with a clear floorplan, they answer common buyer questions early, which encourages showings and reduces uncertainty at open houses.
What lens focal lengths work best for interiors?
A fast 16–24mm zoom on full-frame bodies covers most rooms without heavy distortion. Pair it with a 24–70mm for details, finishes, and lifestyle vignettes that sell how the space feels, not just how it looks.
How do floorplans fit into the marketing mix?
2D floorplans remove guesswork by showing room sizes and adjacency. They complement photos and video by clarifying circulation—especially for remote buyers comparing multiple listings across Greater Vancouver and Vancouver Island.
Wrap-Up: Key Takeaways and Next Steps
Lead with clean, balanced photos, then layer video, drone, and floorplans to answer buyer questions fast. Standardize your prep and delivery checklists and post social-first cuts during launch week. That’s how listings stand out across Maple Ridge and BC.
- Key takeaways:
- Photos create the first impression in seconds; make them count.
- Use video and drone to add emotion and context.
- Publish a 2D floorplan to reduce uncertainty.
- Export MLS and social sets up front to speed launch.
- Next steps:
- Review our services overview and portfolio examples.
- Align your listing goals with this guide’s checklists.
- Start a conversation on the contact page to plan photos, video, drone, and floorplans under one roof.