
Photography angles are the positions and orientations of a camera relative to a subject. The right angle shapes depth, scale, and mood—critical for real estate, drone, and brand visuals. At our Maple Ridge, BC studio (13260 236 St), we plan angles before we ever press the shutter so listings look spacious and brands feel authentic.
By Sumeet S. — Founder & CEO, Silver Valley Studios Inc.
Last updated: 2026-06-02
Quick Summary
Use camera height and tilt to control how big, bright, and believable a space feels. For interiors, keep verticals straight and shoot between 40–60 inches high; for exteriors, vary low and high angles; for drone media, mix oblique (25–45°) and top‑down (90°) views to reveal context and form.
Here’s what you’ll get from this complete guide to photography angles tailored to real estate, restaurants, and social content we produce at Silver Valley Studios Inc. in Maple Ridge.
- Clear definitions and why angles matter for selling and storytelling
- How angles work with perspective, lens choice, and tripod height
- Types of angles with 12+ real-world use cases
- Step-by-step workflows we use on paid shoots
- Best practices, tools, and a comparison table for quick choices
What Are Photography Angles?
Photography angles describe where the camera is placed and how it tilts relative to a subject. They determine perspective lines, relative size, and viewer focus, which is why angle selection directly affects perceived room size, roofline clarity, and brand mood in images and video.
In practice, an angle is a combination of three controls: camera height, camera tilt (pitch/roll), and camera position left/right/forward/back. Changing any one component changes the geometry you record. A small tilt—just 2–3°—can make vertical lines converge, while a 6–8 inch change in height can fix reflections on glossy floors.
- Height: Measured from floor to sensor plane (e.g., 48 inches). Height sets horizon placement and furniture proportions.
- Tilt: Pitch up/down controls convergence; roll affects level; yaw alters composition balance.
- Position: Shifting a foot sideways can separate subject edges, reduce overlap, and reveal depth.
For real estate photography, we keep roll at 0° and aim for verticals within ±0.5° of true. For restaurant flat-lays, we embrace a 90° top-down angle. For social reels, a 10–15° intentional tilt can add energy.
Why Angles Matter for Real Estate and Brand Media
Angles influence trust, scale, and flow. In listings, level verticals and thoughtful height produce believable space. For brands, varied angles signal craft and help audiences understand texture, layout, and use—boosting engagement across photo sets and short-form video.
Angles are not just aesthetics; they’re strategy. The right angle can reduce visual clutter by 20–30% simply by aligning edges with walls. Small choices—like moving from 36 to 50 inches camera height—can extend countertop visibility by several inches in frame, which helps buyers assess finishes.
- Trust and accuracy: Level lines reduce subconscious “tilt fatigue” and make rooms feel honest.
- Attention flow: Low angles emphasize height; high angles map layouts; obliques add depth.
- Conversion impact: Consistent angles across a gallery increase coherence, aiding buyer decision-making.
In our experience with Greater Vancouver listings, balanced angle sets—eye-level plus a high-angle hero—improve time-on-listing pages and save/share rates on social clips.
How Photography Angles Work (Perspective, Lenses, and Height)
Angles shape perspective by changing where the horizon sits and how lines converge. Wide lenses exaggerate depth; telephoto compresses it. Height sets the horizon: at 48 inches in a standard room, the horizon falls near counter height, balancing cabinetry and floor detail.
Three technical levers control the look:
- Lens focal length: On full-frame, 16–24mm shows a 100–84° diagonal field; 35–50mm narrows to ~63–47°. Wider = more perspective stretch.
- Camera height: 40–60 inches covers most interiors; 30–36 inches is great for kids’ rooms and low furniture; 60–72 inches clarifies island layouts.
- Tilt/shift correction: Keep pitch near 0° to protect verticals; correct remaining keystoning in post by 1–3% when needed.
Here’s the thing: distance and angle are partners. If walls bow, you’re likely too close with too wide a lens; back up by 1–3 feet and raise height 4–6 inches. Outside, a 5–10° upward tilt at a low angle can make rooflines read cleanly without heavy distortion.
Types of Camera Angles and When to Use Them
Use eye level for neutral truth, low angles to add height and drama, high angles to clarify layouts, and top-down for patterns and plating. Mix oblique and overhead drone views to show context and structure. Choose an angle to answer a viewer question within 2–3 seconds.
Core angles (interiors and exteriors)
- Eye level (approx. 48–54 inches): Natural perspective; ideal for kitchens and living rooms.
- Low angle (30–40 inches): Adds stature to fireplaces and tall windows; watch for ceiling distortion.
- High angle (58–72 inches): Reveals floor plans and furniture relationships; perfect for tight dining nooks.
- Bird’s-eye (ladder or mezzanine): Great for double-height spaces; secure footing and stabilize at 1/125s+.
- Worm’s-eye (very low): Dramatic exteriors; emphasizes siding lines and sky gradients.
- Dutch tilt (intentional roll): Use sparingly for brand/social energy; usually avoid in MLS sets.
Angles by specialty
- Top-down 90°: Restaurant flat-lays; ensure even lighting and orthogonal plate placement.
- Corner reveal (two-point perspective): Stand at a room corner with 0° roll for strong depth cues.
- One-point perspective (centered): Symmetry-focused hallways and spa-like bathrooms.
- Over-the-shoulder: Brand content with people using products; connects action to environment.
- Oblique drone (25–45°): Shows facade + lot; best near golden hour for soft shadows.
- Nadir drone (90° down): Lot lines, roof textures, walkability cues; ensure safe altitude and wind margins.
Take a Maple Ridge example: for a modern condo kitchen, we’ll deliver an eye-level master, a high-angle island reveal, and a corner perspective to connect kitchen to dining—three angles that answer size, flow, and finish questions.
Step-by-Step: Choosing the Right Angle for Any Room
Decide the story, pick the height, level your lines, and then refine with micro-movements. Start at 48–52 inches, keep pitch near 0°, and shift left/right by 6–12 inches to separate edges. Lock the tripod, shoot variations, and select the angle that answers the buyer’s key questions.
- Define the question: Size? Layout? Finish detail? Each question suggests an angle.
- Set a starting height: 48–52 inches for living spaces; 50–56 inches for kitchens.
- Level first: Use a bubble level; roll 0°, pitch ±0.5°; correct micro-tilt in camera if available.
- Micro-move: Slide 6–12 inches to eliminate edge mergers; rotate 3–5° to align leading lines.
- Bracket wisely: For HDR blends, shoot ±2 EV; keep the camera fixed to preserve geometry.
- Audit the frame: Check corners, door trims, and ceiling angles for creeping distortion.
We use this flow on nearly every listing—from detached homes in Langley to townhomes in Coquitlam—because it’s fast, reliable, and repeatable, even when rooms are tight or reflectivity is high.
Best Practices by Genre (Real Estate, Restaurants, Social)
Match angle to intent: neutral for MLS truth, stylized for brand mood, dynamic for social. Keep verticals straight in property sets, build height contrast for restaurants, and vary three angles in every short-form clip to raise watch-through and saves.
Real estate media
- Keep verticals clean: Correct keystoning to within 1–2% if you must tilt.
- Show flow: Use corner reveals and high angles to connect rooms.
- Exterior variety: Supply one eye-level facade, one low angle for drama, one high angle for context.
- Drone set: Pair one oblique with one nadir for lot and roof clarity.
Restaurant and commercial spaces
- Top-down patterns: 90° for tabletops; maintain plate spacing at 1–1.5 plate widths.
- Ambient exteriors: Low angles at blue hour to capture signage glow and interior warmth.
- Texture close-ups: 30–45° obliques highlight steam, garnish, and grain.
Social-first content
- Three-angle rule: Open at eye level, cut to a 15° tilt detail, finish with a top-down map; each clip 1.0–1.5 seconds.
- Vertical composition: Keep action in the center third; avoid heavy Dutch rolls that feel gimmicky.
- Loop logic: End on the opening angle to create seamless loops.
Want examples in motion? Explore our videography services and recent portfolio projects that follow these patterns across Greater Vancouver.
Tools and Resources for Precise Angles
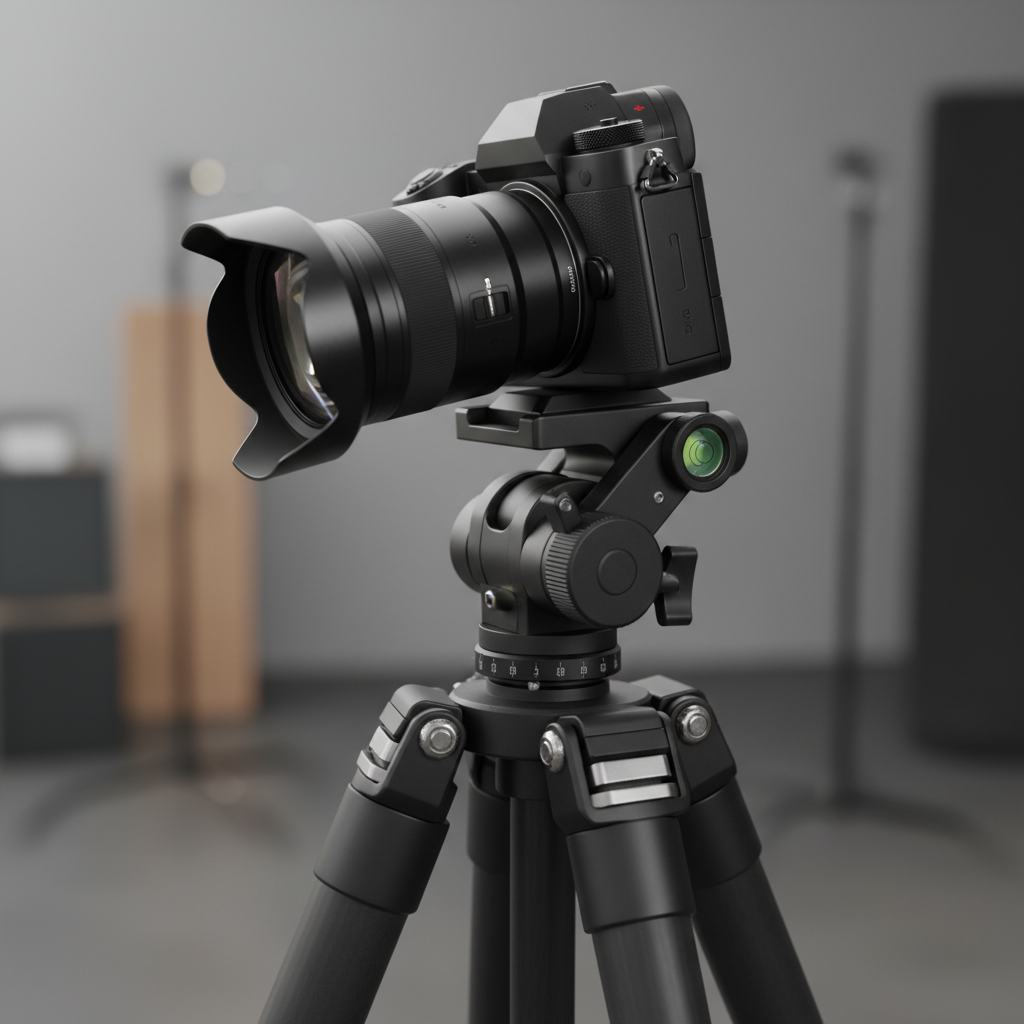
Use a sturdy tripod with a leveling base, a geared head for micro-tilt, and a 16–35mm lens for interiors. For exteriors and drone work, add circular polarizers and ND filters. Turn on gridlines, virtual horizon, and focus peaking to speed up alignment on location.
- Tripod + leveling base: Faster 0° roll; saves 30–60 seconds per frame on alignment.
- Geared head: 1° micro-adjustments without sag; crucial for millimeter-accurate verticals.
- Lenses: 16–35mm (full-frame) for rooms; 24–70mm generalist; 70–200mm for compressing facades.
- Polarizer: Cuts 1–2 stops; removes glare on stone and cabinetry.
- Drone: Gimbal set to 0° for oblique, −90° for nadir; plan 3–5 waypoint positions.
- On-camera aids: Gridlines, histogram, and virtual horizon keep lines true and exposures consistent.
For an end-to-end media plan—including floorplans and cinematic tours—see our consolidated services or reach out via contact to align angles with your listing goals.
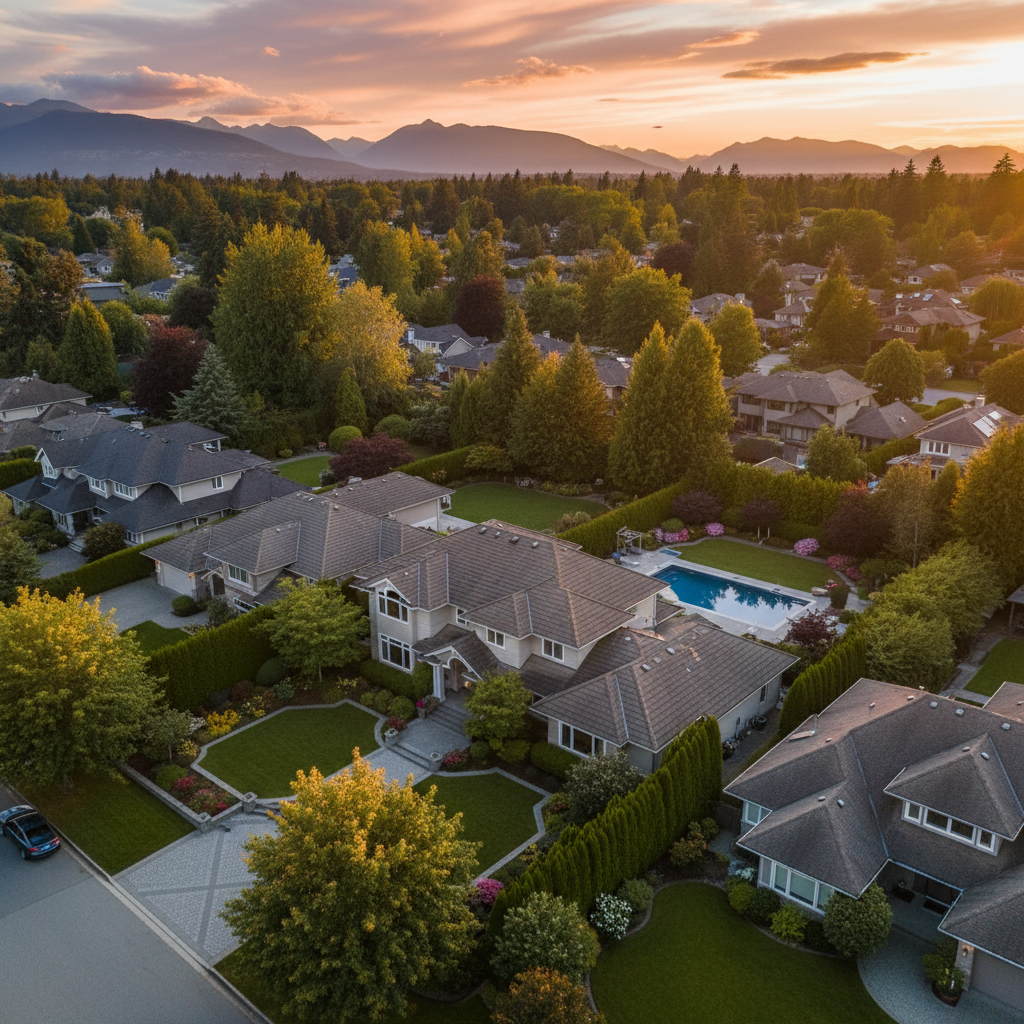
Case Studies and Examples from Maple Ridge and BC
In Maple Ridge and across BC, we use consistent angle sets to sell the story fast: one neutral truth, one layout map, and one dramatic hook. This trio helps buyers process scale, flow, and finish within seconds—online and in-person.
Detached home in Maple Ridge
- Problem: Narrow living room felt cramped.
- Angle plan: High angle at 60 inches to map layout; corner reveal at 48 inches; low angle at 38 inches for window height.
- Outcome: The high-angle master clarified walkway widths; the low exterior added presence to the facade.
Townhome kitchen in Coquitlam
- Problem: Glossy cabinets reflecting windows.
- Angle plan: Raise height from 46 to 54 inches; rotate 7°; maintain 0° roll; polarizer engaged.
- Outcome: Clean verticals and minimal glare while preserving countertop depth.
Restaurant hero in Surrey
- Problem: Busy table causing visual noise.
- Angle plan: 90° top-down, even light, plate spacing at 1.25 widths, 35mm equivalent.
- Outcome: Clear hierarchy and a shareable hero image for social and menu boards.
Local considerations for Maple Ridge
- Plan around bright overcast common to the region; soft daylight helps keep verticals and whites clean.
- In winter months, schedule exterior and drone angles near midday for higher sun and shorter shadows.
- For brand shoots, mix indoor eye-level with quick covered outdoor angles to handle passing showers without delays.
Browse our commercial office project for how angle variety explains complex layouts in a few frames, and see our about page for our angle-first approach to storytelling.
Angle Selection: Quick Comparison Table
Choose neutral eye level for honesty, high angles for layout, low angles for drama, and drone oblique for context. Match lens to space: 16–24mm for rooms, 24–35mm for kitchens, 70–200mm for exteriors needing compression or privacy.
| Angle | Best Use | Typical Lens | Starting Height |
|---|---|---|---|
| Eye level | Neutral room truth | 24–35mm | 48–54 in |
| High angle | Layout mapping | 20–28mm | 58–72 in |
| Low angle | Tall windows, drama | 16–24mm | 30–40 in |
| Top-down 90° | Flat-lay/tabletops | 28–50mm | Overhead rig |
| Oblique drone | Facade + lot | Fixed (drone) | 0° gimbal |
| Nadir drone | Lot lines, roof | Fixed (drone) | −90° gimbal |
Angles in Property Video Tours and Social Reels
In motion, angle is choreography. Start with an establishing eye-level glide, cut to a high-angle map, then finish with a low-angle reveal. Keep movements slow (0.5–1 m/s), stabilize roll at 0°, and hold each shot 2–3 seconds for clarity on mobile.
- Gimbal moves: Push-ins at eye level for entryways; lateral slides to show width; parallax arcs around islands.
- Vertical video: Frame critical lines in the center third to avoid crop issues across platforms.
- Cut rhythm: Alternate neutral and stylized angles to maintain attention without disorientation.
To see how we combine angles with movement, explore our property video tour workflows and how they pair with floorplans and HDR photo sets for cohesive marketing.
Common Angle Mistakes (and Easy Fixes)
Avoid excessive tilt, over-wide lenses in tight rooms, and horizon drift in drone footage. Fix by raising height 4–6 inches, stepping back 1–3 feet, swapping to 24–28mm, and using the camera’s virtual horizon to keep roll at 0°.
- Keystoning: If verticals converge, lower tilt toward 0°; correct residuals by 1–3% in post.
- Edge mergers: Separate furniture edges with a 6–12 inch lateral move.
- Too wide: 14–16mm stretches scale; if possible, switch to 20–24mm and step back.
- Drone roll drift: Recalibrate IMU/compass; enable gridlines; re-fly key frames.
A quick sanity check: if the ceiling dominates 40% of the frame indoors, drop height or angle down slightly while holding pitch near 0°.
Resources and References
Study angle fundamentals, then practice with a consistent checklist. Read practical guides, analyze floorplan-to-photo matches, and review brand examples to see how angle choices shift perception across platforms.
For additional reading on room visuals, see this room photography guide. For camera setup ideas, browse a dual camera overview. For listing preparation context, skim a Canadian listing guide. These resources complement our Maple Ridge–based angle workflow.
Frequently Asked Questions
Most rooms look best between 48–54 inches camera height with verticals kept straight. Kitchens often benefit from 50–56 inches. For drone work, combine one oblique (25–45°) and one nadir (90°) to communicate both facade and lot context quickly.
What camera height works best for kitchens?
Start around 50–56 inches to align the horizon near countertop level. This balances uppers and lowers, keeps verticals true, and reduces glare on glossy finishes. Micro-adjust a few inches to manage reflections and island proportions.
Should I use a very wide lens in small rooms?
Use the widest lens sparingly. Extreme wide angles stretch scale and can mislead. If possible, step back and use 20–24mm on full-frame. Keep pitch near 0° to protect verticals and present a truthful sense of space.
How many angles should each room get?
Deliver at least two per key room: one neutral truth (eye level, straight verticals) and one that answers a layout or feature question (high angle, corner reveal, or detail). Large or complex rooms often need a third for flow.
What drone angles best show lot size?
Pair an oblique view (gimbal 0°) from 100–200 feet with a straight-down nadir (−90°). The oblique communicates neighborhood context and facade, while the nadir reads roof geometry and property lines more clearly.
Conclusion and Next Steps
Angle choice is your fastest path to clearer, more persuasive visuals. Set a default height, keep verticals straight, and vary one dramatic and one mapping angle per scene. Repeat this across photos and video for a consistent, trustworthy portfolio.
- Key takeaways:
- Default to eye level; add a high-angle map and a low-angle hook as needed.
- Protect verticals: roll 0°, pitch near 0°, correct minor keystone in post.
- Use 16–24mm thoughtfully; step back and raise height before going wider.
- For drone sets, mix oblique and nadir to tell the whole property story.
- Action steps:
- Build a per-room angle checklist for your next listing.
- Audit your last gallery for horizon drift or over-wide frames.
- Plan a three-angle sequence for your next 15–30 second reel.
If you’re in Maple Ridge, Langley, Surrey, or anywhere across Greater Vancouver, we’d love to help. Explore our services, review our portfolio, and book a session to align angles with your goals.