
Lightroom for real estate photography is the process of organizing, correcting, and stylizing property photos inside Adobe’s non-destructive editor to create clean, accurate, and market-ready images. From our Maple Ridge, BC studio at 13260 236 St, we use Lightroom to standardize white balance, blend brackets, and export consistent sets that make listings look professional across MLS and social.
By Sumeet S. — Founder & CEO, Silver Valley Studios Inc.
Last updated: 2026-05-10
Quick Summary
Lightroom streamlines real estate photo delivery by managing files, syncing edits, and producing uniform, color-accurate images fast. Use it for lens correction, white balance, exposure blending, perspective fixes, and batch export. Pair Lightroom with bracketed shooting and a repeatable preset stack to deliver consistent, on-brand galleries for every listing.
This guide shows exactly how we at Silver Valley Studios Inc. build a dependable Lightroom workflow for real estate and commercial interiors. You’ll learn the what, why, and how—plus receive a practical, step-by-step process we apply across Greater Vancouver and Vancouver Island.
- What Lightroom is and when to use it for property media
- Why consistent editing boosts online engagement and inquiries
- How to build a start-to-finish Lightroom workflow (our 12-step stack)
- Editing methods: HDR, flambient, natural light—where each shines
- Presets, plugins, and export recipes that save real time
- Case studies from Maple Ridge and neighboring markets
What Is Lightroom for Real Estate Photography?
Lightroom is a non-destructive photo editor and catalog system used to organize, correct, and stylize real estate photos at scale. It centralizes culling, color, geometry, and export. For agents and media teams, it’s the best hub for fast, consistent delivery of on-brand interiors and exteriors.
In practice, we import a full shoot, flag selects, apply a preset stack, and finish with geometry and local refinements. Edits live as instructions, not pixels, so you can revisit decisions without degrading image quality. That’s crucial when listings evolve or need new crops for MLS, Instagram, or vertical reels.
- Non-destructive editing: Your RAW files remain untouched; edits are reversible at any time.
- Batch speed: Sync settings across rooms to keep color and contrast uniform.
- Catalog control: Rate, filter, and keyword images for fast handoffs to teams and clients.
- Geometry tools: Keep walls vertical and lines straight—buyers notice crooked frames instantly.
- Export recipes: Deliver correct sizes for MLS, web, and social without re-editing.
Why Lightroom Matters for Property Marketing
Lightroom matters because listings win attention when visuals are color-true, bright, and consistent. It reduces turnaround time, preserves image quality, and keeps galleries uniform across rooms and devices—improving click-through, saves, and showing requests in competitive markets.
When a buyer scrolls a gallery, they build trust from visual consistency. Mixed white balance between rooms, leaning doorframes, or heavy-handed saturation signal “amateur.” Our brand-first approach keeps tones natural and lines accurate so the home’s story—not the edit—takes center stage.
- Consistency converts: Unified tonality across 20–40 images helps buyers compare spaces quickly.
- Speed to market: Lightroom’s batch tools shorten delivery windows, keeping momentum after staging.
- Cross-platform fidelity: Proper color and contrast translate better to MLS, email, and mobile apps.
- Team alignment: Shared presets let large teams maintain one look across many shooters.
In our experience with fast-moving Surrey and Langley projects, a reliable Lightroom flow keeps agents ahead of listings going live, open houses, and social promotions. That operational edge matters as inventory and buyer attention shift week to week.
How Lightroom Works in a Real Estate Workflow (Step-by-Step)
A repeatable 12-step Lightroom workflow turns messy card dumps into polished galleries: import, cull, lens and profile corrections, white balance, tonal base, geometry, detail, local refinements, color harmony, sky/window control, sync, and export. The sequence keeps quality up and turnaround tight.
- Ingest and backup: Copy cards to a dated project folder. Build smart previews for laptop editing.
- Import with metadata: Apply copyright, rating color labels (e.g., selects = green), and base preset.
- First pass cull: Reject blinks and misfires; keep variations of key angles.
- Lens corrections: Enable profile, remove chromatic aberration. Straight lines sell space.
- White balance and exposure: Neutralize color casts; establish a bright but honest baseline.
- Global tone: Use Basic + Tone Curve for clean midtones and gentle highlight roll-off.
- Geometry: Upright/Guided to square walls. Minor warp beats over-aggressive transforms.
- Detail: Sharpen lightly; keep noise reduction conservative for texture retention.
- Local refinements: Brush edge glare, lift shadowy corners, tame hotspots on stainless or stone.
- Color harmony: Keep wood and paint tones believable. HSL to desaturate stray magenta/green.
- Sync: Copy settings within room types. Kitchen to kitchen, bath to bath—never blindly all.
- Export recipes: Create MLS, web, and social presets to avoid rework later.
For a typical detached in Maple Ridge, we might deliver a balanced set of 25–35 images with consistent WB around 5000–5800K indoors and cooler exteriors to match the day’s light. That balance keeps materials looking natural across devices.
Editing Approaches: HDR, Flambient, and Natural Light
Use HDR for speed and dynamic range, flambient when color accuracy and window balance matter most, and natural light for airy spaces. Lightroom supports each by blending brackets externally or compositing in Photoshop, then refining global color and geometry in the catalog.
HDR (Exposure Bracketing)
- When to use: High-contrast interiors where windows clip at base exposure.
- Capture plan: 3–5 brackets at 1–2 EV apart; lock white balance in-camera.
- Workflow: Merge externally or in Lightroom’s HDR Merge, then normalize tones and geometry.
- Watch-outs: Halos, crunchy contrast, and murky shadows—avoid heavy-handed clarity.
Flambient (Flash + Ambient)
- When to use: Color-critical kitchens and baths; complex mixed lighting.
- Capture plan: Ambient base + one or more bounced flash frames per angle.
- Workflow: Blend in Photoshop; return the composite to Lightroom for finishing.
- Watch-outs: Specular hotspots and obvious flash falloff—feather brushes and keep it natural.
Natural Light
- When to use: Bright, evenly lit, open-plan spaces with good daylight.
- Capture plan: Tripod, base ISO, f/7.1–f/9, and shutter to taste; avoid mixed light sources.
- Workflow: Global edits in Lightroom with subtle local dodging/burning; minimal retouching.
- Watch-outs: Blue shadows and green casts; correct with WB, HSL, and calibration.
At Silver Valley Studios, our default is natural light plus selective flash for texture and color accuracy. We reserve flambient for complex finishes or tight condos where mixed light overwhelms a single exposure.
Best Practices for Consistent Results (What We Apply Daily)
Consistent real estate edits come from disciplined capture and a locked, repeatable Lightroom stack. Standardize white balance, geometry, and tonal targets. Save them as presets. Sync by room type, not entire shoots, and keep color believable so materials look true in every frame.
Capture Standards
- Bracket with intent: 3–5 frames at 1–2 EV; avoid 9+ unless truly necessary.
- Keep ISO low: Most interiors hold at ISO 100–400 with tripod.
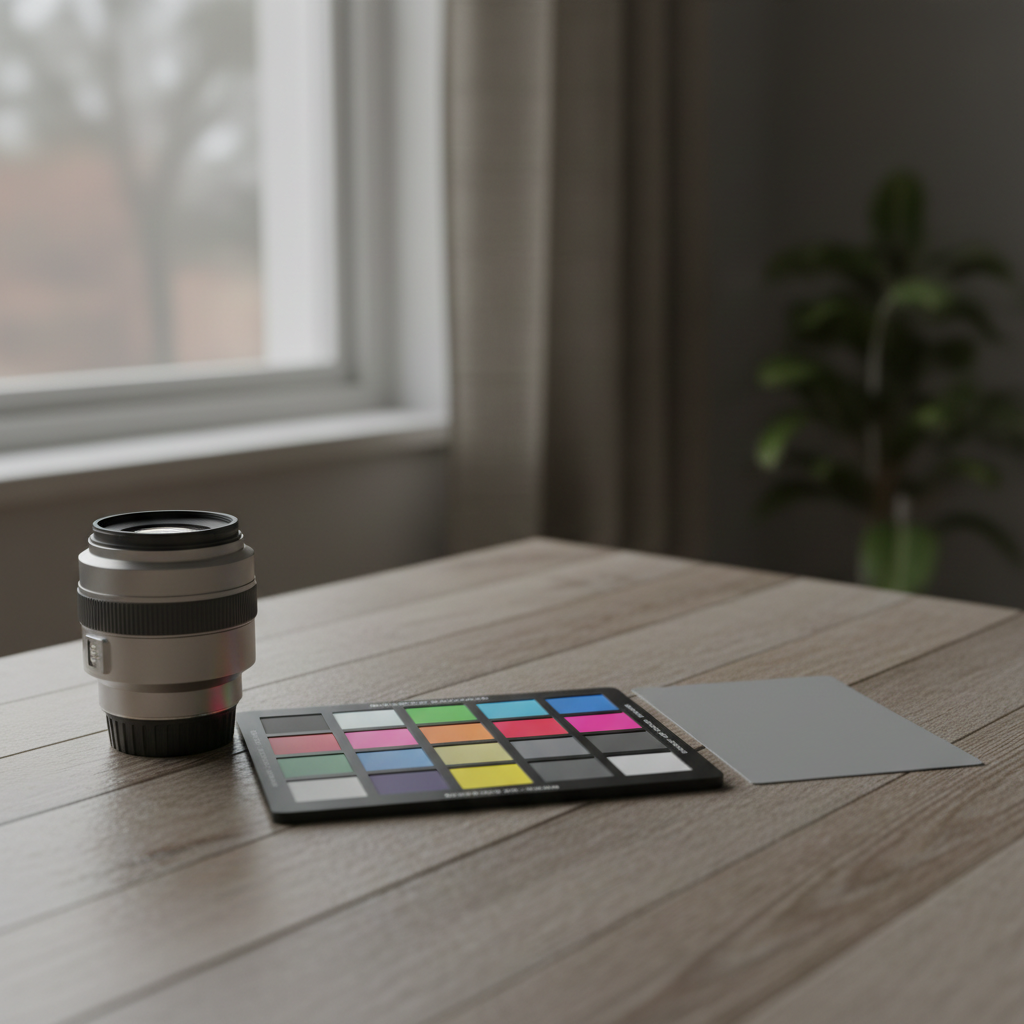
- Color reference: Shoot one frame per room with a color checker for calibration.
- Uniform height: Eye-level to keep verticals neutral; adjust only for story.
Lightroom Editing Targets
- White balance: 4800–6000K for interiors depending on daylight; tint to neutralize casts.
- Contrast curve: Gentle S-curve; avoid crushed blacks that hide texture.
- Highlights/Shadows: Protect ceiling lights and lift cabinets without plastic sheen.
- Geometry: Guided Upright with two vertical and two horizontal guides.
Export Consistency
- Recipes: Separate MLS, web, and social presets (dimensions + sharpening).
- Color space: sRGB for web; keep files lightweight for fast loading.
- Naming: Property-city_room-number to aid agents and stagers.
We apply the same foundation across real estate shoots and our videography services for brand cohesion across campaigns. That unity shows up in engagement metrics agents share back with us.
Local considerations for Maple Ridge
- Leverage bright mid-mornings common in Maple Ridge to minimize mixed lighting; schedule interiors when daylight is steadier.
- Rainy stretches are frequent in BC; plan exterior reshoots or sky swaps only where disclosure rules permit editorial adjustments.
- Homes often back onto tall evergreens; watch for green spill and correct tint so paints and stone read accurately.
Tools and Resources: Presets, Plugins, and Gear
Build speed with a preset stack, repeatable export recipes, and geometry shortcuts. Use a sturdy tripod, wide zoom (16–35mm full-frame equivalent), a color checker, and one or two flashes. Plugins can batch-bracket merges or sky replacements, while Lightroom handles cataloging and finishing.
- Presets: Create base tone, interior and exterior WB, geometry, grain = 0, and subtle clarity profiles.
- Plugins/Assistants: Bracket merging and flambient helpers speed complex blends before final Lightroom polish.
- Gear: Tripod, wide rectilinear lens, polarizer on exteriors, and off-camera flash with bounce modifier.
- Color management: Monitor calibration keeps whites neutral; export test images to verify across devices.
For brand campaigns and vertical reels, our team extends the same standards to short-form content so your feed and MLS gallery feel like one story. See how we apply this in our portfolio.
Case Studies and Examples (Maple Ridge and Greater Vancouver)
We standardize Lightroom editing across varied properties by locking a preset stack, syncing per room type, and adjusting color locally. The result is consistent galleries—whether a Maple Ridge detached, a Surrey condo, or a Coquitlam commercial space—delivered quickly and ready for MLS and social.
Maple Ridge Detached Home
A four-bedroom with mixed daylight and warm LEDs. We shot natural light plus selective bounce flash. Lightroom balanced WB near 5200K indoors, cooled exteriors for clarity, and used Guided Upright to square cabinetry. The final gallery felt bright, neutral, and consistent end to end.
Surrey High-Rise Condo
Large windows with strong backlight. We bracketed 5 exposures. After merging, we reduced halos using a gentle curve and restrained clarity. HSL desaturated cyan spills from glass reflections. Geometry corrections kept slim doorframes true without warping proportions.
Coquitlam Commercial Office
Even, cool light across glass walls. We kept edits minimal: white balance consistency, fine contrast control, and slight vignetting removal. The results matched the brand’s clean aesthetic showcased in our commercial office shoot.
To explore more creative applications, browse our restaurant project and full portfolio for lighting and color approaches we adapt to interiors.
Lightroom vs. Photoshop vs. Capture One (When to Use Which)
Lightroom excels at cataloging, batch edits, and geometry corrections at scale. Photoshop is best for composites (flambient, heavy retouching). Capture One offers robust tethering and color tools. Many studios combine Lightroom for flow with targeted edits in Photoshop when needed.
| Task | Lightroom | Photoshop | Capture One |
|---|---|---|---|
| Catalog + Culling | Excellent | Limited | Good |
| Batch Color/Tone | Excellent | Good (Actions) | Excellent |
| Geometry Fixes | Strong | Strong (Manual) | Strong |
| HDR/Flambient | Good (Merge) | Best (Composites) | Good |
| Tethered Capture | Good | Good | Excellent |
| Learning Curve | Gentle | Moderate | Moderate |
For our real estate media, we anchor the workflow in Lightroom for speed and consistency, then round-trip to Photoshop for complex window pulls or fixture cleanups as needed.
Frequently Asked Questions
These quick answers address the most common Lightroom questions we get from agents and teams. Each reply is direct and action-focused so you can apply it to today’s listing without guesswork.
Should I edit real estate photos in Lightroom or Photoshop?
Start in Lightroom for culling, color, tone, and geometry. Jump to Photoshop for composites like flambient blends, heavy retouching, or object removals. Many pros finish 80–90% in Lightroom and use Photoshop sparingly for specialty work.
What are the best Lightroom settings for interiors?
Keep a bright, neutral baseline: moderate exposure lift, gentle contrast curve, restrained clarity, and WB around 4800–6000K depending on daylight. Use Guided Upright to square lines. Sync settings within room types for consistency.
How many bracketed shots should I take for HDR?
Most interiors work with 3–5 frames at 1–2 EV apart. That usually captures the window-to-interior range without creating halos or mushy shadows. Add frames only when the scene’s contrast truly demands it.
Can Lightroom handle drone real estate photos?
Yes. Apply lens corrections, dehaze lightly for atmosphere, and keep color natural to avoid cartoonish yards or skies. Use geometry tools to fix horizon tilt. Export separate recipes for MLS and social to preserve crisp detail.
Conclusion and Key Takeaways
Lightroom is the backbone of a fast, reliable real estate editing workflow. Lock your preset stack, sync by room type, and export with recipes. Use Photoshop only where needed. The result: faster delivery, consistent galleries, and stronger listing performance across MLS and social.
- Lightroom anchors the process: Catalog, color, tone, geometry, and export at scale.
- Match method to scene: HDR for range, flambient for color accuracy, natural light for simplicity.
- Consistency wins: Uniform edits build buyer trust and help listings stand out.
- Refine locally: Brush edge glare, balance windows, and keep materials believable.
Next step: If you’re a Greater Vancouver or Vancouver Island realtor, developer, or marketing lead, we can implement this exact workflow on your next listing. Explore our services or book a shoot to start.
Soft CTA: Want us to audit your current photo flow? Share one gallery, and we’ll suggest three Lightroom tweaks to tighten color, geometry, and export recipes—no obligation. See examples in our portfolio.
For broader marketing context beyond editing techniques, you can review these practical guides to presentation and materials for listing success on the web and in print, including professional best practices and budget-friendly branding tips. For checklist-style listing prep, see this 2026 listings guide.