

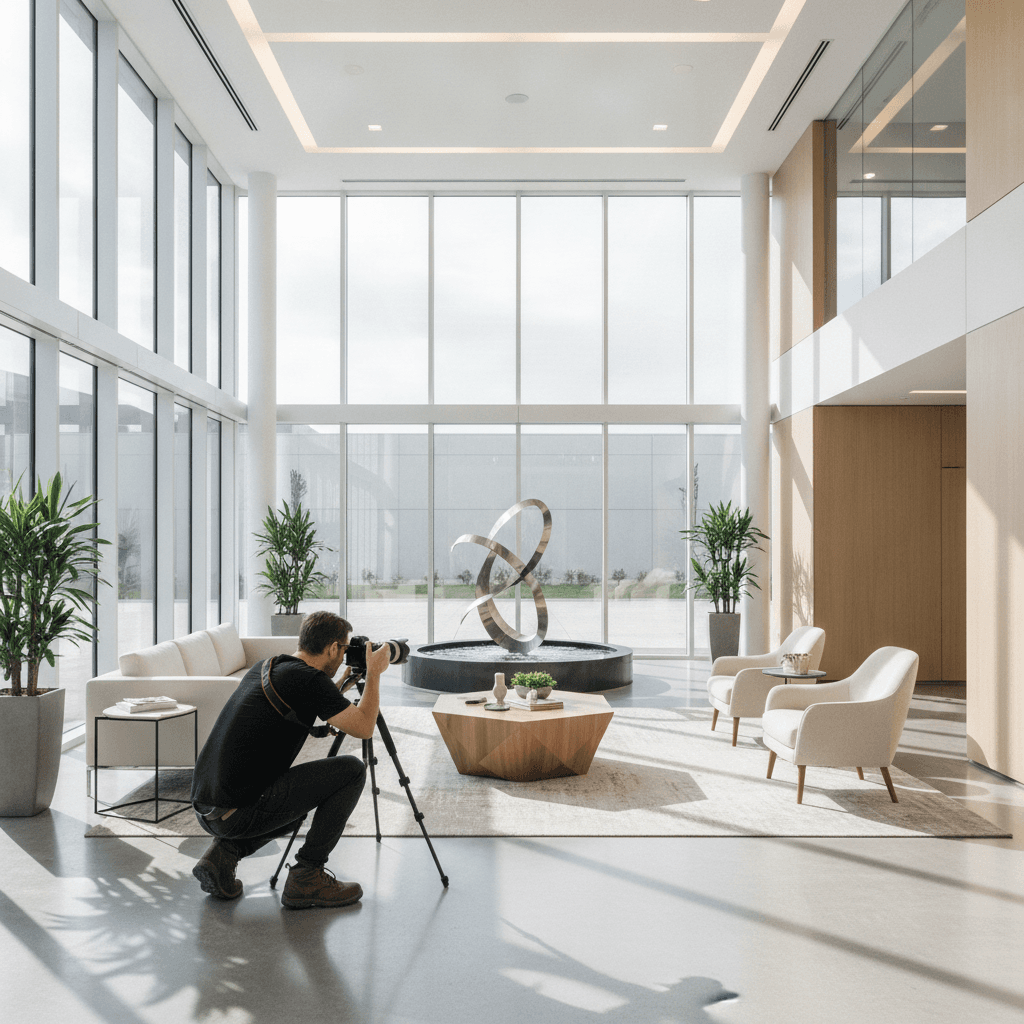
Commercial real estate photography is the specialized creation of marketing visuals—HDR photos, video tours, 2D floorplans, and drone coverage—for offices, retail, industrial, hospitality, and mixed‑use listings. From our Maple Ridge, BC base at 13260 236 St, Silver Valley Studios produces commercial property media that shortens time on market and drives qualified inquiries across Greater Vancouver.
By Silver Valley Studios Inc. — Last updated: 2026-06-21
Quick Summary
To market commercial property faster, pair accurate photos with floorplans, drone context, and short video. Stage to show operations, schedule for the best light, and export native formats for MLS, brochures, and social. This guide gives you the exact workflow, checklists, and examples we use across Maple Ridge, BC and Greater Vancouver.
- What commercial real estate photography includes and why it matters.
- Field‑tested process: discovery → prep → capture → delivery → distribution.
- Methods we use: HDR, flash‑ambient, blue‑hour, and aerial perspectives.
- Best practices for composition, staging, logistics, and compliance.
- Gear, templates, and mini case studies from recent projects.
Start Here: Overview & Table of Contents
This complete guide shows how commercial real estate photography moves listings faster by combining HDR images, 4K video, 2D floorplans, and drone. Follow our step-by-step workflows, checklists, and best practices to plan marketing‑ready shoots for offices, retail, industrial, and hospitality spaces around Maple Ridge and the Greater Vancouver area.
Use this section to jump to what you need. We’ve built a clear path from strategy to execution so you can brief stakeholders, schedule with confidence, and publish conversion‑ready visuals.
- What is commercial real estate photography?
- Why it matters for leasing and sales
- How it works: end‑to‑end workflow
- Types, methods, and deliverables
- Best practices that win attention
- Tools, gear, and checklists
- Mini case studies and examples
- Frequently asked questions
- Key takeaways and next steps
Want an expert partner? Explore our real estate photography services to see how we combine photos, video, floorplans, and drone for cohesive campaigns.
What Is Commercial Real Estate Photography?
Commercial real estate photography is the specialized capture of offices, retail, industrial, hospitality, and mixed‑use spaces for marketing and leasing. It blends HDR images, controlled lighting, accurate floorplans, and cinematic motion to communicate scale, access, tenant fit, and amenities with clarity across web, print, and social channels.
Here’s the thing: decision‑makers move fast. In our experience, stakeholders have seconds—often a single swipe—to decide whether to click deeper on a property. Clear visual storytelling does the heavy lifting by answering practical questions early.
- HDR photos show detail from bright windows to shadowed corridors without halos, so materials read accurately.
- 2D floorplans map circulation, loading, office/retail splits, and test‑fit ideas so prospects qualify faster.
- 4K video tours provide a sense of flow; we often target 60–90 seconds for highlights and 2–3 minutes for deeper tours.
- Drone aerials reveal parking counts, site access, and area context in a frame or two.
For brand‑sensitive assets—boutique retail, medical, hospitality—consistency matters. We design looks around neutral whites, true‑to‑life color, and straight verticals, then apply the same treatment across listing photos and short‑form verticals to keep marketing cohesive.
If you’re building a broader campaign that spans corporate and retail, our commercial photography guide breaks down style choices that scale across channels.
Why Commercial CRE Photography Matters
Strong commercial visuals create measurable lift: more listing views, longer on‑page engagement, and higher‑quality inquiries. They reduce site‑visit friction by answering layout, access, parking, and condition questions before prospects book tours—shortening leasing and sales cycles.
Visuals either create momentum or stall it. When assets communicate function and fit in the first 5–7 frames, teams avoid repetitive “Does it have…?” messages and move directly to scheduling. We see three consistent advantages.
- Attention economics: Clean subject intent within the first second of load keeps users from bouncing.
- Qualification: Floorplans filter mismatched tenants early, saving teams hours of back‑and‑forth coordination each week.
- Omnichannel reach: Landscape for MLS and brochures; 9:16 verticals for social; 1:1 for ads and feeds—no awkward crops.
In Greater Vancouver, inventory moves quickly when listings present tangible value upfront. We’ve found pairing a precise exterior hero, an honest lobby read, and two functional bays (e.g., open office + warehouse) eliminates ambiguity and accelerates next steps.
To connect stills with motion strategy, our real estate videography guide outlines story arcs that hold attention and convert.
How Commercial Real Estate Photography Works
A reliable commercial workflow covers pre‑production, on‑site capture, and delivery. Align goals, prep spaces, and schedule light. Then capture exteriors, interiors, details, drone, and measurements. Deliver curated sets with consistent color, straight lines, and labeled floorplans, plus short‑form verticals for social.
Step‑by‑step process you can run tomorrow
- Discovery (15–30 minutes)
- Define target tenant/buyer personas and must‑have shots.
- List usage channels: MLS, brochure, signage, ads, social.
- Gather landlord or brand guidelines early to avoid rework.
- Pre‑production (1–2 days)
- Confirm staging, cleaning, access codes, elevator keys, and loading details.
- Choose AM or golden‑hour for exteriors; identify drone restrictions and safe stand‑off zones.
- Lock a backup weather window for exteriors to avoid delays.
- Shotlist + plan (30 minutes)
- Draft a 12–18 frame backbone: 2–3 exteriors, 6–10 interiors by zone, 2–3 detail/amenity, 1–2 drone angles.
- Prioritize “function frames” that show how the space works for day‑to‑day operations.
- On‑site capture (1–4 hours)
- Interiors: 3–5 bracket HDR or flash‑ambient blends; keep verticals true and lines straight.
- Exteriors: Read the sun; capture front elevation, signage, and parking count cleanly.
- Drone: 2–3 safe orbits and a top‑down for site context; watch reflections near glass.
- Floorplans: Measure and verify annotations; double‑check unit numbers and entrances.
- Post (24–48 hours)
- Color‑consistent edits, perspective correction, dust removal.
- Export three aspect ratios (16:9, 4:5, 9:16) where needed.
- Rename files with sequence cues so marketing can deploy fast.
- Delivery + QA
- Curate 20–40 hero frames into a narrative set.
- Supply a printable feature sheet, MLS‑ready set, and a 30–60 second vertical cut.
- Provide a one‑page usage guide with export settings for each channel.
| Workflow Segment | Goal | Typical Outputs | Owner |
|---|---|---|---|
| Pre‑production | Remove friction; align expectations | Shotlist, access plan, staging notes | Agent + Photographer |
| Capture | Accurate, attractive visuals | HDR photos, drone, measurements | Photographer |
| Post | Consistency across channels | Color‑corrected images, floorplan PDFs | Photographer |
| Distribution | Reach target tenants/buyers | MLS set, brochure, vertical video | Agent/Marketing |
When video is essential—large office floors or complex retail footprints—review examples on our commercial real estate videography page for pacing and framing ideas.
Types, Methods, and Deliverables
Commercial shoots blend methods—HDR, flash‑ambient, and single‑frame editorial—based on space and timeline. Deliverables typically include 20–40 images, a measured 2D floorplan, 1–2 aerials, and a 60–90 second video cut, plus 3–6 vertical clips designed for social reach.
Capture methods and when to use them
- HDR bracketing (3–5 exposures): Fast, natural look for offices and retail with mixed lighting; preserves window detail.
- Flash‑ambient blend: Adds crisp, commercial contrast in showrooms or healthcare; excellent for white walls and product zones.
- Single‑frame editorial: Useful for moody hospitality lobbies or creative studios where ambiance sells.
- Blue‑hour exteriors: 10–15 minutes of perfect balance; signage and glass facades glow evenly.
- Drone aerials: Context in one glance—truck access, parking counts, and site layout.
Deliverables that convert
- 20–40 finished photos spanning exteriors, overview rooms, key bays, circulation, and amenities.
- Measured 2D floorplan with clear labels for bays, offices, loading, and circulation; furnished overlays when helpful.
- 60–90 second 4K video highlighting flow; 3–6 short verticals for reels.
- 1–2 drone angles showing access points, parking, and roof condition where relevant.
For Vancouver‑focused stills strategy and examples, explore our real estate photography in Vancouver resource.
Best Practices That Win Attention
Winning listings keep lines straight, color true, and narratives simple. Stage to purpose, schedule to light, and tell a three‑part story: approach, arrival, and function. Then package assets for MLS, brochure, and social so each channel gets native‑format files that load quickly and look consistent.
Composition and staging
- Keep verticals vertical: Correct perspective; viewers tolerate 0–1 degree of lean, not more.
- Purpose‑first framing: Show 2–3 clear uses per space—meeting, collaboration, storage—so tenants picture operations.
- Declutter: Remove temporary signage and stickers; hide bins and cables; one clean focal point per frame.
- Color management: Balance mixed light; aim for neutral whites so finishes read accurately online and in print.
- Signage sanity: Capture clean wayfinding and compliance signs without distractions; avoid personal info and sensitive postings.
Scheduling and logistics
- Light windows: For north‑facing glass, mid‑day holds; for south/east facades, morning trims glare; blue hour for signage glow.
- Access certainty: Confirm elevator keys, fobs, and bay doors; 10–15 minutes lost on entry can break blue‑hour timing.
- Drone compliance: Check local advisories and property management restrictions; maintain safe stand‑off distances.
- People presence: If shooting during business hours, secure appearance releases and plan angles that protect privacy.
Local considerations for Maple Ridge
- Expect overcast mornings much of the year; schedule exteriors when clouds thin to get even light across facades and parking.
- Plan around seasonal rain; bring floor protection and extra microfiber to keep interiors spotless during wet months.
- Coordinate with building ops for loading access; morning windows reduce traffic conflicts in busy commercial corridors.
Packaging for channels
- MLS: 16:9 and 3:2 sets with concise captions; prioritize 12–18 frames that tell the full story.
- Brochure: 300‑dpi exports and a one‑page feature sheet with 4–6 heroes and a floorplan.
- Social: 9:16 verticals with a hook in the first 2 seconds; 3–5 scene cuts; clear CTA in the caption.
For an end‑to‑end stills + motion approach we use daily, review our commercial photography guide and connect strategy to execution.
Tools, Gear, and Checklists
Great results come from dependable tools and repeatable checklists: full‑frame bodies, tilt‑shift or 16–35mm lenses, sturdy tripods, flash kits, drones with obstacle avoidance, and measurement tools for floorplans. Pair this with a run‑sheet, shotlist, and distribution plan so nothing slips.
Gear we trust on commercial sets
- Cameras: Full‑frame bodies with strong dynamic range for HDR and clean ISO 400–800 interiors.
- Lenses: 16–35mm zooms and 24mm tilt‑shift for straight lines and minimal distortion.
- Support: Carbon tripod, geared head for 1‑degree alignment, remote trigger.
- Lighting: 2–4 speedlights or compact strobes, softboxes, and flags for reflection control.
- Drone: Obstacle avoidance, 1‑inch sensor, and ND filters for smooth 1/60–1/120 shutter at 30–60 fps.
- Floorplans: Laser measurer and CAD/plan software for accurate line weights and labels.

Workflow checklists
- Run‑sheet: Contacts, access notes, parking, site rules, and emergency numbers.
- Shotlist: Exterior hero, approach, lobby, core zones (2–3), amenities, restrooms, back‑of‑house, details.
- Delivery plan: File formats for MLS, brochure, and social; filenames and captions standardized.

Want a one‑team solution for photo, video, floorplans, and drone? Browse our real estate photography services to align deliverables with your next listing or lease‑up.
Free planning consult: 15 minutes
- Clarify shotlists for your space type (office, retail, industrial).
- Choose a sequencing plan for photo + video + floorplans.
- Map assets to MLS, brochures, and social in one go.
See recent approaches on our commercial property photos guide.
Mini Case Studies and Examples
These examples show how integrated media shortens decision time. Each project used a tight shotlist, accurate floorplans, and channel‑specific exports to deliver faster inquiries and cleaner stakeholder alignment without extra revisions.
Example 1: Maple Ridge flex space (office + light industrial)
- Challenge: Mixed lighting and unclear flow between office and warehouse bays.
- Approach: 3–5 stop HDR for offices, flash‑ambient in warehouse, plus a measured 2D plan labeling loading and power.
- Outcome: Clearer circulation reduced redundant tours; prospects arrived with targeted questions.
Example 2: Surrey street‑front retail
- Challenge: Need to show foot traffic patterns and parking access.
- Approach: Golden‑hour exterior with parking count, two drone angles for approach, and a 60‑second vertical reel with three hooks in the first 5 seconds.
- Outcome: More saves/shares on social; faster shortlisting by multi‑site tenants.
Example 3: Greater Vancouver office floor
- Challenge: Long floorplate felt repetitive in photos.
- Approach: Narrative sequence—arrival, reception, collaboration zone, private rooms, kitchen—using 8–10 anchors and 3 detailed vignettes.
- Outcome: Stakeholders aligned on test‑fit viability before touring, shortening decisions.
Example 4: Langley industrial bay
- Challenge: Showcase loading access and clear height without distortion.
- Approach: Tilt‑shift for straight verticals, two‑point perspective, and top‑down drone for truck movement.
- Outcome: Fewer access questions and quicker transport approvals from prospects.
Example 5: Coquitlam medical clinic
- Challenge: Mixed color temperatures and privacy concerns.
- Approach: Flash‑ambient balance for clean whites, angles that protect patient privacy, and labeled floorplan of rooms.
- Outcome: Marketing launched confidently with consistent visual standards across channels.
Example 6: Burnaby creative studio
- Challenge: Sell ambiance while keeping accurate finishes.
- Approach: Single‑frame editorial with controlled contrast and a short 45‑second motion loop.
- Outcome: Increased time‑on‑page and higher inquiry quality from creative tenants.
Example 7: Richmond showroom
- Challenge: Glare and reflections on glass product displays.
- Approach: Flagging and softboxes for reflection control; flash‑ambient blend to keep lines crisp.
- Outcome: Clear product reads in photos and smooth pans in video reels.
Example 8: Abbotsford multi‑tenant retail pad
- Challenge: Communicate co‑tenancy context and ingress/egress.
- Approach: Two aerials (oblique + top‑down), exterior hero with co‑tenancy in frame, and a labeled site plan.
- Outcome: Faster shortlist by regional brands comparing multiple pads.
Example 9: Chilliwack hospitality lobby
- Challenge: Mood lighting without color cast shifts.
- Approach: Single‑frame editorial at blue hour; white‑balance sweeps and localized color control in post.
- Outcome: Elevated brand feel while keeping finishes true for procurement teams.
Example 10: Vancouver Island mixed‑use
- Challenge: Large footprint with varied tenants.
- Approach: Multi‑zone narrative with 10 anchors and three drone perspectives; stitched site plan for clarity.
- Outcome: Portfolio‑level story that helped capital partners visualize long‑term fit.
To see how motion supports complex assets, review our commercial real estate videography page and apply similar pacing to your next listing.
Frequently Asked Questions
Get direct, practical answers to the most common questions about commercial real estate photography—timelines, deliverables, coordination, and how to align visuals with leasing or sales objectives.
What does a standard commercial shoot include?
Most projects include 20–40 finished photos, a measured 2D floorplan, 1–2 aerials, and a 60–90 second highlight video or a short vertical cut. We tailor the mix to your space type and marketing plan so MLS, brochure, and social all get native‑format files without rework.
How long does the process take from booking to delivery?
Discovery and pre‑production usually take 1–2 days, capture 1–4 hours on site, and delivery 24–48 hours after shooting. Complex assets or multi‑site portfolios may add time for access, staging, and stakeholder review. We set expectations and milestones during discovery.
Do you handle floorplans and measurements as well?
Yes. We capture and deliver accurate 2D floorplans with clear labeling for offices, bays, loading, and circulation. When helpful, we add furnished overlays so prospects understand fit and function before touring, reducing unnecessary site visits.
Can you produce social‑first vertical videos from the same shoot?
Absolutely. We plan 3–6 vertical clips alongside your main set. Each clip uses a strong hook in the first 2 seconds, 3–5 scene cuts, and a clear CTA in the caption. This extends reach on Instagram and TikTok without adding another production day.
What makes commercial real estate photography different from residential?
Commercial shoots prioritize operations: access, parking, loading, signage, circulation, and compliance items. We focus on accurate scale, straight lines, and brand alignment, then package assets for MLS, brochures, and social. Residential style choices don’t always translate to retail, office, or industrial objectives.
Conclusion: Key Takeaways and Next Steps
Commercial real estate photography moves listings by reducing uncertainty. Combine accurate stills, floorplans, motion, and aerials; deliver fast, consistent sets; and package for each channel. When every asset answers a real buyer or tenant question, decisions come faster with fewer surprises.
Key takeaways
- Lead with a clear three‑part story: approach, arrival, function.
- Deliver 20–40 images, a measured floorplan, and short motion.
- Export native formats for MLS, brochure, and social distribution.
- Use drone and blue‑hour windows to add context and polish.
- Maintain color consistency and straight verticals across the set.
Action steps
- Outline your 12–18 frame backbone and floorplan needs.
- Book a morning or golden‑hour exterior slot and confirm access.
- Decide where motion adds value and script a 60–90 second tour.
Ready to move a listing? Start with our real estate photography services or schedule a short planning call. We’re based in Maple Ridge and support Greater Vancouver portfolios end‑to‑end.
For additional perspectives on commercial property marketing contexts and buyer expectations, see this overview of commercial real estate basics. To align visuals with future improvements, this commercial remodeling guide can help you anticipate stakeholder questions. For print collateral ideas, browse feature sheet examples used in property marketing.