

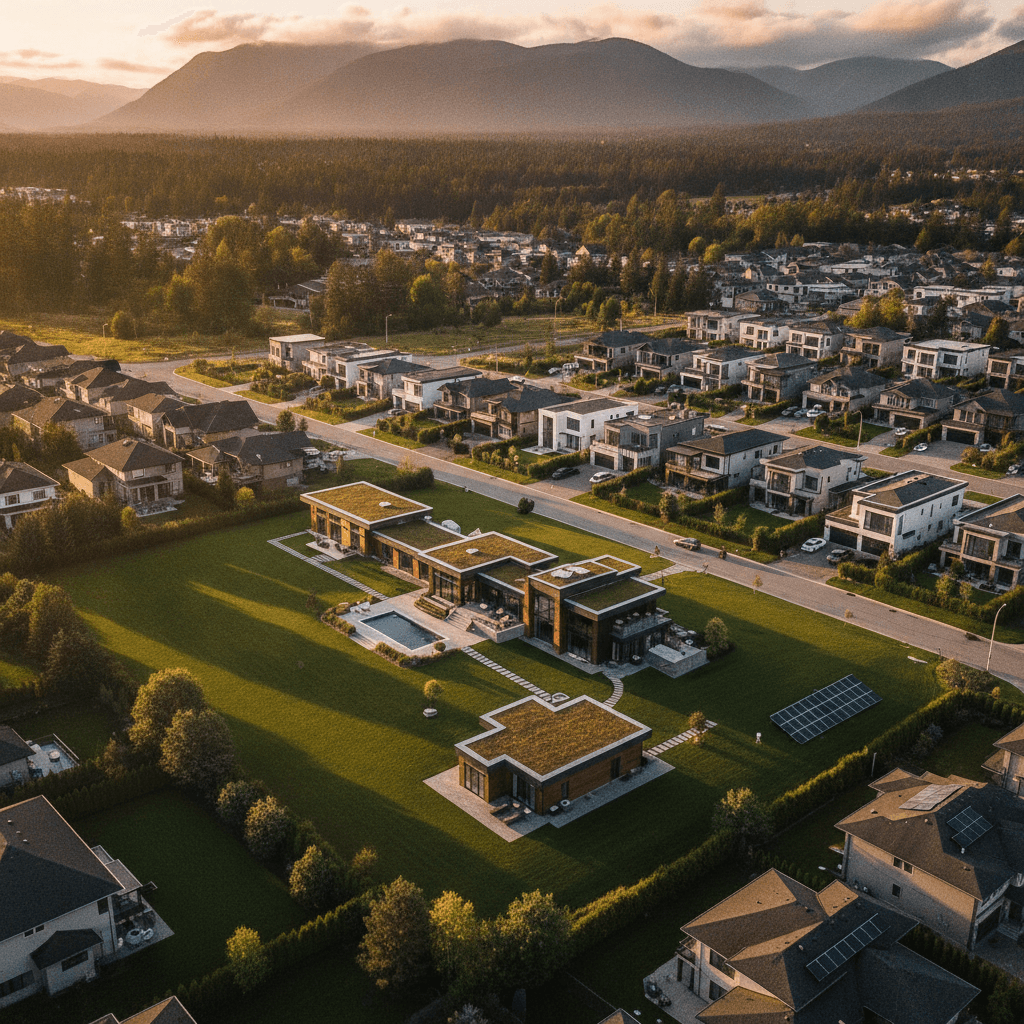
The difference between drone videography and regular video is perspective, regulation, and role in the story. Drone footage uses an unmanned aircraft for stabilized aerial context; regular video uses ground cameras for interiors, audio, and human moments. In Maple Ridge, smart teams mix both to sell place, flow, and lifestyle.
By Sumeet S. — Founder & CEO, Silver Valley Studios Inc.
Last updated: July 2, 2026
Summary
Drone videography shows scale and setting from above; regular video captures interiors, people, and sound at eye level. Use drones to establish place and drama, then hand off to a gimbal walkthrough for flow and details. This guide explains when each wins and how to blend them for results.
In this complete guide (built from our Maple Ridge shoots), you’ll learn:
- Clear definitions, roles, and benefits for both approaches
- A practical, side-by-side comparison table
- Step-by-step on-set workflows we use with realtors and brands
- Best practices that make edits look polished and consistent
- Local planning tips for Maple Ridge projects and crews
- What is drone videography?
- What is “regular” video?
- Key differences and use cases
- Why the difference matters
- How the combined workflow works
- Types and approaches
- Best practices
- Planning, permits, safety
- Tools and resources
- Case studies
- FAQ
- Conclusion
What is Drone Videography?
Drone videography is stabilized video captured by small unmanned aircraft. It delivers sweeping aerials and top-down context that quickly communicate scale, access, and neighborhood setting. Flights follow aviation rules, pre-flight checks, and weather windows to stay safe and produce clean, editable footage.
At Silver Valley Studios Inc., we use aerials to answer buyers’ first questions: Where is it? How big is it? What surrounds it? One 6–8 second orbit can reveal lot lines, roof condition, parking access, and proximity to greenspace in a single, elegant move.
To see how we deploy aerials for listings and campaigns, explore our aerial videographer guide and our drone videography company overview for strategy and examples.
- Core moves: rising reveals, orbits, lateral slides, top-down pins, approach-and-settle at entry.
- Technical traits: 3-axis gimbals, GPS/GLONASS positioning, log/flat profiles, 24/30 fps with 180° shutter rule.
- Operational notes: 2–4 takes per move, battery swaps every 15–25 minutes, and dual backups on-site.
What is “Regular” Video?
Regular video refers to ground-based cinematography using handheld, tripod, slider, or gimbal setups. It excels at interiors, details, and human storytelling with controlled lighting and audio. These shots translate finishes, flow, and lifestyle better than aerial footage alone.
For real estate, a smooth 45–90 second walkthrough communicates layout and sightlines. For restaurants, ground macro shots of plating and steam say “delicious” in under two seconds. For small businesses, interviews and action b-roll humanize the brand. See our real estate videography guide for structure and pacing we use with agents.
- Strengths: eye-level relatability, accurate room scale, rich audio, repeatable motion, and precise lighting.
- Tools: full-frame cameras, fast primes, 3-axis gimbals, wireless lav mics, bi-color LEDs for balanced color.
- Deliverables: 16:9 tours, 9:16 Reels/TikToks, 1:1 teasers, and 7–12 second interview bites.
Drone Videography vs Regular Video: Key Differences
The difference between drone videography and regular video is viewpoint, regulation, and storytelling role. Drones establish place and scale; ground cameras deliver interiors, detail, and audio. Combine them to win attention fast and keep viewers watching through to the call to action.
| Aspect | Drone Videography | Regular (Ground) Video |
|---|---|---|
| Point of View | Aerial, top-down, sweeping lateral | Eye-level, intimate, human-scaled |
| Regulations | Aviation rules, airspace checks | Site permissions, local bylaws |
| Motion | Long, floating moves over terrain | Walkthroughs, sliders, gimbal arcs |
| Interiors | Limited (space/prop wash) | Strong (lighting + audio control) |
| Audio | Not practical in flight | On-camera, lavs, shotguns |
| Detail Shots | Great for roofs/land | Excellent for finishes/products |
| Weather Tolerance | Wind/precipitation sensitive | More flexible |
| Risk Envelope | Airspace + bystander safety | Cable/lighting safety |
In practice, our edits often open with a 5–7 second aerial, then transition into a smooth interior walkthrough and 6–10 micro-cuts of fixtures and materials. This mix balances context and intimacy and keeps average watch time high on both listing pages and social posts.
Why the Difference Matters for Listings and Brands
Understanding the roles of aerial and ground footage helps you design videos that hold attention. Open with context that matters, then deliver human-scale details and sound. This sequence improves watch time, recall, and the likelihood of saves, shares, and qualified inquiries.
- Real estate: Use aerials when neighborhood setting, lot size, or roof condition influences value. Follow with a pacey walkthrough to answer layout questions fast.
- Restaurants: Brief exterior aerial for place; ground macros for texture, color, and steam. It aligns with what we see when clients standardize on clean, consistent visuals.
How the Combined Workflow Works
Plan the handoff from sky to eye level. Preproduction sets goals and story beats; production executes aerials first while light is ideal; ground crews follow with interiors, audio, and detail coverage; post stitches both into platform‑ready masters and social cutdowns.
- Preproduction (45–60 minutes): Define the hook, map a 6–8 shot list, create a shot ledger, and confirm deliverables (16:9 master plus 9:16 cutdowns).
- Aerial block (30–45 minutes): Safety brief, test hover, 2–4 takes per move (orbit, top-down, lateral), quick on-site review.
- Ground block (60–120 minutes): Staging, lighting, repeatable paths on gimbal, 7–12 second interview bites if needed.
- Ingest + backup (20–30 minutes): Dual copies with verification; label cards and batteries for next use.
- Post (4–8 hours per edit): Color match profiles, music licensing, captions for social, thumbnail frame exports.
We document this flow in every booking. If you want a deeper breakdown of camera movement choices, our drone aerial view guide and real estate videography guide cover pacing and transitions.

How Drone Videography Works on a Shoot
A strong drone sequence follows deliberate planning: confirm airspace, set profiles, choreograph 2–4 takes per move, and review footage on-site. Keep motion smooth, shutter angles clean, and horizons level so aerials cut seamlessly into ground footage.
- Discovery: What must viewers learn in 6–8 seconds (lot size, access, roof, water, transit)?
- Pre‑flight checks: Weather, sun angle, wind, obstacles, bystanders, and takeoff/landing zone.
- Camera setup: Log/flat picture profile, 24/30 fps, ND filters for 180° shutter.
- Move set: Orbit, lateral slide, rising reveal, top‑down pin; fly each twice.
- On‑site QC: Check focus, horizon, and micro‑jitters; re‑fly if needed.
- Data discipline: Label, verify, and back up cards before leaving.
For additional aerial planning tactics and checklists, our drone photography guide dives into composition and light, and our drone imaging guide covers matching codecs for clean color grades.
How Ground (“Regular”) Video Works on a Shoot
Ground video builds narrative with a logical path, controlled lighting, and clean audio. A 45–90 second flow anchored by 6–10 detail cuts feels premium and holds attention. Capture one or two vertical hooks for social as you go—don’t leave them to chance.
- Walkthrough map: Entry → living → kitchen → primary → bath → patio/yard.
- Staging + lighting: Declutter, set practicals, add soft LEDs to shape faces and textures.
- Camera tune: Gimbal balance, repeatable speeds, and matched white balance with aerials.
- Audio: Wireless lavs for interviews; capture natural room tone for transitions.
- Coverage: Wide, medium, macro (hardware, tile, fixtures, textures).
- Social bites: 1–2 second hooks; 6–15 second Reels cutdowns.

Types, Methods, and Approaches
Assign each shot a job: establish, guide, reveal, or delight. Use aerials to establish and guide, and ground shots to reveal finishes and delight with human moments. This discipline improves retention and tells a complete story in under two minutes.
Drone moves that sell the scene
- Rising reveal: Start low behind trees or a fence; lift to show skyline and lot lines.
- Top‑down pin: Hover 90° overhead to display parking, walkability, and access.
- Orbit: 180–360° around the subject to demonstrate symmetry and scale.
- Lateral slide: Track along a property edge or waterfront to add depth.
- Approach and settle: Fly toward the front door, settle, and hand off to ground.
Ground sequences that build desire
- Hero walkthrough: A single, steady path that answers layout questions quickly.
- Micro‑details: Hardware, tile, and fixture cutaways signal quality in 1–2 seconds.
- People in frame: A chef plating; a trainer cueing posture; a realtor opening doors.
- Interview bite: 7–12 seconds of voice to anchor the brand or call to action.
- Vertical hooks: Front‑load motion or steam for thumb‑stop moments on Reels/TikTok.
Want more aerial composition tips that boost buyer interest? Skim our drone aerial view guide next.
Best Practices for Blending Aerial and Ground Footage
Match settings, movement, and color across cameras. Lead with a 5–7 second aerial, land at the entry, then transition into a calm interior walkthrough and detail cuts. Export a 16:9 master and platform‑ready 9:16/1:1 versions with captions and a clear CTA.
- Match the math: 24 or 30 fps across both cameras; use ND filters to hold 180° shutter.
- Profile parity: Shoot log/flat or standard on both to simplify grading.
- Movement continuity: If the aerial pans right, start the ground shot moving right.
- Sound strategy: Record VO/interviews on the ground; layer music under aerials.
- Storyboard handoff: End the aerial at the door; begin ground shot opening it.
- Deliverables stack: 16:9 master, 9:16 Reels, 1:1 teasers, plus thumbnail frames.
For a broader perspective on short vs. long video formats, this practical rundown on short vs. long‑form content pairs well with our own recommendations and testing.
Soft CTA: Planning a listing video now? Our drone videography company guide outlines how we sequence sky-to-interior stories for Greater Vancouver agents.
Planning, Permits, and Safety
Strong visuals start with safe, compliant planning. Check airspace, respect bystander distance, schedule flights for weather windows, and keep ground sets tidy. In Maple Ridge, we build buffer time for wind and clouds and coordinate with homeowners and teams before each takeoff.
Local considerations for Maple Ridge
- Weather swings can change wind and cloud cover within an hour; schedule flexible holds for aerials.
- Short winter daylight demands exteriors first; move indoors mid‑day for ground sequences.
- Neighborhood quiet hours matter; align takeoffs/landings and audio recording windows accordingly.
On regulated flights, we review advisories and maintain pilot records. For ground crews, we manage cables, light stands, and foot traffic to keep homeowners, tenants, and staff safe. For composition tips that help even in tricky light, see our drone photography guide.
Tools and Resources for Marketers and Agents
Equip for consistency: stabilized bodies, matched profiles, ND filters, bi‑color LEDs, and a disciplined ingest/backup routine. Plan each shoot with a concise brief, a 6–8 shot list, and a ledger for deliverables so teams can repeat success across listings and campaigns.
- Cameras and glass: Full‑frame bodies with fast primes for clean interiors.
- Stabilization: 3‑axis gimbals; drones with 3‑axis gimbals and obstacle sensing.
- Filtration: ND/PL filters to lock shutter and control reflections.
- Lighting: Soft, bi‑color LEDs to balance with daylight.
- Audio: Wireless lav mics and on‑camera shotguns for nat sound and interviews.
- Data discipline: Dual card recording, checksum backups, and folder templates.
- Creative brief: Use a simple brief to align goals and deliverables; this Shopify creative brief guide is a solid reference.
To round out a listing package, pair the video with HDR photos and clear diagrams. Our drone photos for real estate guide shows how stills and aerials complement each other in a buyer’s journey.
Case Studies and Examples from Our Maple Ridge Work
We’ve found the best-performing edits pair one tight aerial opener (5–7 seconds) with a calm, human‑paced walkthrough (45–90 seconds) and 6–10 detail cuts. Here are scenarios we see often in Greater Vancouver and the outcomes marketing teams watch.
- Suburban family home: 6‑second rising reveal showed calm streets and greenspace. The 60‑second interior path focused on kitchen, great room, and the backyard handoff. Result: more saves and higher average watch time.
- Townhome near transit: Top‑down pin established parking and walkability. Vertical micro‑cuts of storage, laundry, and finishes spoke to first‑time buyers. Result: more direct messages from comparison shoppers.
- Restaurant re‑launch: A 4‑second lateral aerial anchored place, then macro steam and garnish shots carried desire. Result: an uptick in shares and reservations after posting.
- Fitness studio: Exterior aerials clarified parking; ground clips showed coaching cues and equipment textures. Result: increased trial sign‑ups attributed to the video series.
For more examples of how we stage exteriors and interiors for motion, scan our aerial videographer guide alongside the real estate videography guide.
FAQ: Drone Videography vs Regular Video
Use drones for context and scale; use ground cameras for interiors, people, and audio. Most projects benefit from both, especially when you plan the handoff up front. These direct answers cover the questions we hear most from agents and marketers.
Do I need drone footage for every listing?
Not always. Use aerials when exterior context, lot size, proximity to amenities, or roof condition matter. For tight urban sites or condo interiors, ground video often delivers more value. Many listings perform best with one aerial opener plus a clean interior walk‑through.
Can I record usable audio while flying a drone?
Generally no. Rotor noise overwhelms microphones, and safe operating distance places the aircraft too far from subjects. Record voiceover or interviews on the ground, and layer music or ambient sound in post for aerial segments.
What’s the ideal length for a property video?
Aim for 45–90 seconds for listing tours, with 6–15 second cutdowns for social. Lead with a short aerial establishing move when location is a selling point, then switch to a smooth interior walkthrough and detail cuts to hold attention.
Is drone filming legal in residential neighborhoods?
Yes when compliant. Crews must follow national aviation rules, maintain safe distances from people and property, and respect municipal bylaws and privacy. Professional teams perform airspace checks and safety briefs, and they avoid schools in session and restricted areas.
Conclusion and Next Steps
The difference between drone videography and regular video is simple: drones establish place and drama; ground cameras deliver interior story, detail, and audio. Plan the handoff, match settings, and export platform‑ready versions to maximize watch time and inquiries.
- Key takeaways: Aerial = context and scale; ground = flow, finishes, and people.
- Action steps: Write a one‑page brief, storyboard 6–8 shots, and pre‑assign the sky‑to‑door handoff.
- Next move: Browse our real estate videography guide and drone videography overview, then book your Maple Ridge shoot when ready.