

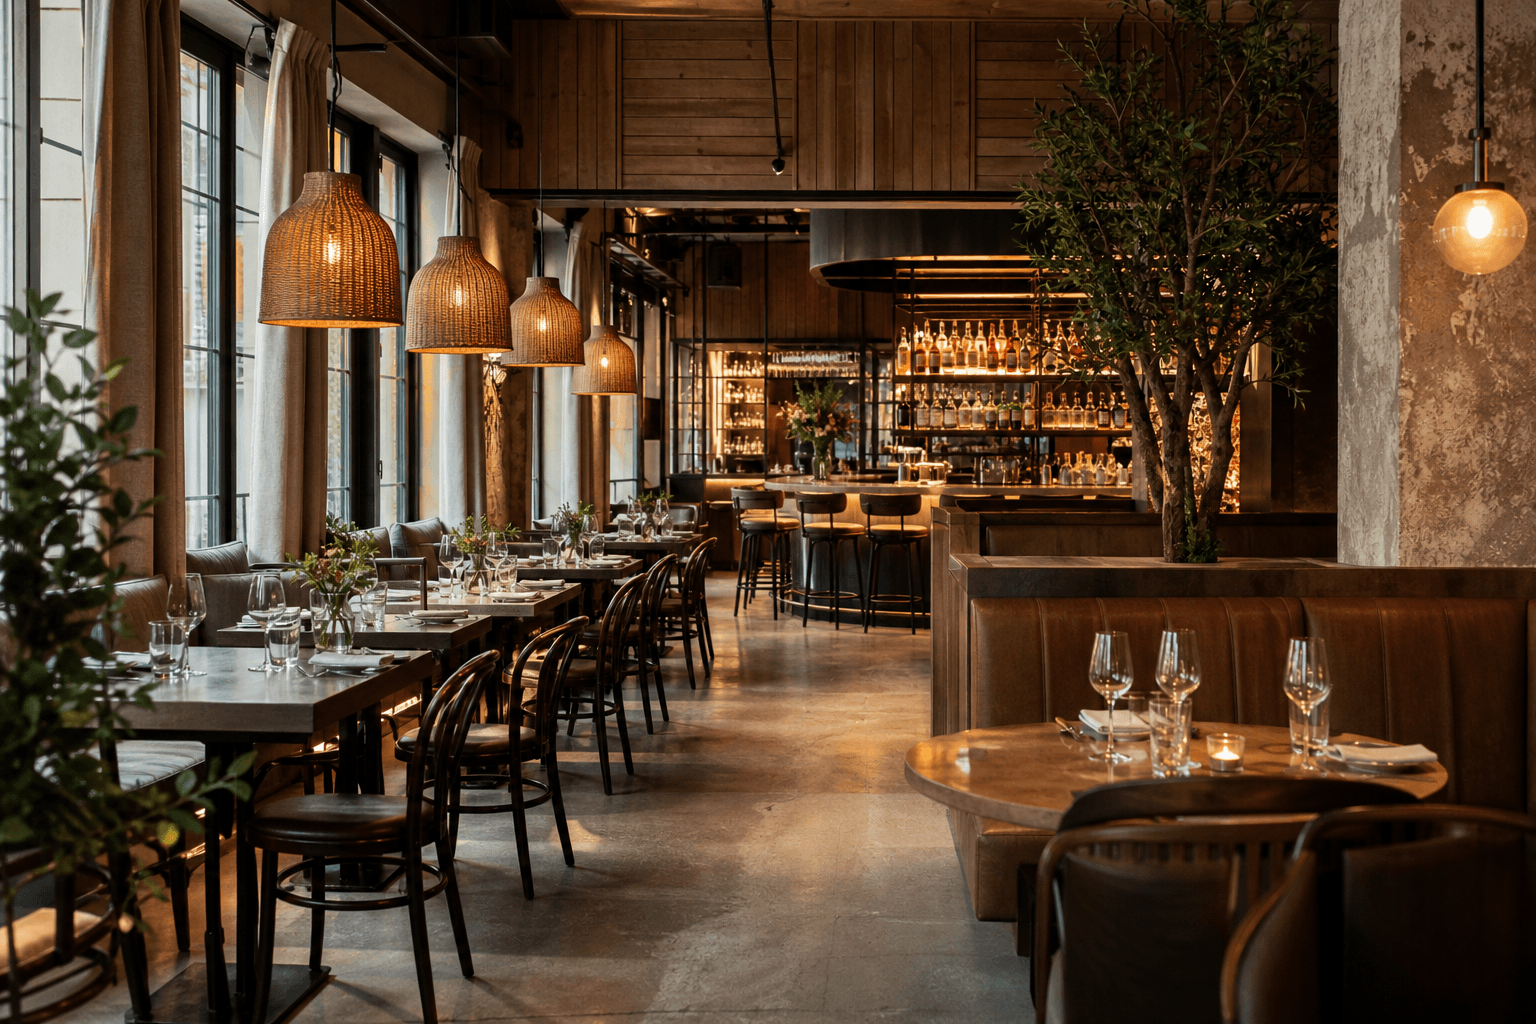
To photograph a restaurant interior well, do more than record walls, tables, and fixtures. Strong images communicate how the space feels, how it functions, and what guests can expect. That requires planning the mood, preparing the room, controlling distractions, choosing a deliberate camera position, and capturing both the overall layout and the details that express the brand.
This approach is often called restaurant interior ambiance photography. It is useful for restaurant websites, social media, launch campaigns, renovations, private-event promotion, and brand updates.
Quick summary

- Define the intended feeling, audience, priority spaces, and platforms first.
- Schedule the shoot during pre-service, a split shift, or another quiet period when possible.
- Assess the light, keep the camera level, and protect natural-looking vertical lines.
- Capture wide views, perspective images, design details, and carefully controlled activity.
- Review colour, reflections, clutter, proportions, and mood before leaving.
1. Define what the photos need to communicate
Start with the experience you want viewers to imagine. Is the restaurant intimate and refined, bright and family-friendly, energetic and social, or casual and fast-moving? The answer affects the timing, styling, activity level, camera position, and areas you prioritise.
Identify the audience and intended channels. A website may need horizontal images that explain the room’s layout. Social media may need tighter details and vertical compositions. A renovation announcement may focus on design changes, while a new opening may need images of the dining room, bar, entrance, patio, and branded details.
Decide whether the goal is documentation, atmosphere, or both. Documentation shows what the space contains and how it is arranged. Atmosphere adds light, materials, styling, and selected signs of activity to express the restaurant’s identity.
2. Prepare the restaurant before shoot day

Walk through the restaurant and list priority areas, such as the entrance, main dining room, bar, private dining space, patio, feature wall, open kitchen, or seating area. Remove temporary, damaged, unrelated, or distracting items.
Check tables, chairs, menus, napkins, glassware, plants, artwork, light fixtures, and service stations. Styling should look intentional rather than artificially perfect. Select a small number of branded colours, materials, or serving pieces instead of filling every frame with props.
Coordinate access, cleaning, signage, deliveries, staff availability, and areas that cannot be moved. If the room needs painting or another visual refresh, complete that work before photography. This interior painting checklist can help with preparation and sequencing before images are made.
Pre-shoot checklist
- Confirm the desired mood and priority spaces.
- Remove clutter, temporary signage, bins, cables, and unused equipment.
- Clean windows, mirrors, tables, floors, and reflective surfaces.
- Choose table settings and props that fit the brand palette.
- Confirm access, power, staff coordination, and the quietest time window.
- Decide whether people, food, drinks, or service activity should appear.
3. Choose a schedule that protects the atmosphere and operations
A pre-service shoot usually provides a clean, controlled room with minimal disruption. A split-shift session can offer similar control while allowing the team to reset between service periods.
A quiet period during service may be appropriate when the restaurant’s identity depends on activity, such as prepared tables, a working bar, staff movement, or selected guests. Keep activity controlled. A few intentional human elements can communicate scale and energy, while an unplanned crowd may block sightlines.
Discuss guest privacy and staff movement in advance. Do not photograph people who have not agreed to appear, and avoid placing equipment where it blocks customer paths, emergency access, or normal work.
4. Assess the available light before composing the shot
Look at the direction of window light, bright patches on tables, reflections in mirrors and glass, dark corners, overhead hotspots, and differences in colour between daylight and fixtures.
Where suitable, side or angled window light can add texture and dimension. Strong overhead light may flatten surfaces or create bright distractions, so test whether fixtures should remain on, be reduced, or be balanced with another source. Brighter is not always better. The room’s colours, surfaces, and finishes should remain believable.
The Canadian Food Inspection Agency notes that adequate and appropriate lighting provides visual accuracy for food and activities in an establishment. For photography, that means checking whether the room’s colour and details remain credible rather than relying only on an attractive mood.
Mixed colour is a common problem. A window may cast cool light while ceiling fixtures cast warm light, leaving walls or table settings with different tones. Simplify the scene by changing the timing, adjusting window coverings, or reducing one competing source. If extensive control is needed, professional lighting may be more efficient than correcting every mismatch later.
5. Choose camera height, tilt, and perspective deliberately
Camera position changes how large, balanced, and believable a restaurant feels. Use camera height and tilt deliberately rather than raising the camera simply to fit more into the frame.
For many interiors, 40 to 60 inches is a useful starting range. A lower position can make seating and table details more prominent. A higher position can clarify the layout, but may reduce the feeling of being inside the dining experience.
Keep the camera level and aim to keep vertical lines natural. Door frames, wall edges, windows, and light fixtures should not lean unless intentional. Check the edges of the frame for stretched furniture or exaggerated proportions.
Choose the viewpoint according to the room. A corner view can show depth and the relationship between walls. A centred view may suit a symmetrical entrance or bar. An angled view can reveal the connection between seating, circulation, and a feature area. Move the camera instead of relying on cropping later.
6. Build a useful interior shot list
A good shot list prevents repetition and ensures the final set explains both the room and its personality.
| Image type | What it should show | Useful purpose |
|---|---|---|
| Wide establishing view | Main room, layout, seating, and major design elements | Website headers and general context |
| Corner or perspective view | Depth, circulation, and connected spaces | Showing the guest journey |
| Design detail | Materials, lighting, artwork, textures, or branded elements | Social posts and brand storytelling |
| Service-area view | Bar, open kitchen, counter, or preparation area | Explaining the restaurant’s character |
| Activity-led image | Controlled staff movement or guest experience | Communicating energy and atmosphere |
Do not photograph every table from the same height and direction. A wide frame should establish where the viewer is, while a detail should explain why the space feels distinctive.
7. Capture images for websites, social media, and campaigns
Think about the final use before shooting. Horizontal images work well for websites, venue pages, menus, and promotional layouts. Vertical compositions suit social-first placements and can present a tall entrance, feature wall, or layered dining room effectively on a phone.
Leave space around important features if text may be added later. Capture clean room views and tighter details for announcements, seasonal posts, private-event promotion, and brand updates.
Interior photography is one part of a broader content set. Food photography focuses on dishes. Promotional video shows movement and service. Vertical video supports short-form social content. Business branding visuals connect the room with the team and wider identity. If several deliverables are needed, plan them together so styling remains consistent.
8. Review the images before leaving
Review representative images on location. Ask whether each image is accurate, useful, and consistent with the intended mood.
- Are vertical lines and door frames reasonably straight?
- Do tables, chairs, counters, and rooms have believable proportions?
- Are colours consistent across windows, walls, furniture, and branded details?
- Are reflections, hotspots, and dark corners distracting?
- Are cables, bins, cleaning supplies, or temporary signs visible?
- Do people or equipment block important sightlines?
- Does the image show how the space functions, not only how it looks?
- Is there a useful balance of wide views, details, and atmosphere?
Correcting a chair, reflection, prop, or camera position on location is simpler than fixing it later. Verify that the required horizontal and vertical compositions have also been captured.
When should you photograph the interior yourself or hire a professional?
A phone or basic camera may be adequate for a quick update when the room is simple, well lit, and intended for informal use. Professional support is more useful when the space has mixed lighting, reflective surfaces, difficult proportions, multiple rooms, strict colour requirements, or several channel requirements.
| Situation | DIY may be adequate | Professional support may help |
|---|---|---|
| Room complexity | One small, uncluttered area | Several connected rooms or difficult sightlines |
| Lighting | Even light with few reflections | Mixed light, hotspots, or dark corners |
| Brand consistency | Occasional informal updates | Website, launch, campaign, or brand refresh |
| Disruption | Flexible timing | Short, coordinated quiet window |
| Deliverables | A few images in one format | Stills, vertical content, video, and branding visuals |
Restaurant interior photography checklist
Before the shoot
- Define the mood, audience, priority areas, and platforms.
- Prepare the room and clean reflective surfaces.
- Confirm scheduling, access, staff coordination, and guest considerations.
- Choose styling and props that support the brand.
During the shoot
- Test the available light before settling on a composition.
- Keep the camera level and choose height intentionally.
- Capture wide views, corner views, details, service areas, and selected activity.
- Make room for horizontal and vertical uses where required.
Before delivery
- Check verticals, proportions, colour, reflections, and distracting objects.
- Confirm that the images communicate the intended atmosphere.
- Separate interior, food, video, and social-first deliverables.
- Ensure the set supports the planned website, campaign, or platforms.
Frequently asked questions
Should a restaurant interior be photographed empty or with people?
Use an empty room when layout, design, and cleanliness are the priority. Add controlled activity when the restaurant’s identity depends on energy or service. A combination is often most useful.
How do you photograph a restaurant with mixed window and overhead lighting?
Identify which sources create conflicting colour or harsh highlights. Change the timing, adjust window coverings, or simplify competing sources. Controlled professional lighting may help when the room cannot be balanced easily.
What interior shots should a restaurant use on its website and social media?
Use wide views to explain the room, perspective views to show depth, and detail images to communicate materials and personality. Add vertical compositions for social-first use and leave space for text when needed.
Can interior photography be combined with food photography or promotional video?
Yes, but the shot lists and styling requirements differ. Interior images communicate place and atmosphere, food images focus on dishes, and video adds movement. Planning them together can maintain a consistent visual identity.
Photograph the experience, not only the room
Effective restaurant interior photography begins with a clear purpose. Prepare the space, choose a schedule that protects operations, simplify the light, keep perspective believable, and combine layout views with design details and selected activity. Review the images on site for accuracy and usefulness.
For restaurant photography, promotional content, and broader brand visuals involving food, interiors, and ambiance, Silver Valley Studios Inc. provides photography and videography services from Maple Ridge, British Columbia.