

Last updated: October 2026
Key takeaway:Portrait photography works best when flattering light, an appropriate lens, and clear direction work together. Start with a simple key light placed 30–45 degrees from the subject, use a 50–135mm focal length for natural proportions, and guide expression with short prompts instead of rigid poses. Then match the background, wardrobe, colour, and crop to the way the portraits will be used.
By Silver Valley Studios Inc. • Last updated: October 2026
What makes a portrait photograph effective?
A successful portrait does more than record someone’s appearance. It communicates something about the person: confidence for a realtor, approachability for a restaurant owner, authority for a business leader, or warmth for a personal brand. The technical choices support that message, but they do not replace a comfortable subject and thoughtful direction.
For clients in Maple Ridge and throughout British Columbia, portraits may need to work in several places at once: a website, a real estate profile, a LinkedIn page, a printed feature sheet, a social post, or a vertical video campaign. Planning those uses before the session helps determine the framing, lighting, background, wardrobe, and number of final crops.
- Light: Shape the face with a soft, controlled source rather than relying on an unpredictable overhead fixture.
- Lens: Choose a focal length that gives natural facial proportions and enough working distance to keep the subject relaxed.
- Direction: Use prompts and small movements to create genuine expressions.
- Composition: Leave enough space for profile images, banners, listing graphics, and vertical formats.
- Consistency: Keep colour, contrast, and framing coherent across an individual or a complete team.
This guide explains how to make those decisions, whether you are practising with a camera, preparing for a professional session, or planning portraits as part of a broader real estate media or brand-content package.
What is portrait photography?
Portrait photography is the intentional creation of an image that represents a person’s likeness, character, role, or identity. It combines exposure, lens selection, lighting, composition, and human direction to produce an image that feels recognisably connected to the subject.
The purpose determines the approach. A studio headshot usually prioritises repeatable light and a clean background. A lifestyle portrait includes a workplace, home, café, or outdoor setting to provide context. An environmental business portrait may show a realtor in a property, a chef near a service counter, or a founder among the tools of their trade.
Portrait photography is therefore both technical and relational. A well-exposed photograph can still fail if the subject looks uncomfortable or the setting contradicts the intended message. Conversely, a simple setup can produce a strong result when the light is flattering, the expression feels natural, and the image has a clear role in the client’s communication.
Why do professional portraits matter for businesses?
People often meet a business online before they meet its owner or team in person. A current portrait gives that first interaction a human point of reference and helps the viewer understand who is responsible for the service. For realtors, consultants, restaurant owners, and small businesses, the same portrait may appear across several customer touchpoints.
Trust and recognition
A direct gaze, open posture, and appropriate expression can make a profile feel more welcoming and credible. The image should still look like the person on a normal working day; excessive retouching or an overly theatrical pose can weaken that connection.
Consistent team presentation
When several people need portraits, a consistent setup makes the team look organised. Matching camera height, background, light direction, colour treatment, and crop gives a website or company profile a unified appearance even when people have different features and personalities.
More useful content from one session
A portrait session can be planned for more than one final image. A photographer may capture a vertical crop for social media, a horizontal frame for a website banner, and a tighter head-and-shoulders option for profiles. If motion is also required, the lighting position can be kept stable while each subject records a short introduction between still photographs.
For a Maple Ridge realtor, for example, a well-planned portrait may support a profile page, listing materials, a social announcement, a team page, and a short introduction video. The image is most valuable when it is delivered in the formats the business will actually use.
How should you light a portrait?
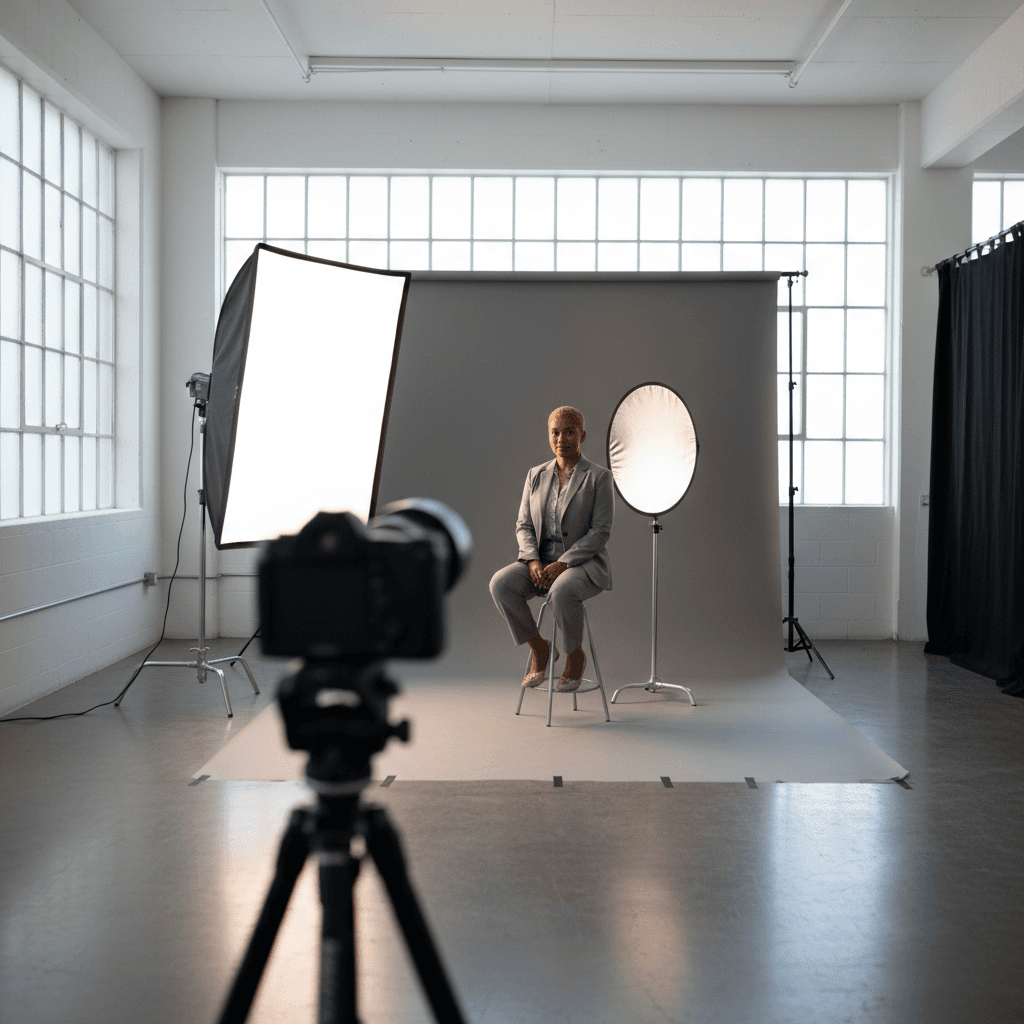
Start with one controllable key light. Place it approximately 30–45 degrees to one side of the subject and slightly above eye level. This creates a catchlight and gentle modelling across the face without requiring a complicated multi-light arrangement.
Use a large, close source for softer light
A larger light source produces a more gradual transition between highlights and shadows. A 36–48 inch softbox positioned a few feet from the subject is a practical starting point for headshots and small branding sessions. Moving the source closer generally makes it appear larger to the subject and can soften the result.
Control contrast with fill or negative fill
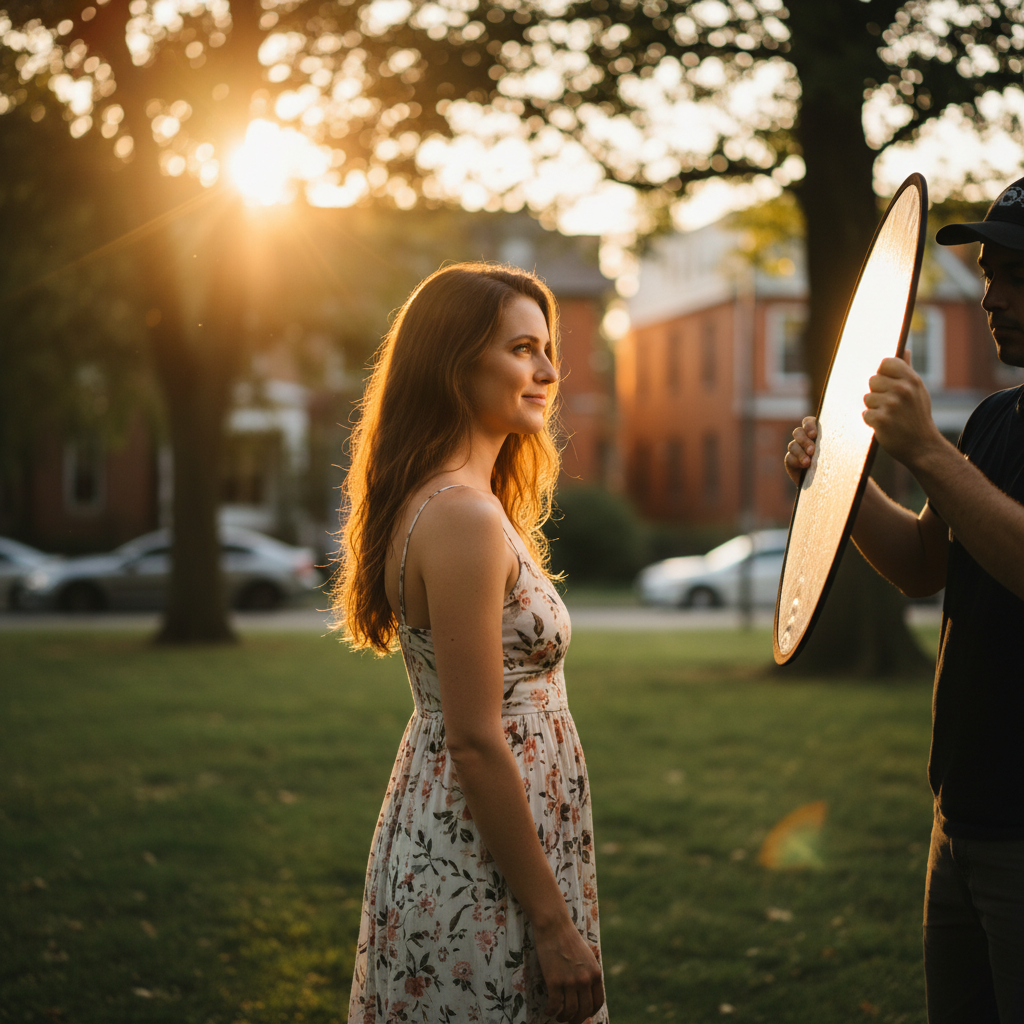
A white reflector can lift shadows gently when the face looks too dark. A black flag or dark surface can deepen the shadow side when the image feels flat. For a general business portrait, a modest contrast ratio such as 2:1 or 3:1 is a useful starting point, but the final choice should reflect the subject and brand.
Make window light predictable
Window light can look natural and attractive, but it changes with clouds, time of day, and nearby surfaces. Place the subject at an angle to the window instead of directly facing it, use a reflector or negative fill to shape the shadow side, and check the background for colour casts. If the light changes quickly, a strobe or speedlight provides more consistency.
Choose a dependable shutter speed with flash
When using flash, a shutter speed near 1/160–1/200 second is a practical starting range for many cameras. Check the camera and flash limits before the session, especially outdoors. High-speed sync can help when a wider aperture is needed in bright conditions, but it may reduce flash efficiency.
Set white balance deliberately rather than allowing every frame to shift independently. A grey card can help establish a repeatable reference, particularly when portraits will be combined with real estate media, product photographs, or other brand assets.
Which lens and camera settings work for portraits?
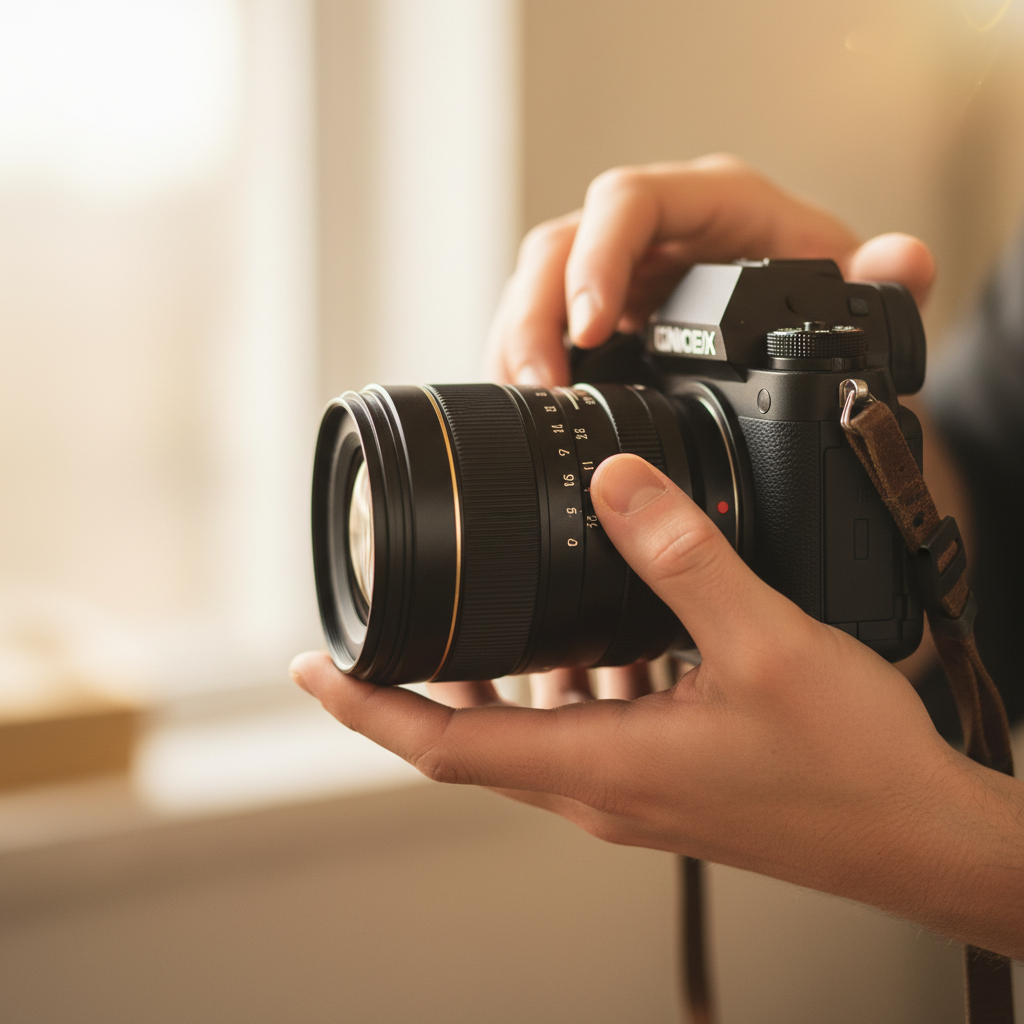
Focal length affects both perspective and working distance. A wider lens used too close to the face can exaggerate features, while a longer lens gives the photographer more distance and a narrower view. On a full-frame camera, 50–135mm covers many common portrait situations.
| Portrait goal | Useful focal length | Starting aperture | Practical consideration |
|---|---|---|---|
| Environmental portrait | 35–50mm | f/2.8–f/4 | Shows the workplace or setting while keeping the person prominent. |
| Lifestyle portrait | 50mm | f/2–f/2.8 | Balances context, movement, and background separation. |
| Classic headshot | 85–105mm | f/2.8–f/4 | Provides natural proportions and enough depth for both eyes on an angled face. |
| Compressed portrait | 135mm | f/2.8–f/4 | Creates more working distance and a narrow field of view. |
At very wide apertures, the nearest eye may be sharp while the farther eye becomes soft when the subject is turned. Stopping down to approximately f/3.2–f/4 can provide a more reliable result for an angled headshot. Keep shutter speed high enough to prevent subject movement from softening the frame, and raise ISO when necessary rather than accepting blur.
Eye-detection autofocus can be useful, but review test frames at full size. Autofocus is not a substitute for checking the near eye, expression, hair, hands, and background before moving to the next look.
Which type of portrait photography fits the assignment?
Studio headshots
Studio headshots are a strong choice when the priority is control and consistency. A neutral background, one large soft source, and a simple fill can work for an individual profile or an entire team. This approach suits websites, LinkedIn profiles, press materials, and company directories where the person needs to remain the main subject.
Lifestyle portraits
Lifestyle portraits show the subject doing something or occupying a familiar environment. A restaurant owner might be photographed near the kitchen, while a business consultant could be shown in an office or meeting space. Use props sparingly: they should support the story rather than compete with the face.
Environmental branding portraits
Environmental portraits place a person within the visual language of their business. A realtor may be photographed in a bright, uncluttered room; a maker may be shown near equipment; and a founder may be placed among products or materials. A 35–50mm lens can preserve more context, while a 70–105mm lens can simplify a busy environment.
Group and team portraits
Groups require attention to height, spacing, hands, and overlapping faces. Arrange people in staggered rows or levels rather than a rigid line, and check that no one is hidden behind another person. For a team day, establish the lighting and camera position first, then use a repeatable sequence so every individual portrait matches.
How do you pose and direct people naturally?
Many people become uncomfortable when asked to “pose.” Direction works better when it gives the subject a small, understandable action. Ask them to turn their shoulders slightly, shift their weight, breathe out slowly, look toward a point beside the camera, or imagine greeting a familiar client.
Use small physical adjustments
- Turn the shoulders approximately 15–30 degrees instead of facing the camera squarely.
- Keep the neck long and move the chin slightly forward before lowering it a little.
- Give hands a purpose, such as holding a notebook, mug, phone, tool, or jacket.
- Ask for a small change between frames rather than repeating the same pose.
- Watch elbows, wrists, shoulders, and fingers; relaxed hands often make the whole portrait feel more natural.
Prompt expression instead of demanding it
Short prompts can produce more authentic expressions than instructions such as “look happier.” Try “soften your eyes,” “take a slow breath,” “think about your favourite part of the work,” or “look just past the camera.” Make the person aware that several frames will be taken so they do not feel pressure to perform perfectly on the first exposure.
Check the background before pressing the shutter
Move the subject away from the background when possible. Four to eight feet can help reduce shadows and create separation, while a longer focal length can simplify distracting details. Look for poles, door frames, bright patches, and lines that appear to grow out of the subject’s head or shoulders.
Leave intentional space when the image will support text or design. A headshot cropped tightly for a profile needs different framing from a horizontal website banner. Capture both when the brief calls for multiple uses rather than trying to create every crop from one narrowly composed frame.
What is a reliable portrait photography workflow?
Before the session
Confirm the purpose, audience, locations, wardrobe, backgrounds, approximate number of people, and final delivery formats. Ask whether the client needs a traditional headshot, a more relaxed branding portrait, a group photograph, or a mixture. This conversation prevents a technically strong session from producing the wrong type of image.
Prepare charged batteries, formatted memory cards, backup equipment, light stands, modifiers, a reflector, a grey card, and basic styling items such as a lint roller. If the session takes place at a business, identify where equipment can be placed safely and whether the location has restrictions on access, power, or setup time.
During the session
Make a test frame before photographing the full sequence. Check exposure, focus, catchlights, background distractions, skin colour, and the amount of room around the head and shoulders. Show the subject one or two successful frames when appropriate; it can make the process feel collaborative and help them understand the intended look.
Work from dependable poses toward small variations. Capture a neutral expression, a warmer expression, a three-quarter angle, a wider environmental frame, and any required vertical or horizontal composition. Keep the conversation moving, but do not rush people through adjustments that affect comfort.
Selection, editing, and delivery
Choose images for expression and purpose before choosing them for technical perfection alone. A sharp frame with a forced expression may be less useful than a slightly less formal image that communicates the client’s personality and fits the brand.
Retouch with restraint. Remove temporary blemishes and distracting flyaways, even out colour, and preserve natural skin texture and identifying features. Export the agreed formats with consistent colour and filenames that make the files easy to find. Common crops include square, 4:5, 16:9, and 9:16, but the delivery should follow the actual platforms and design requirements.
Planning portrait photography in Maple Ridge and the Lower Mainland
Maple Ridge sessions may take place in a home studio, office, commercial space, outdoor location, or a combination of settings. Outdoor portraits need a weather-aware plan, particularly when clouds, tree cover, or changing afternoon light alter the exposure quickly. An indoor backup location can protect the schedule and provide more predictable colour.
For sessions serving clients in Abbotsford, Mission, Chilliwack, Langley, Surrey, Coquitlam, Burnaby, or Richmond, allow time for travel, loading equipment, and checking the location before the subject arrives. The best location is not necessarily the most dramatic one; it is the place that supports the brand, gives the photographer control, and allows the agreed images to be created efficiently.
Local businesses should also confirm that a commercial location is available for photography and that any required permission has been arranged. The City of Maple Ridge provides business-licensing information for local operators, but location-specific permissions, building rules, and property-owner requirements should be checked for each assignment rather than assumed.
What equipment do you need?
You can create effective portraits without a large collection of equipment. A camera with reliable autofocus, a 50mm or 85mm lens, one light source, a suitable modifier, and a reflector cover many individual and small-business assignments.
- Camera: A current mirrorless or DSLR with dependable eye autofocus and sufficient resolution for the intended output.
- Lens: A 50mm lens for context or an 85mm lens for a classic head-and-shoulders view.
- Light: A speedlight or strobe with a 36–48 inch softbox or umbrella.
- Support: Light stands, a reflector, clamps, and gaffer tape for safe cable and equipment management.
- Colour tools: A grey card and a deliberate white-balance method.
- Backup items: Spare batteries, memory cards, a trigger, and a second camera or lens when the assignment cannot be repeated easily.
Tethering can be helpful in a controlled studio or office because it allows the photographer and client to review focus, expression, and composition together. It is not essential for every outdoor session, but a careful review of test frames at full size is essential regardless of whether a computer is connected.
What common portrait mistakes should you avoid?
Flat or unshaped light
If the face lacks dimension, move the key farther to the side, add negative fill, or adjust the height of the source. If shadows become too strong, use a reflector or bring the source closer and soften its angle.
Soft eyes
Confirm that the focus point is on the near eye and that the shutter speed is fast enough for the subject’s movement. If the face is angled and the aperture is very wide, stop down slightly so both eyes have a better chance of remaining sharp.
A distracting background
Change the subject’s position, camera angle, or focal length before trying to fix the problem in editing. A small sideways move can clear a line behind the head, while greater distance from the background can reduce clutter and shadows.
A forced expression
Pause the technical instructions and re-establish conversation. Use a prompt, let the subject move between frames, and photograph the transition rather than waiting for an artificial smile to appear on command.
Inconsistent team portraits
Mark the subject position, keep the camera and light fixed, and use a repeatable direction sequence. Record the lighting and camera settings so a later team member can be photographed in the same visual style.
How can portraits support real estate media and brand content?
Portraits are often one part of a larger visual system. A realtor may need a headshot alongside property photographs, floorplans, video tours, drone coverage, and social clips. A restaurant may need owner portraits, staff images, menu content, and short videos that share the same colour and lighting language.
Plan the session around the complete content requirement. Photograph the formal headshot first while clothing and hair are controlled, then move into relaxed environmental frames. If video is included, reserve a few moments for a short introduction, process explanation, or value statement. Keep enough headroom for vertical framing and capture a clean take that can work with captions.
This approach reduces the need to recreate the same setting later. It also gives the business a coherent library rather than a collection of disconnected images made under different lighting conditions.
Portrait photography checklist
- Define where the images will appear and which crops are required.
- Confirm the visual message: approachable, authoritative, relaxed, creative, or another specific quality.
- Choose wardrobe colours and backup options that support the brand without creating distracting patterns.
- Check the location for available light, background distractions, access, noise, and safe equipment placement.
- Prepare the camera, lens, light, modifier, reflector, batteries, cards, and backup equipment.
- Make a test frame and verify exposure, focus, colour, catchlights, and composition.
- Use prompts and small physical adjustments to create several natural expressions.
- Capture both close and environmental options when the brief supports multiple uses.
- Review images at full size before changing the setup.
- Deliver carefully selected, gently retouched files in the formats the client requested.
When should you hire a professional?
Professional help is useful when the images carry significant brand responsibility, when several people need a consistent look, or when the assignment requires stills and motion in one organised session. A photographer contributes more than camera operation: pre-production, location planning, lighting control, subject direction, selection, retouching, and delivery all affect the final result.
For a growing business, the most efficient session may combine formal headshots, environmental portraits, team photographs, and short vertical clips. Discuss the intended uses before booking so the photographer can build the lighting, schedule, and shot list around the required assets. Silver Valley Studios Inc. serves Maple Ridge and regional British Columbia clients with photography and videography for real estate media, business branding, commercial spaces, and social content.
Frequently asked questions about portrait photography
What should I wear for a professional portrait?
Choose solid colours or subtle patterns that support the brand and do not compete with the face. Bring a second top, jacket, or accessory so the session has a small amount of variety. Steam clothing beforehand and bring a lint roller, particularly for dark fabrics.
How long does a portrait photography session take?
An individual session commonly takes 30–60 minutes when it includes setup, direction, and several looks. A team session can move faster per person after the lighting and camera position are established, but the schedule should still include time for wardrobe adjustments, expression changes, and group photographs.
What lens is best for portrait photography?
An 85mm lens is a practical choice for classic headshots because it provides comfortable working distance and natural-looking proportions. A 50mm lens is useful when the environment matters, while a 105–135mm lens offers more compression and background simplification. The best choice depends on the space, subject, and intended composition.
Can portraits and vertical video be captured in the same session?
Yes. A lighting setup can often serve both still photographs and short 9:16 clips, provided the shot list and schedule allow for both. Capture the formal portrait first, then record a brief introduction or value statement while the subject, lighting, and background remain ready.
Plan your portrait photography session
Effective portrait photography starts with a clear purpose and a simple, repeatable process: choose flattering light, use an appropriate lens, direct natural expressions, and deliver images in the formats your business needs. If you are planning portraits for a Maple Ridge business, realtor, team, or brand, contact Silver Valley Studios Inc. to discuss the setting, visual direction, and complete content requirements.